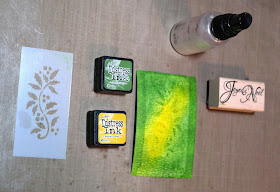
First I applied color to a piece of Tim Holtz watercolor paper, using mini Distress inks direct from pad to paper. For this project, I used Mustard Seed and Mowed Lawn.
I blended the colors just a bit with a mini ink blending tool
I sprayed the back of the stencil liberally with a mixture of water and Perfect Pearls powder (1/4 tsp of Perfect Pearls to 2 oz water) and applied the wet stencil to the inked panel and pressed it down.
When I lifted it up, the pattern was not as strong or dark as I wanted.
Even after waiting a bit for it to dry, it didn't show up as much as I wanted
I replaced the stencil onto the panel, and using a mini blending tool, I inked through the stencil with Mowed Lawn Distress ink. For this step you can use one of the original colors, or any darker color that will go with your project will work.
This time when I removed the stencil, the design really popped!
This is a peek at one of Magenta's newest stencils (TM123), which will be launched very soon in their new Christmas Stencil collection. You are going to love them! I will make a card from this panel for the Magenta blog. Watch for it!


Very pretty, lovethe colors !
ReplyDeleteThat's so pretty. Thank you for explaining about letting it dry and then how to darken the stencil picture; I didn't know how to do that!
ReplyDelete