Pages

Wednesday, February 24, 2021

Christmas in February

 I've been working toward my goal of making 10 Christmas cards each month. My January cards are here, and these are my February cards.


I also have some friends who celebrate Hanukkah, so I made some Hanukkah cards using the same design


I did these as prototypes, and I tweaked the final cards just a bit. To make them, I used a stencil that I acquired for making slimline cards. It works just fine for A2 cards as well.


When I first used this stencil, I realized that the openings are exactly 1/4" wide. I realized I could apply be-creative tape along some of the stripes, and then rub glitter onto the tape. 


For the original Christmas card I used red and gold glitter, and for the Hanukkah card, I used silver and Cool Highlights. In the final Christmas cards, I used Gold and Warm Highlights glitter and for the Hanukkah card I used Cool Highlights only.


I made a total of 7 Christmas cards and 3 Hanukkah cards.


It's hard to capture the glitter in a photo, but they are pretty in real life. The sentiments are from Gina K Designs, and I stamped them onto a die cut circle that I cut using the Master Layouts 3 die set. I cut an additional 2 circles for each sentiment and glued them together.

I originally got the idea for these cards after I made some backgrounds for slimline cards. The stencil is Mega Wrap Stripes SSSt121501 from Simon Says Stamp.


I'll be using these backgrounds for cards that I'll share with you soon.

Products Used:
Simon Says Stamp ssst121501 Mega Wrap Stripes Stencil
Gina K Designs GDKHT Holiday Tapestry Stamp Set
Gina K Designs Master Layouts 3
Distress Inks: Festive Berries, Blueprint Sketch
Versafine Onyx Black ink
Be Creative Tape
Elizabeth Craft Glitter: Gold, Warm Highlights, Cool Highlights
Curious Metallics Super Cold Cardstock
So Silk Fair Blue Cardstock
Neenah Solar White 80# & 110# Cardstock


Friday, February 19, 2021

Magenta Card Exchange February: California

 Another month and another fun chard exchange! This month my card went to a participant in California.


In making this card, I was inspired by a post by Kristina Werner. You can see her post here. She was using glitter watercolors by Iuile Watercolors on Etsy. This young lady hand makes her own watercolors, and I have become a bit addicted to them. They are expensive, but she sells dot cards with fairly large dots of watercolor on them, so that you can try out her colors fairly inexpensively.


I used Stonehenge black watercolor paper, since the glitter colors show up much better on black. Even after watercoloring this image, I still had a lot of watercolor left for other projects.


Prior to watercoloring, I stamped and embossed this beautiful Magenta image (Flower in Square) in gold onto the watercolor cardstock. 


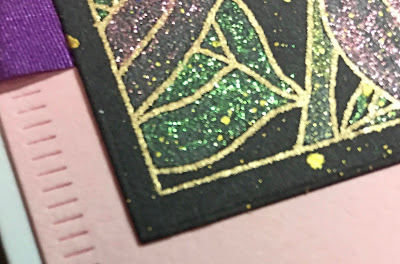
Capturing the glitter on this project is very hard to do with a photograph, but it's pretty bling-y.
I set aside the image to dry and cut a panel of pink cardstock using The Greetery Crimped Frame die, and stamped the Magenta sentiment (Life is a Gift) at the bottom. I added some purple silk ribbon and mounted the watercolored panel over it. The entire panel was then mounted to a base card of 110# Neenah Solar White.


This is the sneak peek I showed on the FaceBook Magenta Passion Studio site. The glitter kind of shows up in this photo.


Magenta Products used:

19.048.M Flower in Square

07.640.G Life is a Gift

Other Products used:

Iuile Glitter Watercolors
Stonehenge Black Watercolor cardstock
Versamark ink
Versafine Onyx black ink
Ranger Gold Embossing Powder
Fine-Tek gold watercolor for splatters
The Greetery Crimped Frame die
Purple silk ribbon


Friday, February 12, 2021

Magenta Super Saturday: Celebrating the Love of Good Friends

 I am over at the Magenta blog today, and you can see that post here.


This is a shoutout to all of my good friends who have kept me (sort of) sane through this last year. I'm aware that this year has been much more difficult and even disastrous for many, and that I am very fortunate in all the ways that matter. Nevertheless, it has not been easy, and my friends have been there for me when I want to touch base with humans. Also thanks to all of the readers of my blog, and especially the ones who take the time to comment. I appreciate it more than you know!


For this card, I blended Distress Ink through a favorite stencil: Celebrating Heart. I started with Worn Lipstick and Candied Apple, and then decided to add some Mustard Seed to the leaves, which gave them an orange hue.


To add texture, I sprayed the stencil MC84 Mandala 5 Small with water and pressed it to the blended colors. I also added some sprinkles of water with my fingers. Most of that is lost behind the Good Friends sentiment that I stamped over the heart in black ink. I added the All You Need is Love sentiment at the bottom and sprinkled a few gems.

Magenta Products Used:

Distress Inks: Worn Lipstick,
Candied Apple, Mustard Seed
Versafine Onyx Black ink
The Greetery Crimped Frame die
Neenah Solar White 80# & 110# cardstock
Stardream Jupiter cardstock


Sunday, February 7, 2021

Cards for Charity: Sympathy cards with Gelli Plate Backgrounds

I have been creating cards to give to my friend Pam for her church charity sales. They sell them for $5 each and the money goes to really good charities, like blankets for the homeless. She recently said they needed more Happy Birthday and Sympathy cards. I showed you the Birthday cards in my last post here. We are now making 15 of each design so that they can put them on their blog. You can see the blog here, and if you are local, you can order. They are not able to send orders out, so you would have to pick your cards up if you order any.


 The backgrounds of these cards were made one day when I was playing with my gelli plate (mono printing). I wasn't even using any images or stencils, but I used brayers and cardstocks with different textures. The medium was Distress Oxide inks, which I loved using. Cleanup was easy and there is a huge variety of colors. I was inspired by Jennifer McGuire, and you can see her post here.


When I'm making multiple cards, I make a prototype first, then I like to prep all the pieces and sit and listen to audio books or podcasts while I'm putting them together. I was able to cut the gelli plate panels in half and get two cards out of each one.


This was my prototype. I like how the Distress colors in the gelli plate panels are soft and not too bold for a sympathy card. The die for the flowers and leaves is from Poppy Stamps, 2319 Leafy Garden Border. I added a strip of the blue cardstock I used for the mat under the border. The sentiment die and stamp are from Avery Elle, ST and D-17-16 Sentimental Too Stamps and dies.


I have really enjoyed making cards for this worthy charity. It keeps me busy doing what I love.

Products Used:
5" x 7" Gelli Plate
Various Distress Oxide Inks
Various brayers and textured cardstock
Poppy Stamps 2319 Leafy Garden Border
Avery Elle ST-17-16 Sentimental Too Stamps
Avery Elle D-17-16 Sentimental Too Dies
Malmero Blue cardstock
Neenah Solar White 80# cardstock

By the way, I have been using a glue that I really do love. It's called Bearly Art Precision Craft Glue, and I've been using it for awhile. I used it on this project to stick down all of those leaves. I usually use Elizabeth Craft Be Creative tape for my card panels, but when I need glue, I use this one.

The set I bought has a bottle of glue, with another larger bottle for refilling, and also a little jar with these pieces


The green cap acts as a stopper. To use the glue, you take it out and put in one of the black nozzles. I have never used the larger one. The smaller one is perfect for me -it's really tiny, and I can apply small amounts of glue in small spaces. I use the pin as a stopper if I'm leaving the glue open for long periods while I'm working. When I'm finished, I take off the black nozzle and put the green stopper back on. I clean out the black nozzle every time, and when I want to use it again it works perfectly with no clogging issues. This is the best glue I have found. You can get it directly from the company here, or at Amazon. I receive nothing from the company for this recommendation, it's just a product that I think works really well.

Wednesday, February 3, 2021

Cards for Charity: Happy Birthday with Distress Blending

 I received a call that more cards were needed at my friend Pam's church charity card sales; especially Birthday cards and Sympathy cards. We're making 15 of each design of cards now, so it's quite a production.


I made Birthday cards first, and the goal is to choose a design that can be easily duplicated. Church members will mount my cards onto base cards that are stamped with their charity's information, so I only needed to make the tops.


Since I have been in a creative funk lately, I had been passing the time by blending Distress ink through stencils. It's fun to try out different color combinations.


 This is my favorite method of sparking creativity. I'm playing with my art supplies, and creating very fun backgrounds by just blending beautiful colors. What could be more satisfying?


I made 5 each of 3 different colored backgrounds. People who buy these cards are told that since they are handmade, there will be variations.


I made a prototype card, and once I was happy with it, I started making all the parts, starting with the stenciled blends. 


I started with my favorite Distress trio to blend, Twisted Citron, Peacock Feathers, and Wilted Violet. The stencil is Ornamental Fans from Gina K Designs, and is hands down one of my favorites. In the above photo (nothing is stuck down at that point) you can see that I cut the panels with the Greetery Crimped Frame die (the middle size) and I put a strip of the mat cardstock on it as I was cutting it so that it matches up with the crimps on the panel.


I decided to cut out ovals of vellum to go behind the sentiment so that it didn't get lost in the busy backgrounds, and it took two ovals for each card to look the best. This great birthday sentiment is a die from Elizabeth Craft  Designs. There is a thin mat of black behind each stenciled panel, and a larger mat of a coordinating color.

Once I cut out all of the pieces for the 15 cards, I sat at my desk and listened to an audio book while I put them together. The time went by so fast when I was making these, that they were done before I knew it.


Once I lined all 15 cards up, I was so happy with them! I loved making these, and I might make more to send out myself.

Products Used:
Gina K Designs Ornamental Fans Art Stencil
Distress Inks: Twisted Citron, Peacock Feathers, Wilted Violet;
Speckled Egg; Candied Apple, Spiced Marmalade, Mustard Seed
Elizabeth Craft 1439 Happy Birthday Small die
The Greetery GD-M-016 Crimped Frame Die
Hero Arts DI337 Nesting Oval Infinity Dies
Hero Arts DI198 Infinity Nesting Rectangle Dies
Translucent Vellum
PTI True Black cardstock
PTI Tropical Teal cardstock
Stardream Fuse Fairway cardstock
Stampin Up Cajun Craze cardstock