Pages

Thursday, June 19, 2014

Technique of the Week: Distress Watercolor

We have a new Technique of the Week featured in the Art 'n Soul newsletter this week, and in conjunction with that, I have made a picture tutorial here on my blog to better illustrate it.  This is another watercolor technique that we had fun with on an Art 'n Soul Watercolor Play Day, and that I previously featured on the blog here.

I assembled some Distress Inks (here I used Picked Raspberry, Squeezed Lemonade, and Peacock Feathers) with some mini blender tools.  I chose a favorite Magenta stamp that was large enough to cover some of the area, but not too much.  Stamps that cover most of the area on your card are still pretty, but you get less color that way.  I used Tim Holtz Distress watercolor card stock.  I like this watercolor paper, because it's good quality, it's already cut to size, and it's white instead of cream color.  It's about 118# paper.  I also like Strathmore 140# cold pressed paper.


I stamped the  Bloom and Flourish image in Versamark ink (on the smooth side of the paper), and embossed using JudiKins White Diamond embossing powder.  I love the sparkle that this powder gives to an image.


I applied the three Distress colors using mini blending tools.  The embossed image resists the color, and really stands out beautifully.


I applied some of each of the 3 colors randomly around the card


You don't have to blend these colors at all.  The blending will happen when you spray it with water


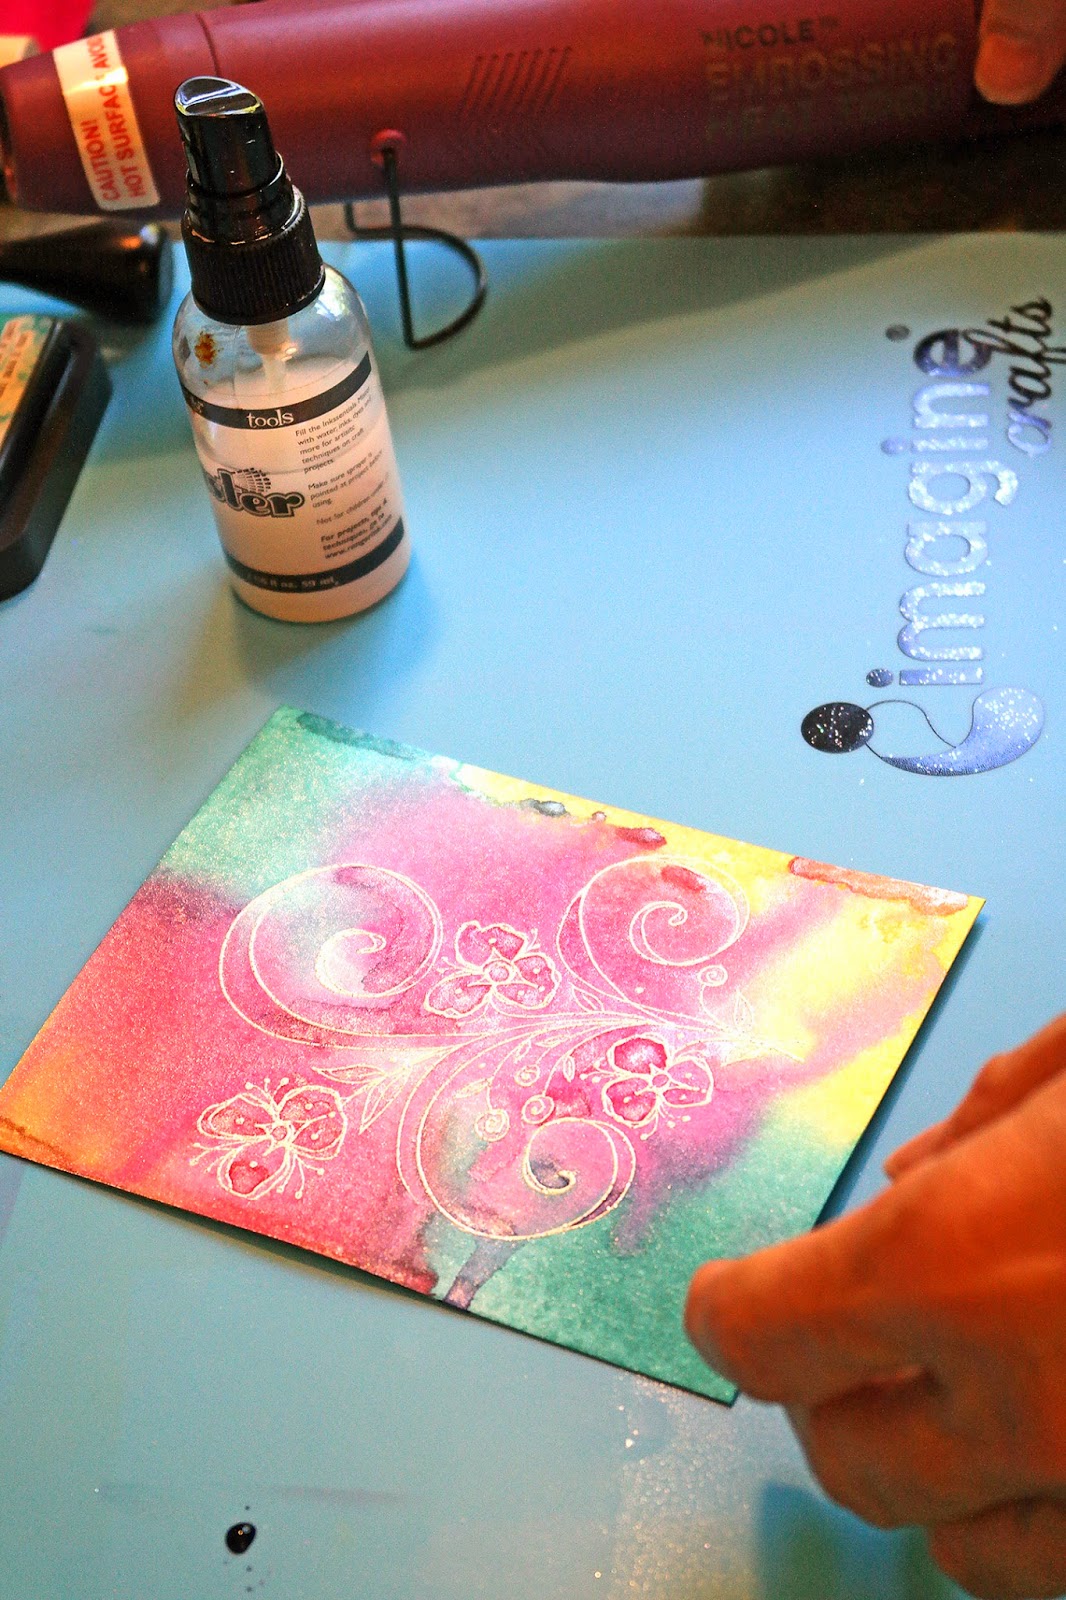
After applying the color, I spritzed the card stock liberally with water mixed with Perfect Pearls Pearl.  In a 2 oz bottle like this one, I usually put about 1/4 tsp of the Perfect Pearls powder into a full bottle of water.  If you use too much, you can clog your sprayer.  The Perfect Pearls adds a beautiful sheen to your project.


Once I sprayed the card stock, the ink beaded up and began to run. You can tip the card stock to let it run together as much as you want, and until you are happy with it.


You can then either leave it to dry naturally, or you can dry it with a heat tool.  Since I'm impatient, I usually dry it with the heat tool.


I really love how this turns out, and it's so easy to do!


BONUS TUTORIAL

I love, love sentiment stamps (especially Magenta ones), but they don't always fit on my card in the way that I want.  You can adjust how your sentiments go onto your card using a stamp positioner.  There are a number of these on the market, and yours may have a name like Stamp-a-ma-Jig or "The Big Ugly".  Here I'm using one from Inkadinkadoo.


This positioner comes with two parts:  a small T-square, and a square piece of plastic.  The first step is to stamp your image onto the plastic square


The plastic should be positioned into the "T" of the T square, with the rough side facing up.  Ink up your stamp, and stamp onto the corner of the plastic, with the stamp fitting into the "T" as shown.


 You can then easily position your sentiment onto your card, because you can see through the plastic to see where you want each part of the sentiment to go.  In this case, I wanted "Life is art" to go at the top; and then Live yours in COLOR" to go at the bottom


Once you have figured out where you want the sentiment to go, put the T-square portion of the positioner so that the corner of the plastic square fits snugly up into the corner of the "T".  Then without moving your paper, remove the plastic square.


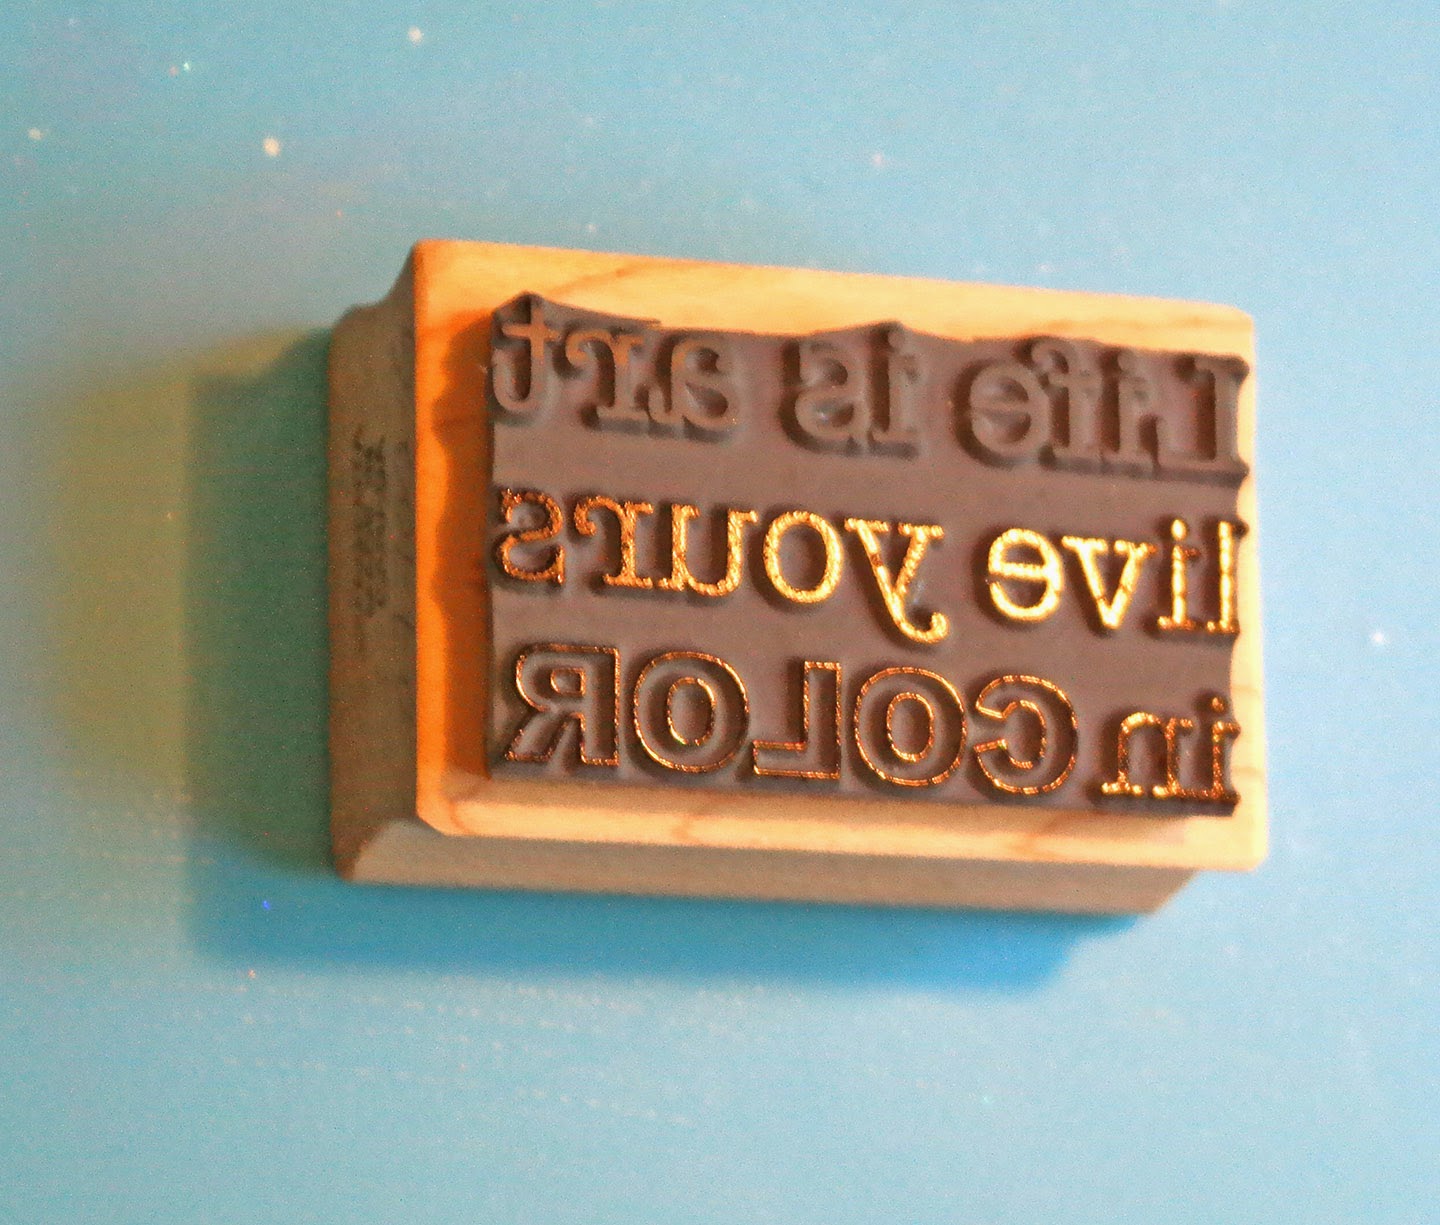
On your stamp, tape over the portion of the sentiment that you are not going to use in this first position.  Just use regular tape for this; it won't hurt your stamp


Ink up your stamp.  In this case, I used Versafine Onyx black ink.  Sometimes I have difficulty with some inks stamping onto watercolor card stock, but I find that the Versafine works well.  The tape prevents you from inking the part of the sentiment that you are not using.


Remove the tape, and here you can see that only the first line of the sentiment is inked.


Fit your stamp carefully into the "T" of the positioner, and press down well.


The portion of the sentiment that I wanted at the top of the card is now perfectly positioned where I wanted it.


Next put the plastic square back onto the card to see where to put the rest of the sentiment.  Since I want "live yours in COLOR" at the bottom, I arranged it where I wanted it and put the "T" part of the tool in place.  Remove the plastic square to stamp.
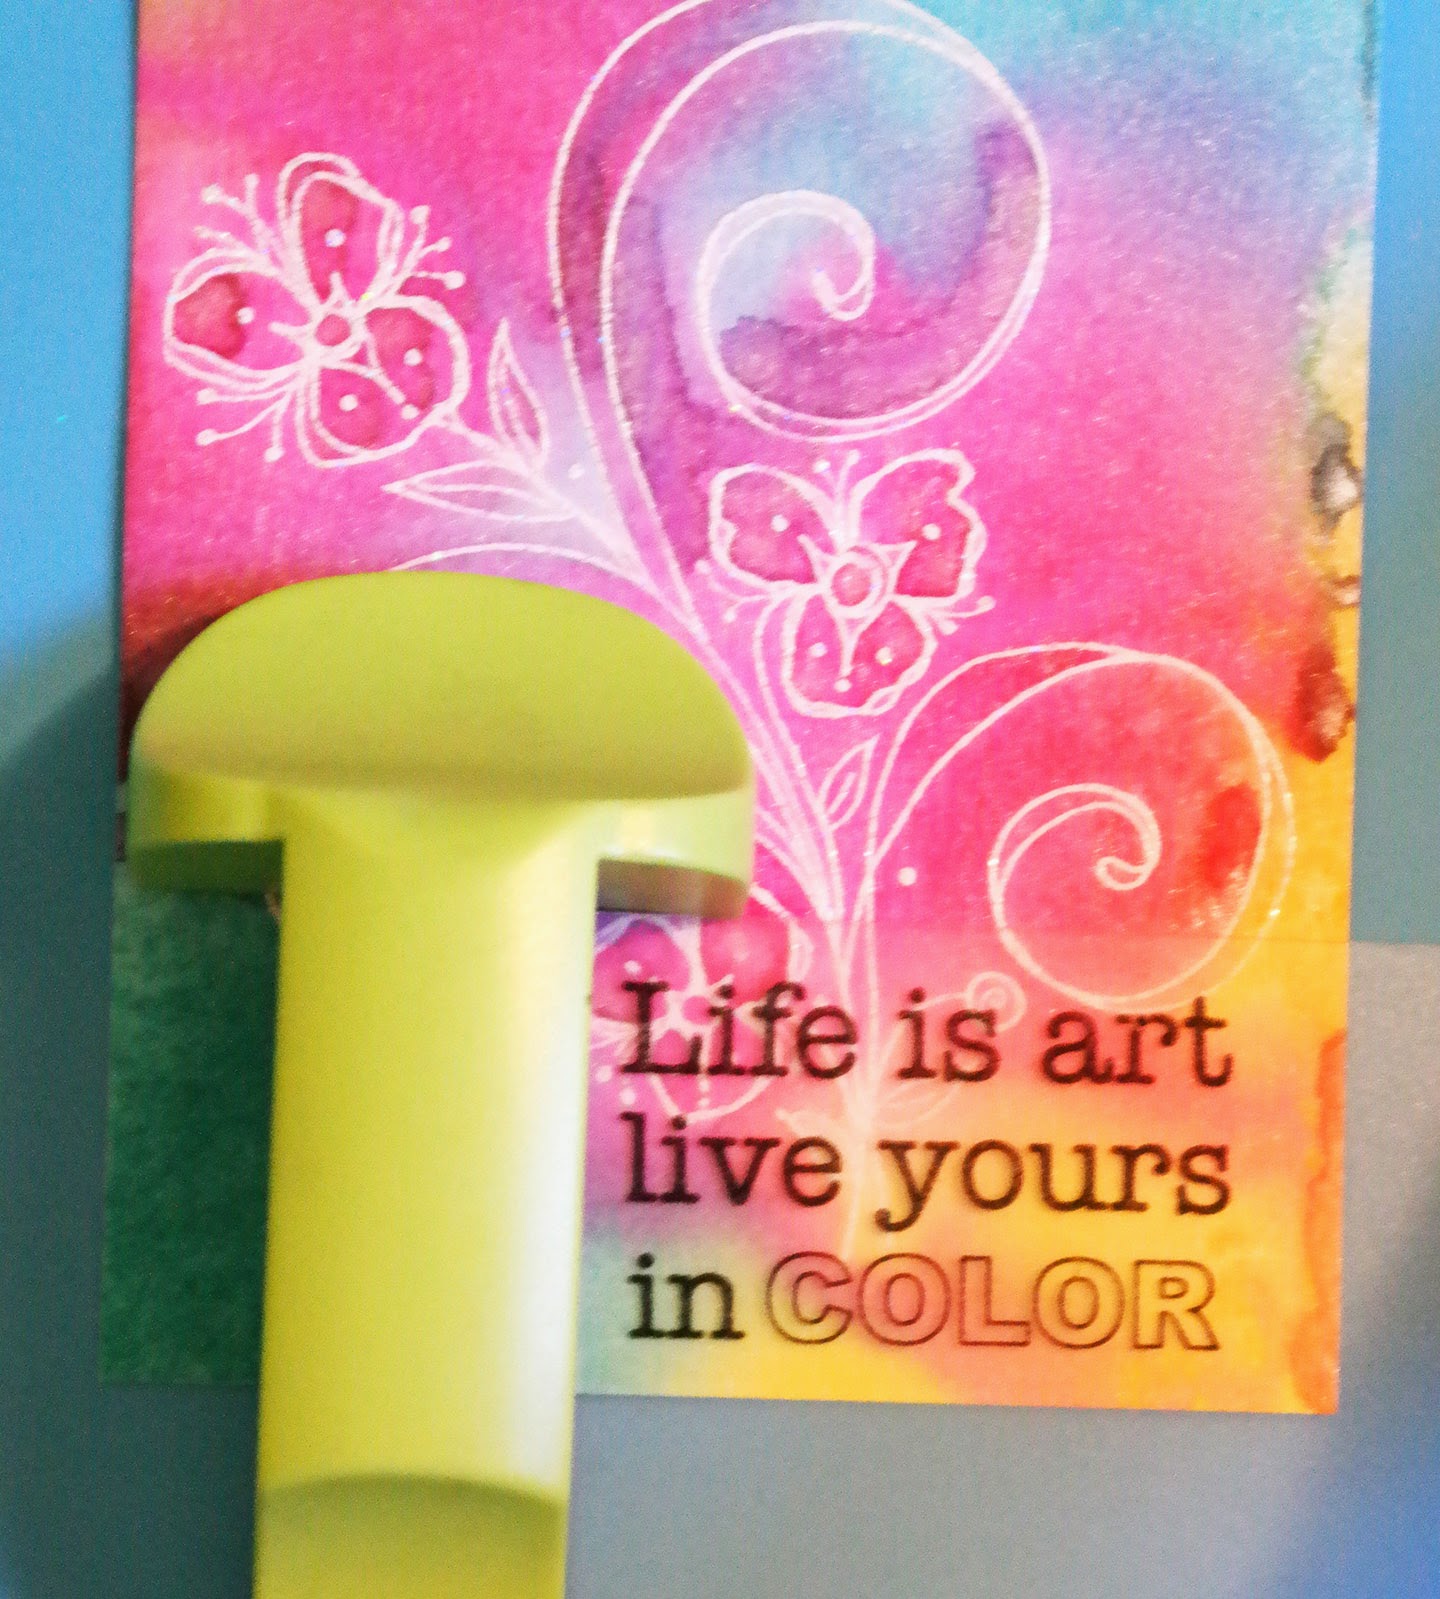

 Tape over the part of the sentiment not needed in this position, and ink up the stamp


Remove the tape and only the portion you need will be inked

Stamp the inked sentiment onto your card by positioning the stamp into the corner of the "T"


I matted the card stock with a slightly larger piece of So Silk Beauty Pink, and mounted it onto an A2 size card.  Some enamel dots were added from My Mind's Eye.  Here is the finished card.


There is a lot of sparkle in the white embossing from the White Diamond embossing powder, and there is a beautiful sheen in the colors from the Perfect Pearl that was added to the water.

I hope you try this technique.  It's fun, easy, quick, and creates a beautiful and very mailable card.

Magenta Stamps used:
P.0536  Bloom & Flourishes
07.700.G  Life is Art

Distress Inks:  Picked Raspberry; Peacock Feathers; Squeezed Lemonade
Versafine Onyx Black Ink
JudiKins White Diamond Embossing Powder
Tim Holtz Watercolor cardstock
So Silk Beauty Pink card stock
Perfect Pearls Pearl
Enamel Dots from My Mind's Eye - "Ashbury Park"


Friday, June 13, 2014

Acrylic Block Stamping

In conjunction with the Art 'n Soul newsletter each week, we are going to try to present a tutorial on a new technique.  I have had a lot of people ask me about watercolor stamping using dye based ink pads and acrylic blocks.  I first showed this technique on my blog here.  One of the most frequent questions I have had since this posting is where did I get the round acrylic block I used on those cards, and I'm sorry, but I really don't recall, and I have not been able to find this exact block in a web search.  I decided to try this technique using square and rectangular blocks to show that it's beautiful in any shape.

First I assembled some Distress Inks and some pieces of watercolor paper (Strathmore 140 # cold press).  I think any dye based ink will work for this technique, but I particularly like Distress Ink.  I think the colors stay very true.

I cut 2 pieces each of the same size paper, that would be appropriate sizes for the acrylic blocks I was using.  The blocks I chose to use are the Tim Holtz 9-piece acrylic block set.  I chose this set because it comes in a lot of sizes in squares and rectangles.
Tim Holtz set of 9 acrylic blocks

First I applied ink directly from the Distress pads onto the acrylic block.  My first try was using 3 colors, but I found I liked the results better using only 2.  Be sure to apply the colors in separate places on your block so that you don't mix your colors on your pad.  If you can't avoid that,  just be sure to use the lightest colors first.


In this example, I used Distress Inks in Mustard Seed and Seedless Preserves.  After applying the ink to the block, spritz water onto the ink, pretty liberally, but not so much that when you turn the block over the ink will drip off.  I like to mix about 1/4 tsp of Perfect Pearls Pearl into my spritzer bottle.  This will add a beautiful glimmer to your colors


When your ink is beading up and starting to run together, turn your block over and stamp onto your watercolor paper.  Press down hard and leave it on the paper for a minute to allow the color to soak in as much as possible.


I noticed when using these blocks, which have grid etched into them, that the grid actually shows up in the stamping.  I loved that look, and made sure that the side I was using was the etched side.


There was still ink on the block after stamping once, and this is the reason that I cut two pieces of paper.  I spritzed the block and stamped again.


In many cases, I preferred the second stamping, and the grid showed up even better on the second piece.


If there are dark blobs of ink that you don't like, just touch a clean paper towel to them to blot them up


I can now stamp on any of these, and they will make gorgeous cards


These are all of my experiments (first and second stampings).  Besides the first two colors of Distress Ink, I also used  Picked Raspberry, and Chipped Sapphire.

Notice in the above photo that I still have ink on my block; also notice the second stamping in the top piece is a little light?  I spritzed my block once more and applied it to the second stamping on the top.  Since the previous ink had dried, this just added another layer of color, and I really like how it turned out.  Just have fun with it and experiment.


I made this card with the second stamping of the larger piece above.

Stamps used:
Magenta 0684.F  Poplar Leaf
Magenta 07.875.F  Always

Stamping was done with Distress Inks:
Shabby Shutters
Dusty Concord
Forest Moss

Gems are from Hero Arts Pearls & Gems Mixed Accents - Foliage and Floral

I hope you give this a try!

Wednesday, June 11, 2014

You Make My Heart Smile


I am loving trying different techniques using dye inks to create watercolor backgrounds.  This card was made by stamping this very lovely sentiment from Magenta and one other Magenta stamp (Small Burst Dandelion) onto 140# card stock with Versamark ink.  The images were then embossed with JudiKins Opaque White embossing powder.  Various colors of Distress Ink were applied over the stamped areas, and the embossing resisted the ink.  I sprayed the piece liberally with water mixed with Perfect Pearls Pearl, until the ink started puddling and moving.


I let the water dry, and then added some gems to the top and bottom of the sentiment, and some Stickles to the center of each Dandelion Burst.  This card has a lovely shine in real life.

Magenta Stamps used:
  07.861.K  You make my heart Smile
42.116.F  Small Burst Dandelion

Other Products used:
Distress Inks:
Peacock Feathers
Squeezed Lemonade
Picked Raspberry
Judikins White embossing powder
Perfect Pearls pearl
So Silk Beauty Pink (for matting)
140# Strathmore watercolor paper
Hero Arts Mixed Accents - Foliage
Waterfall Stickles