Pages

Saturday, January 16, 2021

Magenta Card Exchange: The Netherlands

 I love participating in the Magenta card exchange each month. It's fun and interesting to send and receive a card from all over the world. This month, once again I got to send a card to someone in the Netherlands, one of my favorite countries in the world.


I tried stepping out of my comfort zone with this card, since my preferred go to colors are bright jewel tones. The background of the center panel was made using an acrylic block stamping technique (second stamping) and Distress inks with Perfect Pearls powder. I have a tutorial for that technique here.

When I apply the Distress inks to the block, I spray the inks with water infused with Perfect Pearls powder, and that gives a nice shimmer to the stamping.


It's hard to capture the shimmer in a photo, but it's easier to see in real life.


This photo that I posted for the sneak peek really shows the shimmer.

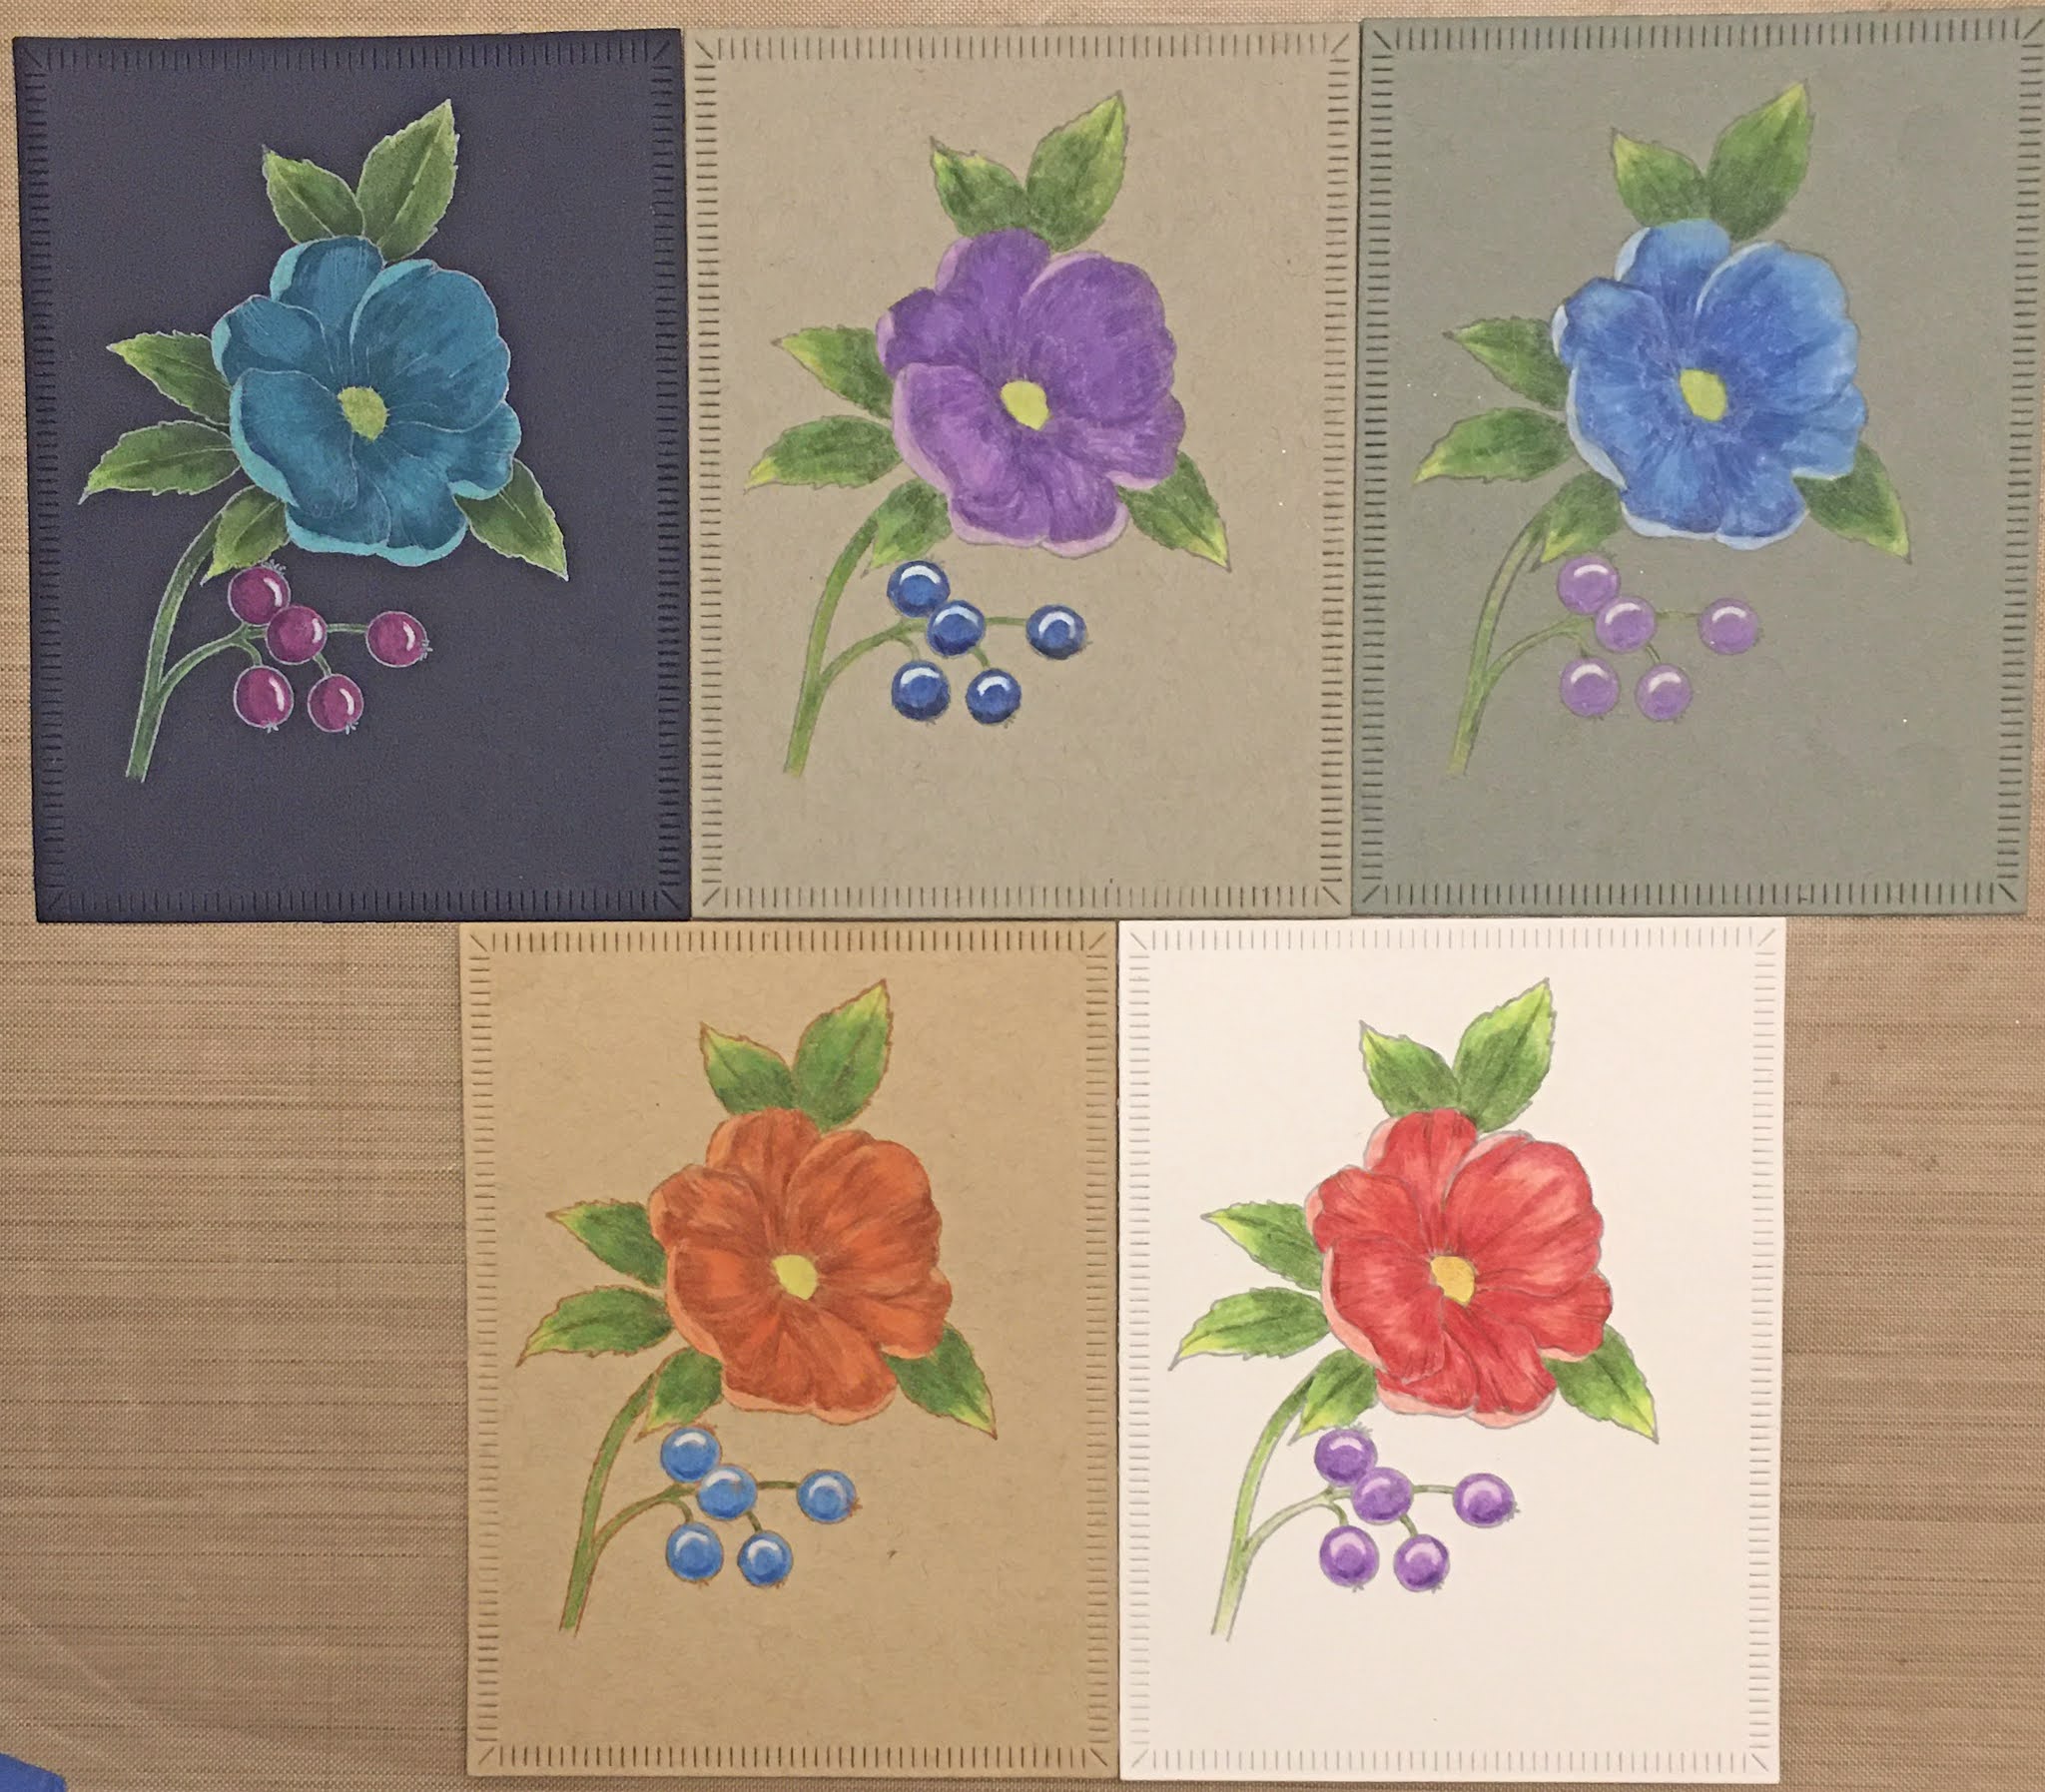
The stamp I used is a favorite of mine, the beautiful Astilbe image. I inked it using small iCrafter brushes that look like daubers.


I inked the entire image at once, using the MISTI to ensure that the stems on the background would be properly stamped.


The background panel was made with the shaving cream technique, and I have made so many great cards with these backgrounds. You see a tutorial of that technique here and the pink and red panels were made in this post. If you search for "saving cream" on my blog, you can see the many times I have used these backgrounds.

Both panels were cut with the Greetery Crimped Frame die.  I stamped the sentiment and matted the panels with black cardstock.

In the end I even stamped the front of the envelope with this pretty stamp.


Magenta Products Used:

09.235.M Astilbe

07.971.F Sending hugs

Other Products Used:
Distress inks: Picked Raspberry,
Peacock Feathers, Seedless Preserves,
Mowed Lawn, Mustard Seed
Distress Festive Berries inker
Shaving Cream
Versafine Ink
Tim Holtz Acrylic Blocks
Perfect Pearls Powder
iCrafter small brushes
The Greetery Crimped Frame die
Neenah Solar White 80# & 110# cardstock
So Silk Black Style cardstock


Friday, January 15, 2021

Super Saturday at Magenta: Wild Rose Birthday With Prismacolors

Hi I'm over at the Magenta blog today, and you can see that post here.

 One of my favorite techniques on a card is to stamp an image with light colored ink, and then color the image with colored pencils. My current favorite colored pencils are Prismacolors.


I keep the stamp in the stamp platform, and when I'm finished coloring, I stamp it over the image with Versamark Ink. I then emboss it with gold or silver embossing powder.


To start, I cut panels out of 5 different colors and types of cardstock. These are my favorites for coloring.


This is how they looked after I colored all of them.


The above image was colored onto a panel of Strathmore Blue Tone cardstock. I will list all of the colors I used on each below.


The purple one was colored onto a panel of Strathmore Toned Gray Mixed Media cardstock


In real life, this one is more of a turquoise. It was colored onto Papercut Deep Blue cardstock.


This orange one was colored onto a panel of Strathmore Toned Tan cardstock.


This red one was colored onto 110# Neenah Solar White cardstock. I also like to use Stonehenge paper when I want the background to be white.


This is how they all looked after embossing. I added the sentiment at the same time. I chose coordinating cardstock for mats.

Magenta Products used:

Other Products used:

All the panels were cut with The Greetery Crimped Frame die
All the panels were mounted onto Neenah Solar White 110# cardstock

Blue Rose:
Strathmore Toned Blue Multi-Media Cardstock
Memento London Fog ink
JudiKins Silver Detail Embossing powder
Malmero Blue cardstock
Prismacolors: 
Copenhagen Blue PC906; Light Cerulean Blue PC904,
Non Photo Blue PC919, Sky Blue Light PC1086,
Parma Violet PC1008, Lilac PC 956,
Greyed Lavender PC1026, White PC938,
Olive Green PC911, Apple Green PC912,
Lime Peel PC1005, Yellow Chartreuse PC1004

Purple Rose:
Strathmore Toned Gray Mixed Media cardstock
Memento London Fog ink
Ranger Gold Embossing powder
So Silk Fashion Purple cardstock
Prismacolors:
Violet PC932, Parma Violet PC1008,
Lilac PC956, Grayed Lavender PC1026,
Indigo Blue PC901, Copenhagen Blue PC906,
Non Photo Blue PC919, White PC938,
Olive Green PC911, Apple Green PC912,
Lime Peel PC1005, Yellow Chartreuse PC1004

Turquoise Rose:
Paper Cut Deep Blue Cardstock
Hero Arts Unicorn White cardstock
Ranger Gold Embossing powder
Curious Metallics Super Gold cardstock
Prismacolors:
Cobalt Turquoise PC105, Light Aqua PC992,
Aquamarine PC905, Dahlia Purple PC1009,
Mulberry PC995, White PC938,
Olive Green PC911, Apple Green PC912,
Lime Peel PC1005, Yellow Chartreuse PC1004

Orange Rose:
Strathmore Toned Tan Multi Media Cardstock
Distress Tea Dye ink
Ranger Gold Embossing powder
PTI Terracotta Tile cardstock
Prismacolors:
Terra Cotta PC944, Pale Vermillion PC921,
Salmon Pink PC1001, Deco Yellow PC1011,
Copenhagen Blue PC906, Light Cerulean Blue PC904,
Non Photo Blue PC919, White PC938,
Olive Green PC911, Apple Green PC912,
Lime Peel PC1005, Yellow Chartreuse PC1004

Red Rose:
Neenah Solar White 110# cardstock
Distress Tea Dye ink
Ranger Gold Embossing powder
Stardream Jupiter cardstock
Prismacolors:
Crimson Red PC924, Scarlet Lake PC923,
Deco Pink PC1014, Greyed Lavender PC1026,
Lilac PC956, Parma Violet PC1008,
Violet PC932, White PC938,
Olive Green PC911, Apple Green PC912,
Lime Peel PC1005, Yellow Chartreuse PC1004


Saturday, January 9, 2021

First Christmas Cards for 2021 with Distress Blending

 Every year I am determined to make Christmas cards each month so that I have them completely finished by October. I succeeded at this a couple of years ago, and I am going to try to do it again this year.


I made 10 cards of this same design with a new to me stamp from Magenta. I love this Swirly Poinsettia. Although it's large, I think it would also be pretty on tags.


I started by blending Distress Oxide colors onto panels of 80# cardstock using the Magenta Square Silhouette stencil. I love the deckle edges this stencil has.


I blended some of the squares using one color, and others using multiple colors.


After doing all of the blendings, I flicked water onto each one so there would be droplets. I left them to dry for awhile. All of the panels have these 6 colors shown.


I stamped each square with Versamark ink and embossed them with gold or silver embossing powder.


I cut each panel with The Greetery Crimped Frame die and added the Magenta sentiment Merry Christmas and Happy New Year. I selected coordinating colors of cardstock for mats and mounted each onto a 110# Neenah Solar White base card.

Magenta Products used:

Other Products used:
Distress Oxide inks:
Candied Apple, Rustic Wilderness,
Mermaid Lagoon, Picked Raspberry,
Seedless Preserves, Speckled Egg,
Ranger Gold Embossing powder
JudiKins Silver Embossing powder
Versamark Ink
Neenah Solar White 80# & 110# cardstock
Various colored cardstock for mats

Monday, January 4, 2021

Cards for Charity: Valentines

My friend Pam's church is wanting Valentines now to sell for their very worthy charities, and I made 10 of these for them.


 Honestly, when I made the first one, I thought I would not be able to make 10; but I figured out a way to do it more easily. These are all die cuts, and the heart is a silhouette type die that cuts holes into your paper, and leaves all of these pieces to either use or throw away. I wanted to use the pieces only on these cards, and sticking them all down in the right place was the challenge.


When I was working at Art 'n Soul, I did a lot of demo'ing. One of the techniques people liked to see was one I called "stencil stamping." It's a type of mono printing using stencils. You can see a tutorial of that here, and if you search for stencil stamping on my blog, you will see lots of samples where I use it. Basically, I use a piece of watercolor cardstock and rub distress ink directly from the pad onto the paper. Then, I take a stencil and spray it with water mixed with Perfect Pearls powder, and press the stencil onto the inked paper. That leaves a print of the stencil onto the paper.


In order to use these backgrounds for the Valentines, I applied Stick-It adhesive to the backs of each panel. I was able to get two sentiments and two hearts out of each panel, so I only needed 5 panels, and I had enough left over from my demos, in blue and pink and purple and pink.

After running it through the die cut machine, I left the paper in the die and turned it over. I removed the release paper from the backs of each of the individual pieces. I then turned it over onto a piece of white cardstock, and pressed a tool through each of the holes in the die to make sure the pieces would come out of the die and stick to the cardstock. I took off the die and rubbed my fingers over the entire piece to be sure the pieces would stay stuck down. 

After doing this several times, it got easier, and I got them all done in one night. Of course I die cut the panels with my favorite Crimped Frame die, and I matted each panel with pink cardstock.


I cut out the negatives of these and plan to make more cards from them. They still have the Stick It adhesive on the backs, so it should be easy to do something nice with them.


Products Used:

Simon Says Stamp S412 Corbel Heart die
Mama Elephant Happy Valentine's Day die
Distress Inks: Picked Raspberry, Peacock Feathers,
Wilted Violet
Perfect Pearls Pearl Powder
Tim Holtz Watercolor cardstock
Stick-It Adhesive
Stencil used on these is no longer in production, but you
can use any stencil that has about equal amounts of open area to solid
So Silk Beauty Pink cardstock