Pages

Showing posts with label Magenta 07.834.F Find your song and sing it. Show all posts

Wednesday, July 29, 2015

Inspiration Station

Sorry it's been so long since I posted, but it's been a crazy busy summer for me so far!

I realized that I had not posted the last few Inspiration Station cards I made at Art 'n Soul. Our theme in June was Magenta Stencils, which coincided with the new Magenta release of the designs from talented designer Christine Gaudreault of Marie Lune Design (designing exclusively for Magenta). For the stencil cards, I used a new product by Magenta called Nuance. Nuance is a water-soluble powdered dye that creates magic with paper and water. There are other powdered dye products on the market, and I have tried several of them, but Nuance is my favorite because I love the range of 15 bright, beautiful colors.


Playing with Nuance is such great fun. I have made numerous colorful backgrounds with this product. Just sprinkle the powder onto a piece of watercolor paper and spritz! You can continue to add powder and water as you wish, and you can also use a brush to spread color around if you wish.

For spritzing, I prefer to use "pearly water" (1/4 tsp of Perfect Pearls Pearl with 2 oz water makes a great pearly spray). The mica in the Perfect Pearls powder gives a sheen to your background that is nearly impossible to photograph, but looks great in real life.  The card above was done over a Nuance background. The flowers are a stencil that I outlined with a black Micron pen. I then painted bleach onto each flower to make them stand out from the background. The sentiment was added in Versamark ink and embossed using White Diamond embossing powder. So simple and so fun. 

FYI if you are bleach painting, it's best to use a brush with synthetic bristles. I read a post on line that suggested to put bleach into a water brush, and I'm definitely going to devote one of my water brushes for this purpose!


I adore this little frog by Christine Gaudreault! His name is Henrí, and he is available in small (pictured) and large stencils and small stamp. So Adorable! We have many tree frogs on our property and do they ever sing in the Spring!


Again, I was creating cards to feature stencils, but also using Nuance. On this card, I placed a stencil onto watercolor card stock and added powder with the stencil in place, and spritzed. I removed the stencil and loved the background effect. I then used the flower stencil and outlined it with a black Micron pen. I added more color to the flower by painting with Nuance. You can add a little powder to a palette and dissolve with water to paint with just like you would do with any watercolor.

Here's one more card, and this one was for July's Inspiration Station. For July, our theme was Nuance. I had fun creating this card, which is somewhat different from the ones above. Was I thinking of a Hawaii vacation, perhaps?


I put down a little color on the left side of a watercolor panel, then stamped the flower several times with Versamark ink. The flowers were embossed with clear embossing powder to act as a resist. More Nuance was added to the rest of the panel (and spritzed with pearly water). The sentiment was added with Versamark ink and embossed with White Diamond. A few flower sequins were sprinkled on.

I hope you enjoyed, and I hope you will try Nuance. The colors are vibrant and beautiful!

Materials Used:

Life is Art:
Magenta products used:
Template TM114 Sweet Garden (small)
07.700.G Life is art
Nuance colors:
Hot Pink, Orange, Yellow, Grass Green, Royal Blue, Mauve, Violet

Other Products:
Versamark Ink
Judikins White Diamond Embossing Powder
Micron Pen
So Silk Beauty Pink paper
Tim Holtz Watercolor paper
Bleach

Find your song:
Magenta products used:

Template TM95 - Little Henrí
07.834.F Find your song
Nuance colors:
Turquoise, Grass Green, Jade

Other Products:
Memento Ink: Bamboo Leaves
Versafine Onyx Black Ink
Versamark Ink
Micron Pen
Clear Embossing powder
So Silk Fair Blue paper
Tim Holtz watercolor paper

Beauty is everywhere:
Magenta products used:
Template TM100 Sister Flowers (medium)
Template TM80 Double Diamond
07.614.D Beauty is everywhere
Nuance colors:
Orange, Golden Yellow, Grass Green, Jade, Cerulean Blue, Turquoise, Scarlet, Hot Pink, Yellow

Other Products used:
Versafine Onyx Black Ink
Micron Pen
Stardream Flame paper
Tim Holtz watercolor paper

Happiness is the path
Magenta Products used:
85.011.H Flower Silhouette - Sweet Little Garden
07.912.H Happiness is the Path
Nuance colors:
Jade, Mauve, Violet, Cerulean Blue, Turquoise

Other products used:
Versamark ink
Clear embossing powder
Judikins White Diamond embossing powder
So Silk Fair Blue paper
Tim Holtz watercolor paper

Friday, April 3, 2015

Technique of the Week: Make a Shaker Card Using Die Cut Openings

Art ‘n Soul just had a really fun shaker card play day, and we made some cards using the Impression Obsession shaker pouches. This is the easiest way to make a shaker card, and it’s lots of fun too.


We also had some cards on display that were shakers made without the use of shaker pouches, and using various dies to cut the shaped openings. I wanted to write down step by step instructions for making this type of shaker card, but I will be the first to admit that it’s hard to describe without showing you an example. I decided that the best thing to do would be a pictorial step by step. This method of making shaker cards is more complicated, but yields really beautiful results.

 You can see the shaker cards I made with pouches, and the ones I made with dies in my post here.  Here is the card I'm going to show you.


1. Make or choose an image for the background that will show behind the shaker.
This can be anything you wish, even a sentiment.  It can be a stamped or inked or watercolored background – anything you like. This is usually my first step in making a shaker card, because it will determine the color palette I will use. I have a lot of pieces that I have made in the past that did not work out for the project I was working on at the time. I have found that this stash is a great source for shaker card backgrounds.


This is just a small sampling of my "stash"!


In this case I used a piece that I had previously inked with Distress Ink, and stamped with a great Magenta Image “Birds Postcard” 05.230.L.


I was trying to do an ink lifting technique with these panels, and I just could not make it work out to my satisfaction with the images I was trying to use.  I could not bear to throw them away.  You can see the dies i chose for this project (see step 2) in this picture.  The Woodland Oval die cut was helpful to determine how the background would look in the finished card.


2. Choose a die or dies for your shaker card opening or openings (yes, you can have multiple openings in the same card).
Your die or dies can be anything large enough to actually see beads and sequins through.  Keep in mind that the more detailed or ornate the die opening is, the more challenging it will be to make a shaker from it.  This shouldn’t deter you, because the more detailed ones can be really beautiful.

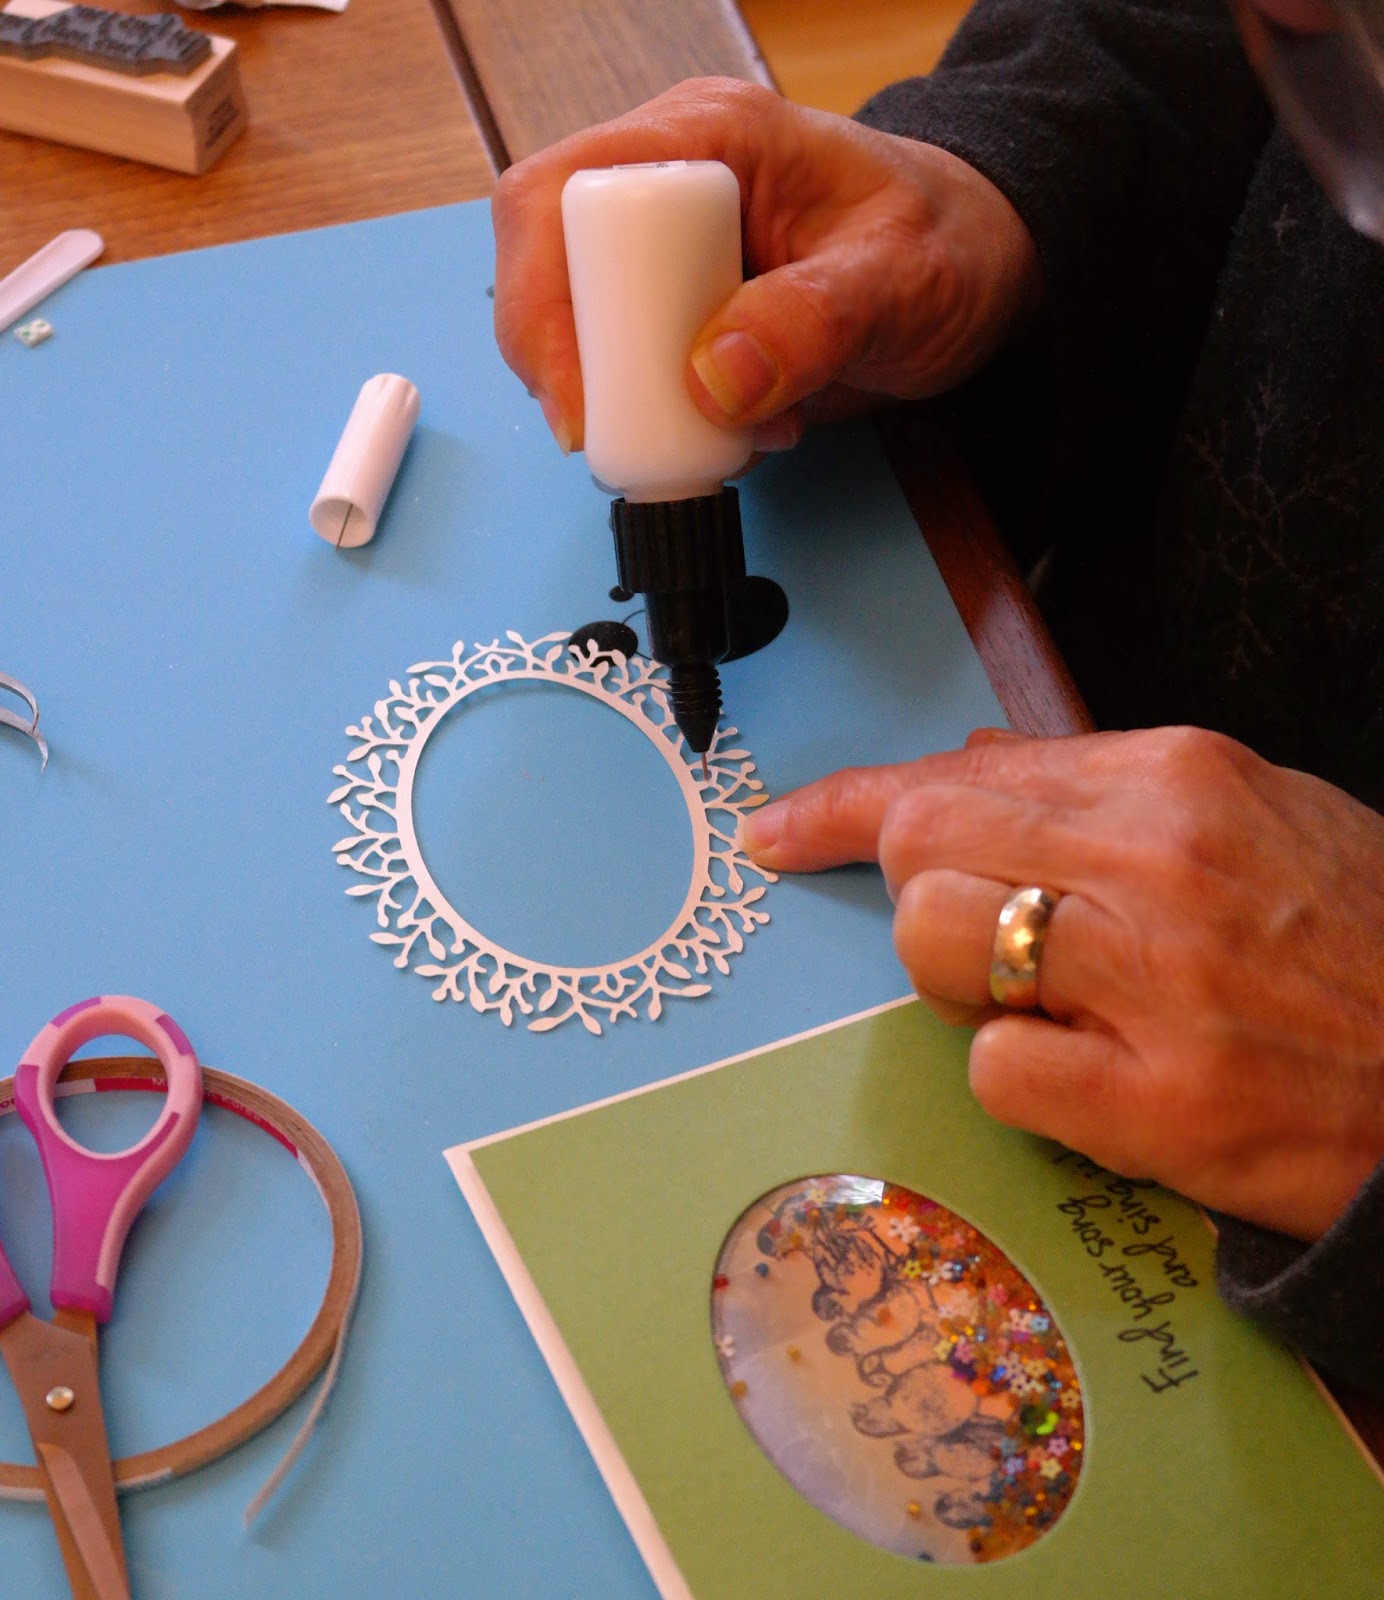
 For this example I chose Poppy 1168 Oval Frame Background for the opening, and Poppy 1125 Woodland Oval for the decorative surround. A decorative surround is not necessary for this technique.


3. Choose your cardstock for the front panel of your card, and choose and make your base card
The front panel and base card can be whatever colors fit into your chosen color palette, but make them of sturdy weight; especially the base card should be at least 100# cardstock. The front panel will form your shaker pouch, and will eventually be mounted on your base card. For the front panel, I chose Stardream Fairway cardstock, and for the base card I used Stardream Opal. I also cut the Woodland Oval surround out of the Stardream Opal. In addition, you will need a piece of acetate that will be larger than the diecut opening.


4. Cut the opening in your front panel, and cover the back of the panel with acetate
The entire opening should be covered with acetate on the back. I used scor tape to stick the acetate down. This will not show, but the acetate is what keeps your shaker material in, and you will see your image through it.


5. If you want to stamp a sentiment on the front of your panel, now is the time.  
I used the Magenta stamp “Find your song and sing it” 07.834.F, and stamped with Onyx Black ink and embossed with clear detail embossing powder. If you stamp onto Stardream paper, you should probably emboss it, because it does not dry readily.


The reason there are scraps of foam tape all around is because I forgot to stamp my sentiment before I put foam tape all over the back, and so I had to peel them off so that I could stamp! I know you all have never done this.

6. With the front side of your panel down on your work surface, and the acetate side of your panel up, completely surround your die opening with foam tape.  Also apply foam tape to the rest of the back of your panel
This is probably the hardest part, but it’s really not that hard. Just be sure that each piece of foam tape around the opening is jammed up against the one next to it so that there are no openings for your shaker material to escape. 


To clarify, this is being done on top of the acetate. Leave the release paper on your foam tape for now. 


7. Add your shaker material on top of the acetate in the well you created with your foam tape.
The shaker material can be anything that is small, sparkly, and will shake around after your card is constructed. I use small beads, spangles, coarse glitter and sequins of various shapes. I have been collecting these things for a while, so I have a lot of it to choose from.

 You can also use your tiny dies to cut great shaker material from shimmer sheetz or shiny cardstock.  Just make sure the pieces are pretty on both sides. Choose shaker material that coordinates with your color palette.


8. Carefully remove the release paper from your foam tape.
I use a fine pointed tweezers to do this, while I’m carefully holding the card down.  Your shaker material will want to jump up onto the sticky side of the foam tape, but just remove any that do.  You don’t want anything that will interfere with the seal you will be making to keep the shaker material in.


9. Place your background image front side down onto the foam tape.
Try to position your piece so that the image that you want shows through the front window of the acetate. Press your background piece firmly down and made sure it is well adhered to the foam tape. This is what forms your shaker pouch and seals in your shaker material.


I also added the decorative surround (Woodland Oval) to the front of the panel at this time. 


I realized too late that I had not left enough room for the surround when I stamped my sentiment, and I had to cut some leaves off the branches at the bottom. 


It still drapes a little onto the sentiment, but I think it’s readable anyway. 


I was originally planning to use my stamp positioner to stamp the sentiment as one line, rather than stacked, but then I didn’t. I should have gone with my first instinct!

10. Adhere your panel to your base card with strong adhesive.
I used scor tape to adhere my panel to the base card.


Thanks so much for hanging in there with me for this tutorial, and I hope you try making cards using this process. It’s well worth the trouble!

Oh, one more picture.  My wonderful husband Jim takes most of the pictures for my blog tutorials for me.  For those who are curious about how he gets good light on some of the pictures (especially on our many gray days), he sent this one along.  He has a ginormous light pad that he often uses, along with other strategically placed lights.


Magenta Stamps used:

Birds Postcard 95.230.L

Find Your Song and Sing it!  07.834.F

Other materials used:

Poppy dies: 1168 Oval Frame Background & 1125 Woodland Oval
Distress Ink:  Faded Jeans & Rusty Hinge
Versafine Black Onyx
Clear Detail embossing powder from Judikins
Stardream papers: Fairway & Opal
Acetate
Foam tape & Scor tape
Various beads, spangles & sequins
Ranger Matte Multi Medium
Pico embellisher bottle
Elizabeth Craft Detail Scissors