I saw this technique on Jennifer McGuire's blog,
and I think she invented it. She makes it look easy, but I'm here for you. I decided to try it to see if a mere mortal could do it.
To make 2 cards, I used panels cut to 5.5 x 2.25
and 5.5 x 2.75. (I made a third panel, but did not make it into a card).
To do this technique, first you need to find a
stamp or stamps with images that have some open space in them. Flowers are
perfect. I used two great Magenta stamps, 14.639.P Three Flowers; 14.635.P Mallow Flowers.
Stamp your image with Versamark on 80# Neenah white
cardstock, and emboss with clear embossing powder. You heard me correctly! She
did NOT use watercolor cardstock; she said that 80# Neenah cardstock worked the best. I admit I have not tried it on other papers. This did make my paper curl, but by the time I stuck them down on the base card, they were fine.

Using Distress ink, the color of your choice, apply
ink from the pad direct to paper, and cover your whole panel completely. Use a
lot of ink, and make sure it's completely covered. For the first card, I used
Mustard Seed ink and the Mallow Flowers stamp.
After covering the embossed panel completely with
ink, I took a small watercolor brush and water, and painted the petals and
leaves of the image with water. This lifted some of the ink from those areas.
I let it dry and then put some Spiced Marmalade ink
on an acrylic block, added a little water to the ink with my brush, and painted
with this in the petal areas. I used Mowed Lawn in the same way to paint the
leaves. (I may have painted some of the Spiced Marmalade on a leaf, but I like how it turned out in the end).
I left this all to dry and started on the second
panel, where I used Peacock Feathers for the background color, and Wilted
Violet for the secondary color.
I again used Mowed Lawn for the leaves. The stamp was Magenta's Three Flowers stamp.
 |
| Painting water on the petals |
 |
| Painting Wilted Violet on the petals after lifting color |
 |
| Painting Mowed Lawn on the leaves |
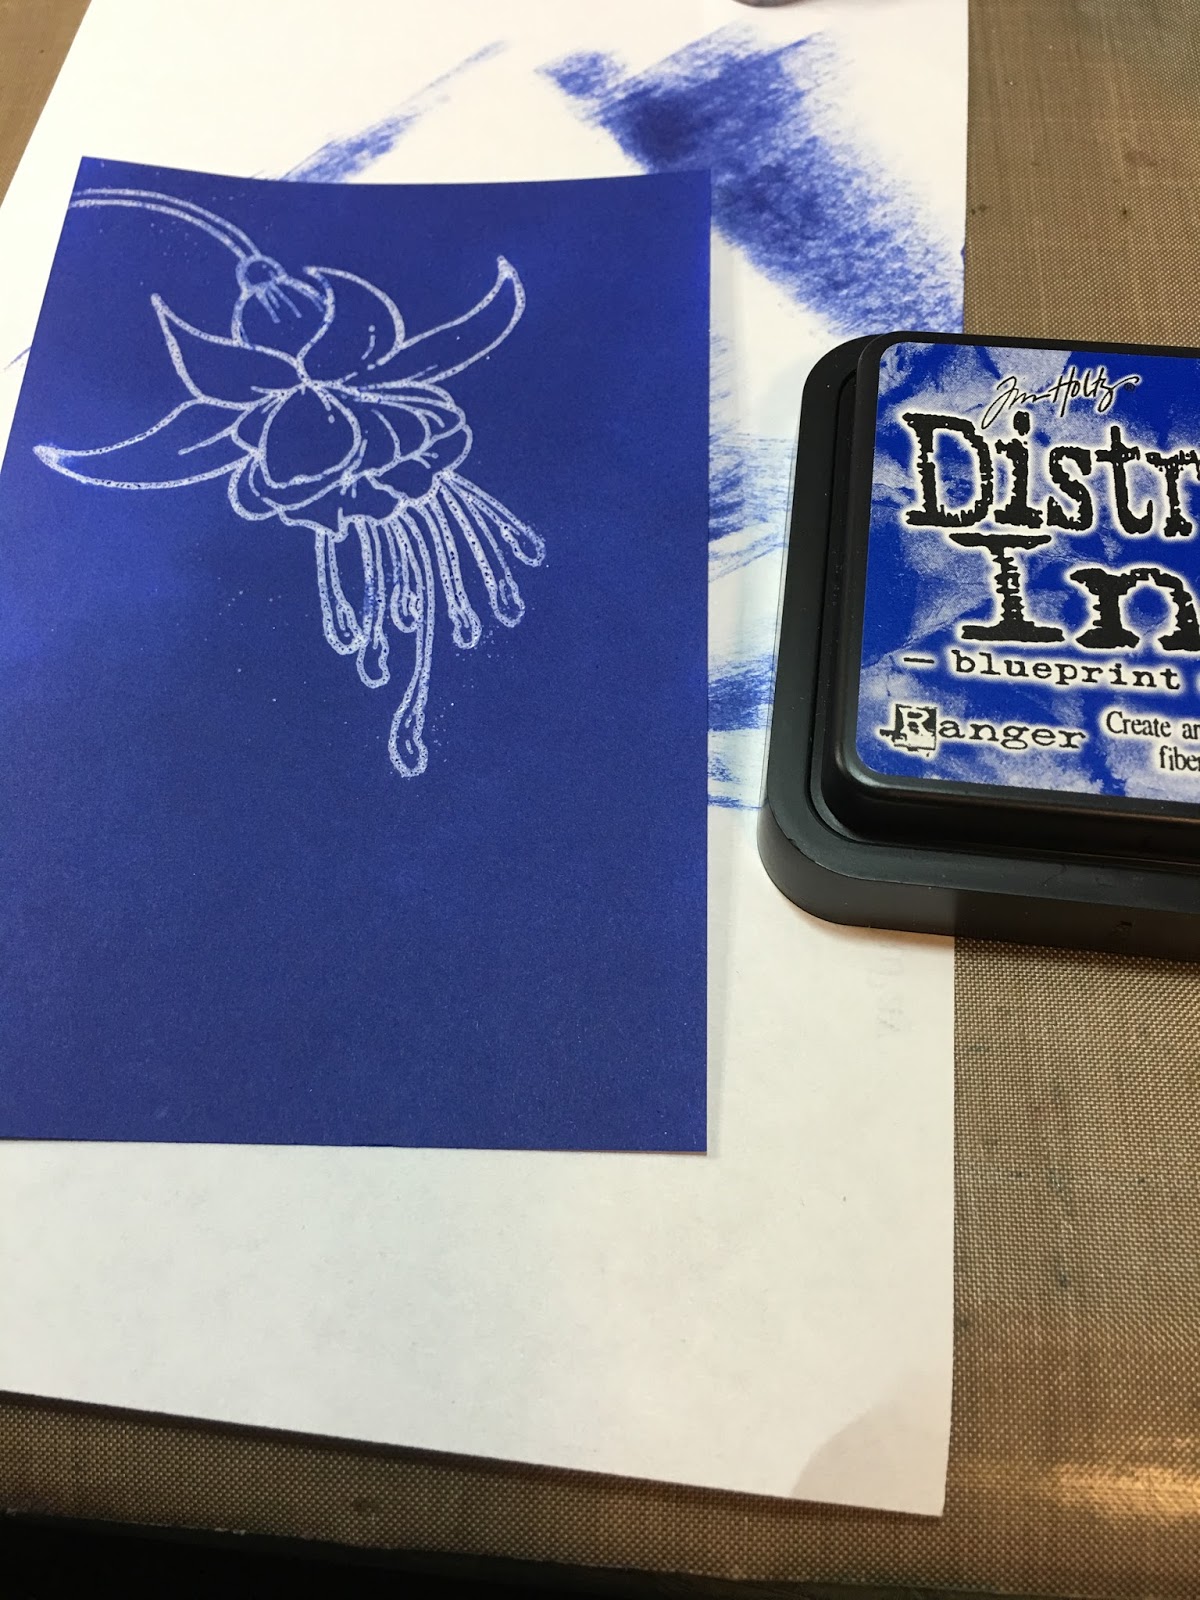
I inked a third panel, but did not end up making it into a card.
 |
| Blueprint Sketch ink and the beautiful Magenta Fuchsia stamp 42.235.O |
Here are the three panels I made. I flicked a little water on them to get little drops in the color.
To finish the cards, I applied strips of leftover
cardstock on each side of the panels. (Stardream Fairway, and So Silk Fair
Blue). (Yes, I save my strips, especially if it's pretty cardstock).
These photos show me using the MISTI tool. I prepared base cards using 110# Neenah Solar White
cardstock. I decided to stamp the sentiment directly on the base card, and to
do that I used a MISTI tool. If you have not heard of this tool, then you should
definitely check it out. At Art 'n Soul, we are going to carry this product as
soon as we can get them in stock. I believe they are due to be shipped in
March. I would not feel safe stamping directly on a base card any other way. If
you are interested in obtaining a MISTI tool, please get one from us at Art 'n Soul. You can
pre-order from us with a pink sheet.
 |
| Lining up the panel and stamp placement on base card |
I decided to stamp the sentiment using Distress
Ink, which can turn out splotchy. I don't usually use it for stamping a
sentiment, but I wanted to match the colors on the panels. With the MISTI, you can stamp it down as many times as you like, and it won't mess up.
I love, love, love the Magenta Happy Birthday
stamp, 07430.I. I used the cling version, since the MISTI does not accomodate
wood stamps. This is a fantastic stamp with a vertical orientation, and worked
perfectly for this card design. I stamped one sentiment with Peacock Feathers,
and one with Mowed Lawn. I did have to stamp each one a couple of times to get perfect coverage.
I decided to stamp on scrap paper first to decide which color I wanted to use for the sentiment. Wilted Violet or Peacock Feathers?
Both are good, but definitely Peacock Feathers!
After mounting the panels on the base cards, I
added a few touches of bling: Wink of Stella clear glitter pen on the flower
petals; touches of Stickles in the centers, and some scattered sequins. The
glitter touches are very hard to pick up in a photograph, so if you want to see these cards in person, please come in to Art 'n Soul.
I have to say that I did not find these hard to do,
and most importantly, they were really, really fun! I think you could easily
make multiple cards using this technique, and depending on the stamps you use,
you could mount the panels horizontally on your card instead of up and down.
You could also use smaller images and mount them in the center. There are lots of possibilities. I hope you give it a try!
Magenta Products Used
Other Products Used
Distress Inks: Peacock Feathers, Wilted Violet, Mowed Lawn, Mustard Seed, Spiced Marmalade
Versamark Ink
Judikins Clear Detail embossing powder
Neenah Solar White Cardstock 80# for panels and 110# for base cards
Small watercolor brush
So Silk Fair Blue cardstock
Stardream Fairway cardstock
MISTI Stamping Tool
Various sequins
Ranger multi medium matte adhesive
Wink of Stella clear glitter pen
Stickles Orange Peel and Starry Night