Pages

Friday, March 25, 2022

Super Saturday at Magenta: Card Exchange and Distress Blending

 Hi Everyone! I'm over at the Magenta blog today with this post, and you can see it here.

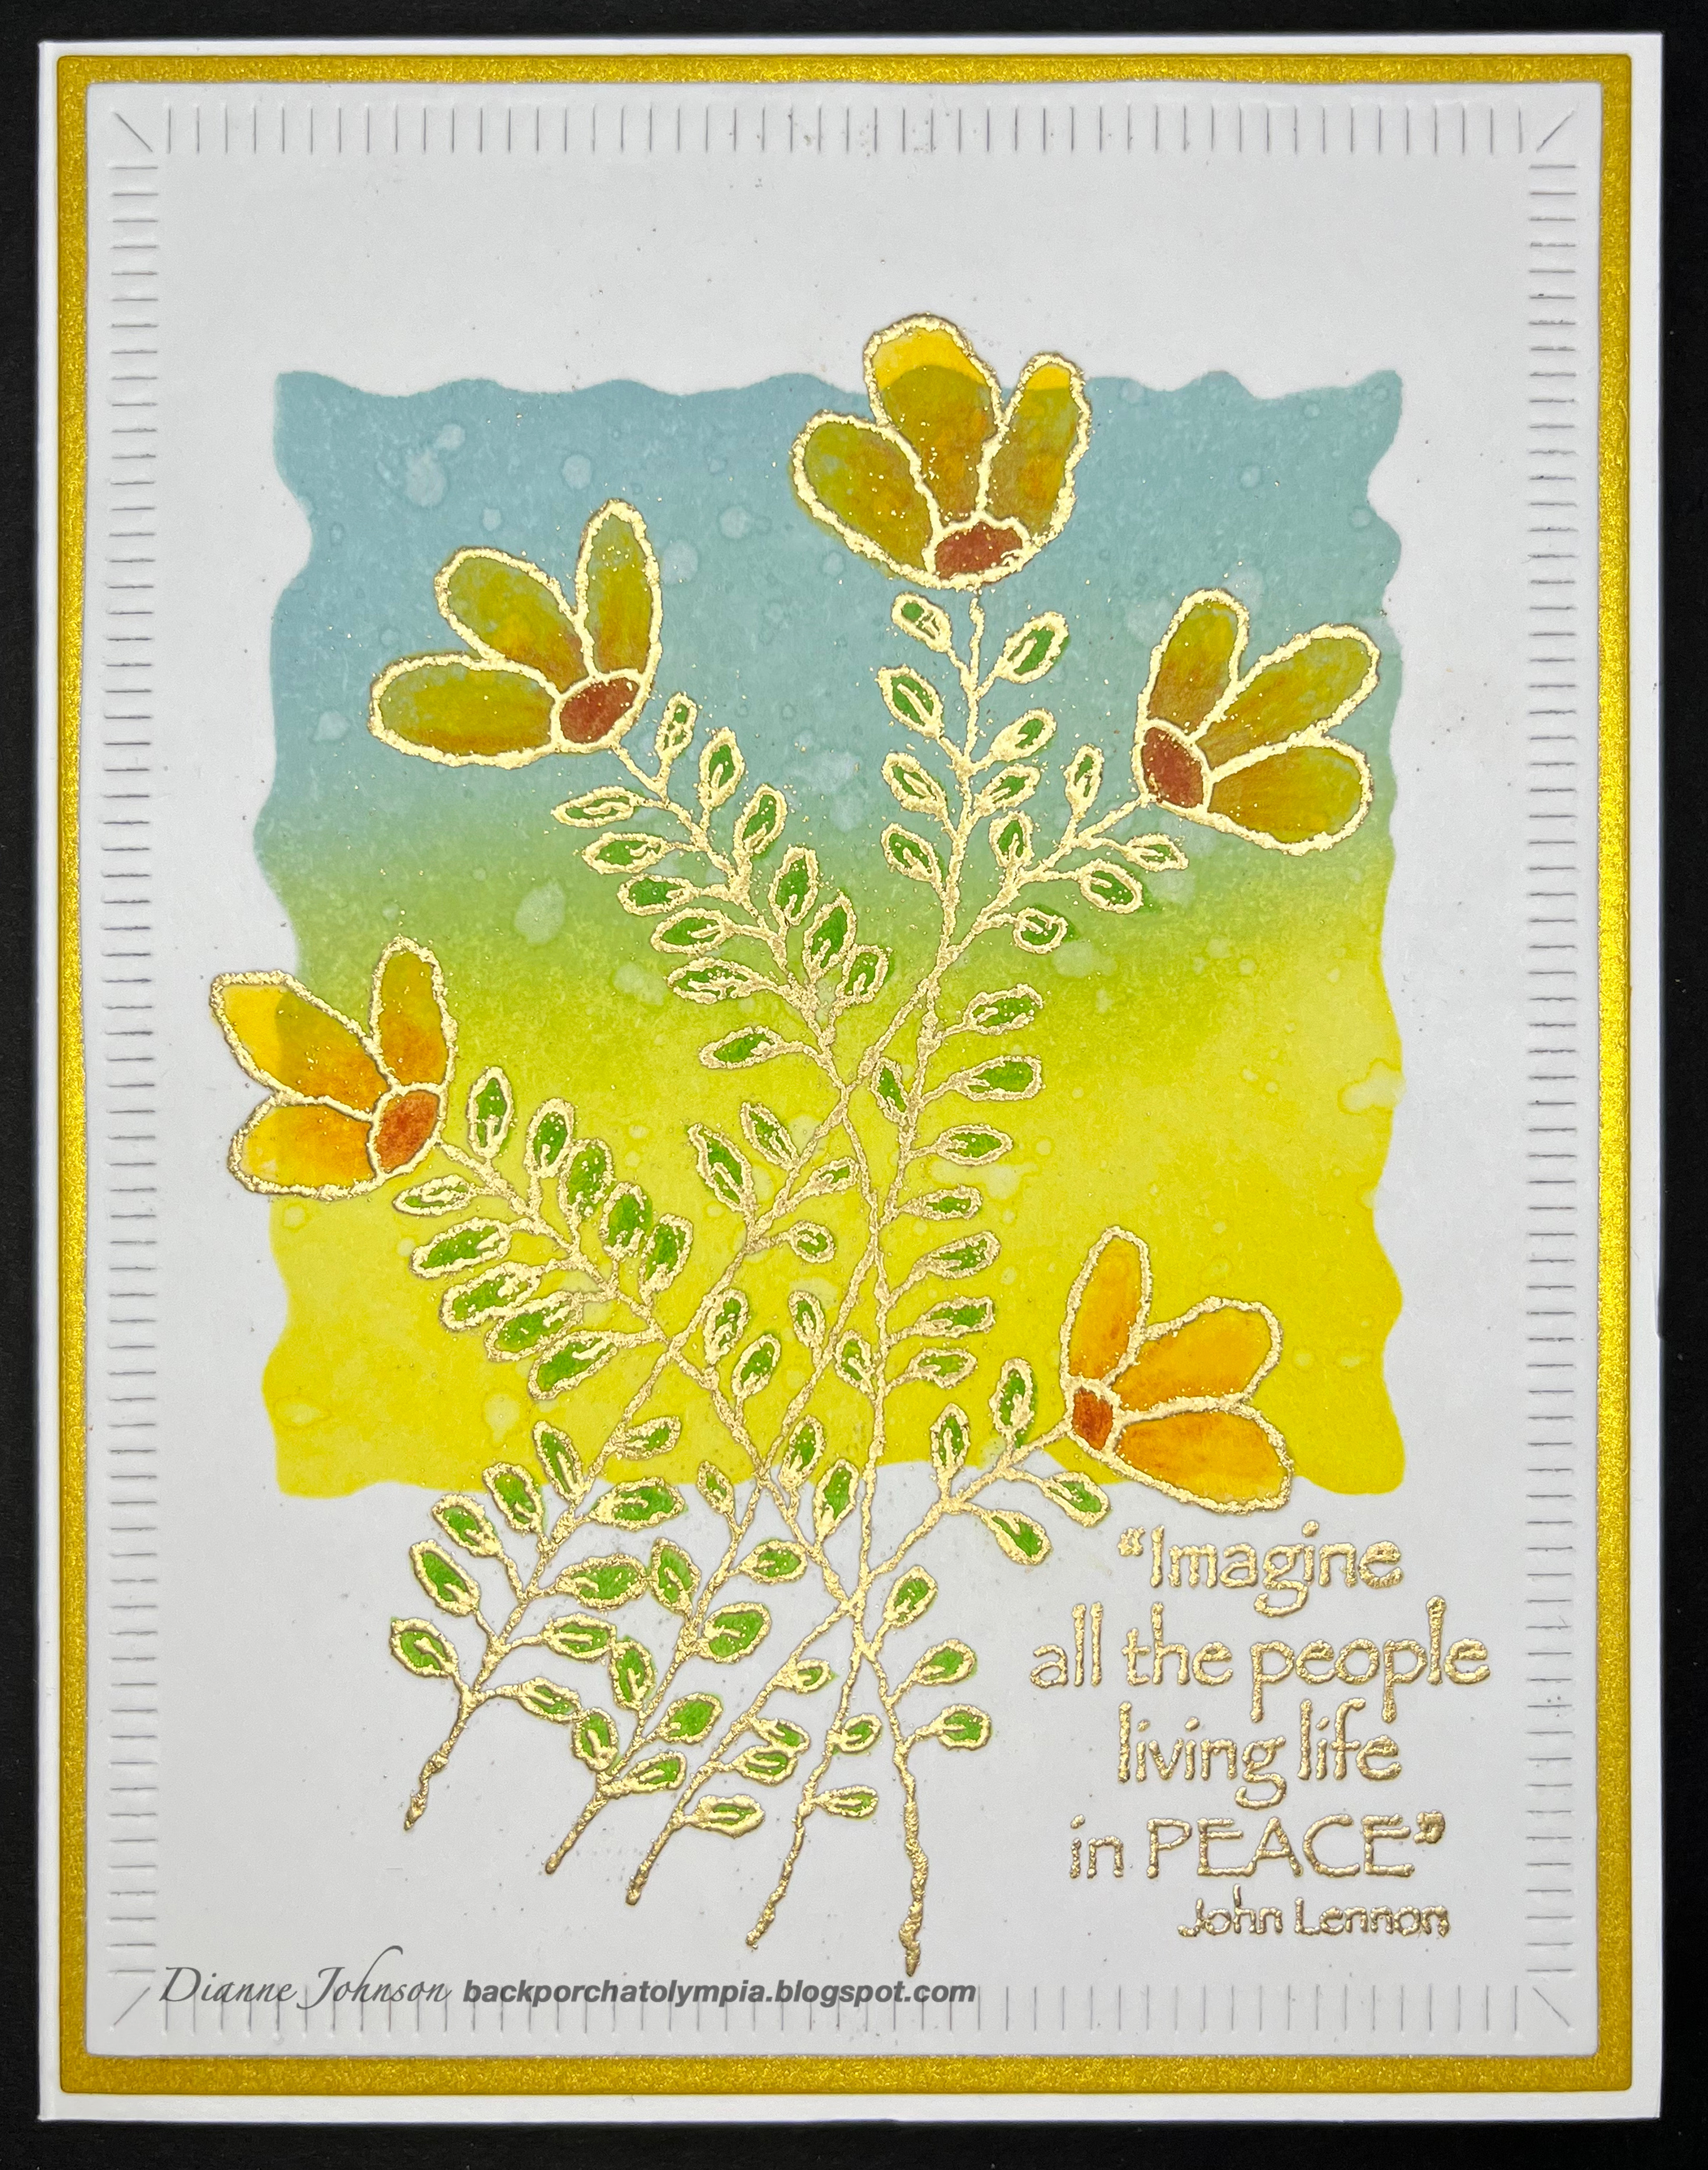
I want to take a few minutes to talk to you about the Magenta Card Exchange. It's hosted by DT member Mariëtte van Leeuwen on the FaceBook page Magenta Style - Passion Studio. It's a page for people who are passionate about Magenta, and a place to share and view cards made with Magenta products. Here is my exchange card this month

The Card Exchange will be taking a brief hiatus for the Summer (as usual) but will start back up in the Fall. I really hope you will join us. It's an amazing way to meet fellow card-makers all over the world. You send a card to the name and address you are given, and you will also receive one from someone completely different. I have had several really enjoyable conversations over FaceBook Messenger with card-makers who have received my cards. It's so rewarding to discover how much we all are alike. I have met the most remarkable people through this craft.


I was very much thinking of the Ukrainian people when I made this card. They are in my heart. I have followed a card maker from Ukraine, Yana Smakula, for many years, and I cried when I read her first post after Ukraine was invaded. She still posts on her blog and Instagram, and most of her posts start with "We are still ok." or "we are safe." I hope she and her husband and mother remain so.

To make this card, I used the Magenta TM277 stencil and blended Distress Ink into the square. I stamped the Magenta Graceful Tri-Petals stamp (one of my favorites) and used Prismacolors to color in the petals and leaves. I stamped the image once more onto my panel and embossed in gold; then added the Peace sentiment and embossed that in gold as well. I die cut the panel with the Greetery Crimped Frame die.

Magenta Products Used:
TM277 Square Silhouette

Other Products Used:
Distress Ink: Mustard Seed, Speckled Egg
Prismacolor Pencils: PC1032 Pumpkin Orange,
PC1003 Spanish Orange, PC912 Apple Green
Ranger Gold Embossing Powder
Versamark Ink
The Greetery GD-M-016 Crimped Frame Die
Neenah Solar White 80# & 110# cardstock
Curious Metallics Super Gold cardstock


Friday, March 4, 2022

Super Saturday at Magenta: Foil Your Stamping

 Hi everyone! I am also posting this card on the Magenta blog today, and you can see that post here.

I recently watched an excellent video by Therese at Lost in Paper. Therese is a very talented paper crafter from Australia, and she did a live video on how to use toner foil on cards with or without a laminator. You can see her very informative and fun video here. One of the things that I picked up that I didn't know is that you can use heat embossing to add foil to your cards. In other words, you can stamp an image, emboss with clear embossing powder, place foil on it and run it through the laminator, and it will foil your stamped image. I was amazed because I had never realized that, and guess what? It works really well!


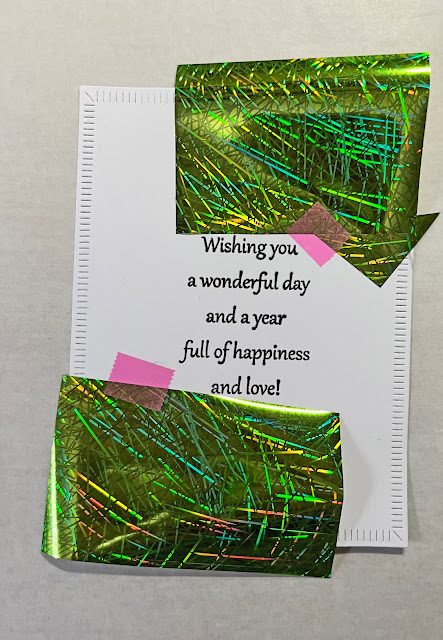
The first thing I did was to use the Greetery Crimped Frame die to cut a piece of scrap paper. I arranged my stamps on it and stamped to get the arrangement I wanted and to be sure everything would fit. I then die cut a panel from Neenah 80# solar white cardstock and stamped the sentiment first. I arranged the Magenta Curved Leafy Branch stamp onto the panel at the top and then the bottom, to frame the sentiment. I embossed the leaves with clear embossing powder.


I chose a color of foil that I liked and then cut two pieces out for the top and bottom. This is transfer foil that is often used in a laminator. Hot foil used for Glimmer type machines will not work in this way.


The best way I have found to cut out sheets of foil is a rotary type paper trimmer such as the one above. It allows you to measure the piece you want to cut, and you can hold the foil down securely while cutting. It cuts the foil beautifully. I prefer a guillotine type paper cutter for paper, but I'm very glad I saved this trimmer out - it's perfect for this task.


I taped the foil in place to cover the embossed leaves. I didn't want the foil to shift going through the laminator.


I sent the panel and foil through the laminator using a parchment/wax paper sleeve to protect it. I recently got this Royal Sovereign laminator to replace my very old one. I thought it only had one setting, but apparently it has two: cold and hot. I guess there must be a reason that you would want to send something through a laminator using the cold setting, but I don't know what it is. Not knowing about the cold setting at first, I sent the panel through that way and of course I thought my new laminator was broken. Luckily the cold/hot switches were very apparent on the front and I set it to hot, waited for the "ready" light and sent it through again.


It worked perfectly and I really was amazed. I plan to use this technique a lot more in the future. This birthay card is going to my daughter in law, because I think she will really like it.

Magenta Products used:

Therm O Web Brutus Monroe Green Sketch
Foil Transfer Sheets 19029     
The Greetery GD-M-016 Crimped Frame dies
Versamark Onyx Black ink
Versafine ink
JudiKins Detail Clear embossing powder
Neenah Solar White 80# & 110# cardstock
PTI Pinefeather cardstock


Friday, February 4, 2022

Super Saturday at Magenta: Watercolored and Heat Embossed

Hi all! I'm doing this post over at the Magenta blog today and you can see that here
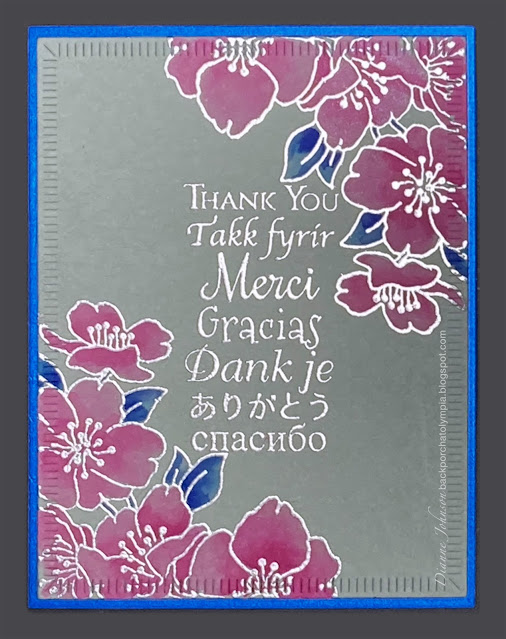
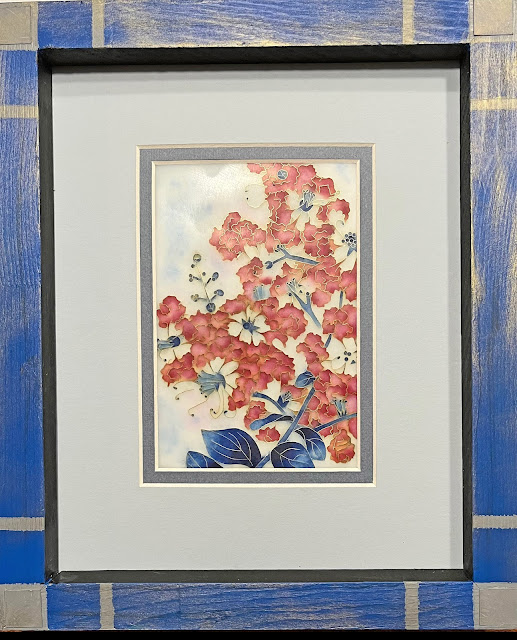
I received the nicest gift from a close Japanese friend who is an amazing artist and a master craftsman who works in Cloisonné. I wanted to send him a thank you card using his artwork as color inspiration.


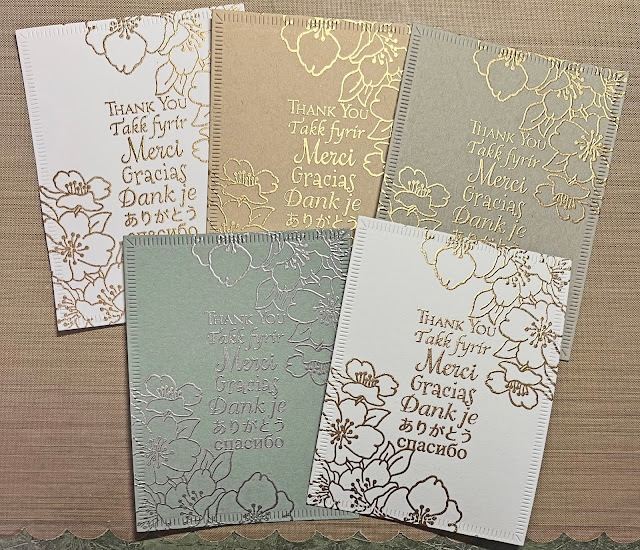
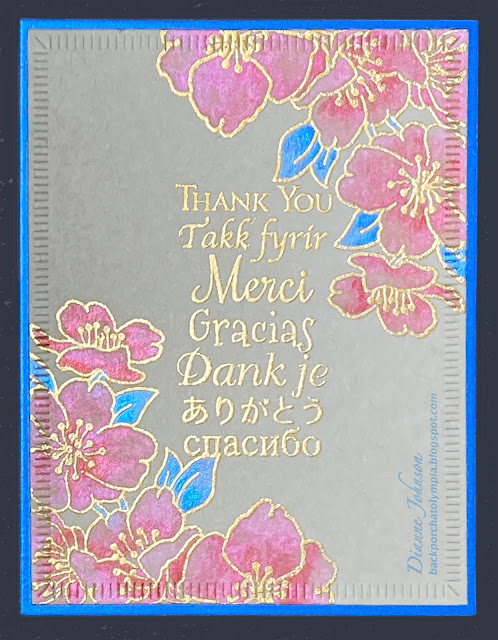
This first card is my choice to send him, but I made 3 others using different cardstock. A photo of the Cloisonné artwork is at the bottom of this post.

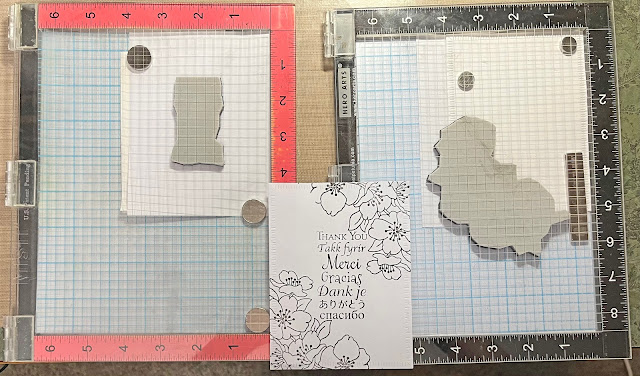
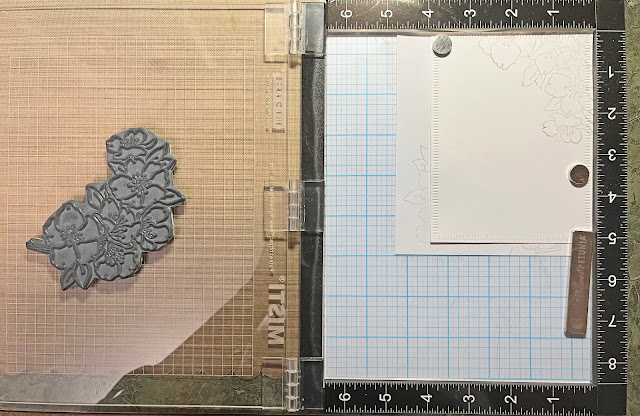
To stamp each card I used a MISTI stamping tool, and used the technique where you stamp and then turn the card upside down to stamp again. 


The panel in the middle of these two stamp platforms above is just a piece of typing paper that I stamped to see if the sentiment would fit. I have the flowers on one platform and the sentiment on the other.


The image above shows how I stamped on one corner and then turned the panel upside down to stamp on the other corner at the bottom.


I stamped 5 panels, but didn't use one of them that was white bristol cardstock.

The beautiful flower image is Magenta's Bloom Crescent. I also set up the sentiment (Multilingual Thank You) in a second MISTI to be sure it would be stamped in the right place for each card.

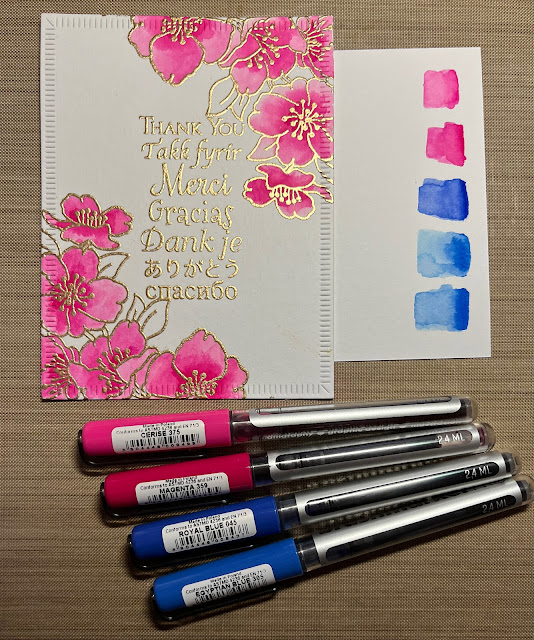
For each card I tried different mediums and substrates. In the first card, I used Karin Markers and a waterbrush. I used the same markers on white Tim Holtz watercolor cardstock.


The Karin Marker colors look very different on white cardstock. I like it both of them though.


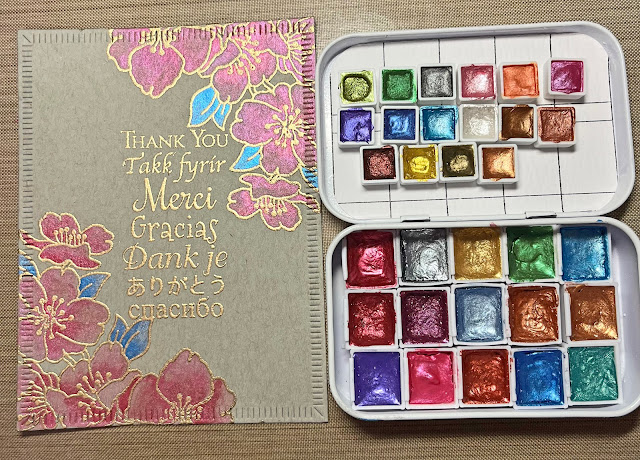
For the third card I used the Twinkle Tones watercolor paint that I and my friend Pam made last year. 


To see other posts about Twinkle Tones click here and here.


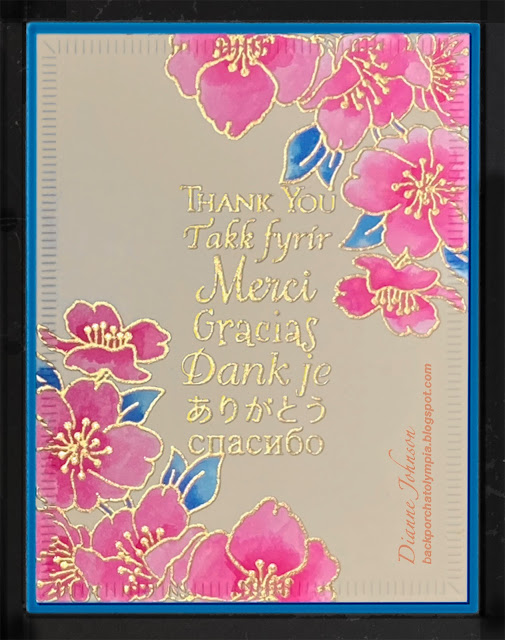
For the last card I used Kuretake Clean Color brush markers. I put the ink onto a block and picked it up with a waterbrush.


Here's the absolutely stunning artwork from my friend

Cloisonné Artwork by Shinya Okamoto


Magenta Products Used:

Other Products Used:

Card #1:
Karin Markers: Cerise375, Magenta359
Royal Blue045, Egyptian Blue305
Strathmore Toned Blue Mixed Media cardstock
So Silk Fair blue cardstock
Neenah Solar White 110# cardstock
Judikins Detail Silver embossing powder
The Greetery GD-M-016 Crimped Frame Die

Card #2
Karin Markers: Cerise375, Magenta359
Royal Blue045, Egyptian Blue305
Tim Holtz Watercolor cardstock
So Silk Fair blue cardstock
Neenah Solar White 110# cardstock
Ranger Gold embossing powder
The Greetery GD-M-016 Crimped Frame Die

Card #3
Twinkletones Shimmer Watercolor
Strathmore Toned Gray Mixed Media cardstock
So Silk Fair blue cardstock
Neenah Solar White 110# cardstock
Ranger Gold embossing powder
The Greetery GD-M-016 Crimped Frame Die

Card #4
Zig Kuretake Clean Color Real Brush Markers:
Persian Blue032, Pink025
So Silk Glamour Green cardstock
Neenah Solar White 110# cardstock
Ranger Gold embossing powder
The Greetery GD-M-016 Crimped Frame Die


Friday, January 7, 2022

Super Saturday at Magenta: Distress Blending

Hi everyone! I have this post over at Magenta and you can see it here.

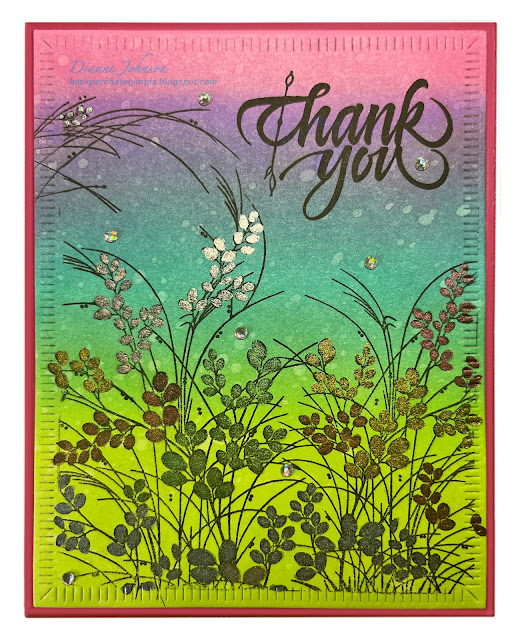
 It's the time of year for Thank You cards, and one of my favorite kind to do. 

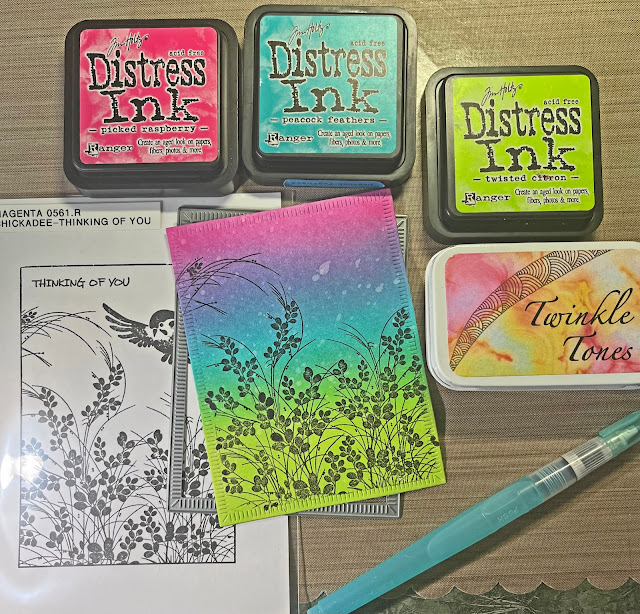
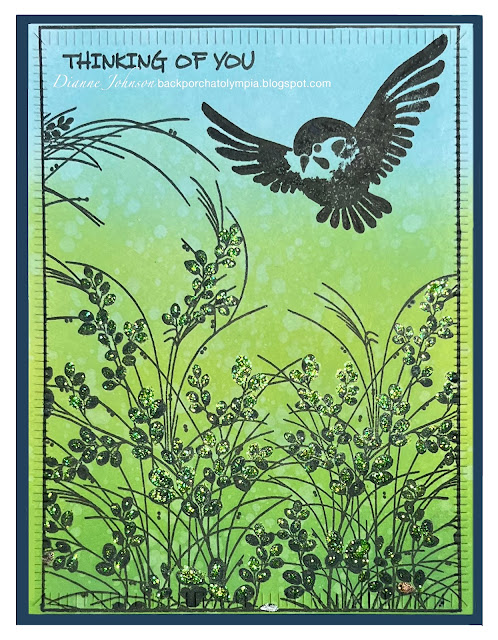
For this one I first blended Distress inks on a panel of Neenah Solar White 80# cardstock. I used an older Magenta stamp called Chickadee - Thinking of You. I have a card using the full stamp at the bottom of this post, and it's the first one I made for this post. But since I really wanted to do a Thank You card, I inked only the bottom of the stamp and added a Thank You sentiment from Sally Penley's beautiful calligraphy stamps. Both were stamped with Versafine Onyx Black ink.


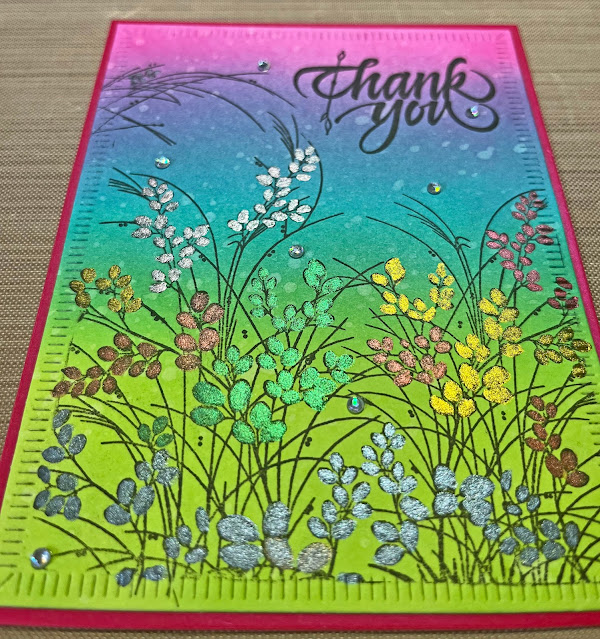
I painted the leaves using the Twinkle Tones shimmering watercolors that my friend Pam and I made. For more information on that, check out my post here. Any shimmery or glittery watercolors would do for this. Since I was painting on regular 80# cardstock, I didn't use a lot of water, and that brings out the beauty of these shimmery paints.


Here's an angled photo that shows how pretty the shimmery watercolors are.

Before I made the Thank You card, I made a Thinking of You card with the Chickadee. I love this stamp because it makes a card without adding anything else. For the Chickadee card I added Stickles on the leaves for some sparkle. The background is blended Distress ink using Tumbled Glass, Twisted Citron and Mowed Lawn.


Magenta Products used:

Other Products used:

Distress inks: Picked Raspberry, Peacock Feathers,
Twisted Citron, Tumbled Glass, Mowed Lawn
Twinkle Tones Shimmer Watercolors
Firefly Stickles
Versafine Onyx Black ink
The Greetery GD-M-016 Crimped Frame Die
Neenah Solar White cardstock 80# & 110#
So Silk Beauty Pink cardstock
PTI Enchanted Evening cardstock
Honey Bee Prism Gems


Friday, December 31, 2021

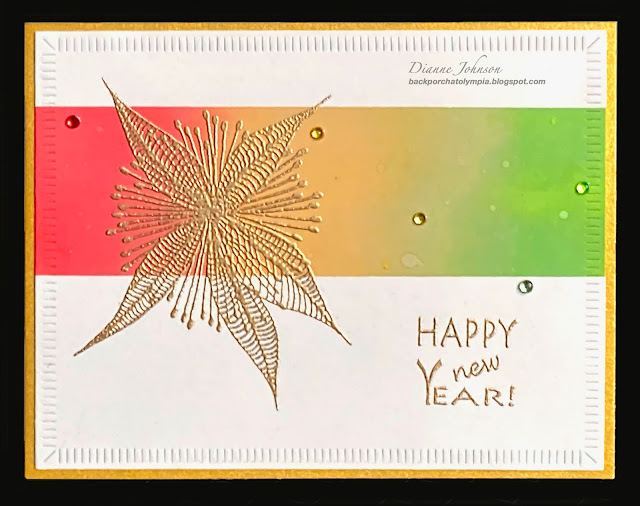
Happy New Year!

 Happy New Year to everyone! It's been another very hard year for many. We are still hanging in there and hope you are all well. Here's wishing a lovely and peaceful year in 2022, and an end to the pandemic.


For this card, the background was blended with Distress Oxide ink in Candy Apple, Mustard Seed and Twisted Citron in a 1.5" strip directly onto the cardstock. The image is a Magenta stamp of my design. I stamped it and the sentiment using Versamark ink and embossed with gold.

The panel was die cut with The Greetery Crimped Frame die and mounted on a mat of gold cardstock.

Magenta Products used:

44.017.L Zen Flower Burst

07.1016.E Happy New Year

Other Products used:
Distress Oxide ink: Candy Apple,
Mustard Seed, Twisted Citron
Versamark Ink
Ranger Gold Embossing Powder
The Greetery GD-M-016 Crimped Frame Die
Neenah Solar White cardstock 80# & 110#
Curious Metallics Super Gold cardstock
Honey Bee Gem Stickers


Friday, December 3, 2021

Super Saturday at Magenta: Christmas Tree and Homemade Watercolors

 Hi! I am over at the Magenta blog today with this post; you can see that here.

I have another Christmas card for you today and it's on a dark background again. I like how the white embossing pops on this background, and also the shimmer paints that my friend Pam Nelson and I made.
First I stamped the Magenta Decorated Christmas Tree using Versamark ink and embossed it in white. I also stamped and embossed the sentiment and embossed in white.


Even though I didn't use watercolor paper, the cardstock I used is fairly heavy duty and I knew that if I didn't use a lot of water I could add my new shimmery watercolors to the ornaments without the paper buckling.

My friend Pam Nelson and I made these paints ourselves, using powdered pigments with mica. The recipe we used for the binder is below
We used our supply of FX powders that we had from Dreamweaver Stencils, plus some that were sent to us (thank you Lynell Harlow) and we used some PearlEx powders as well. There are multiple YouTube videos showing how to make your own watercolors. Pam and I mixed and ground the liquid binder and pigment powders together, using palette knives on Tim Holtz glass mats until they were very smooth. You are sort of trying for the consistency and texture of honey. We tested them on watercolor paper and then loaded the finished paints into half pans to dry. It was a really fun project, and Pam and I did it together every step of the way. Since we used Clove essential oil as a preservative, our paints smell like cloves, which we like. There are other kinds of preservatives you can use too.


Pam made the background for the lids of our watercolor tins, using mineral paper and Nuance. The tins previously held mint candies, and they were collected to use for something like this. I Zentangled over the background design and we affixed the paint name that we decided on (from several contributed by a friend: Twinkle Tones. We printed the design on sticker paper.


It's very hard to get the shimmer in the watercolors to shop up in a photo. Do you see the ornament that I missed in this picture? I found it before it was finally finished, lol!

This Magenta Christmas Tree stamp was perfect for these paints. I hope you like it.

Magenta Products Used:

02.328.P Decorated Christmas Tree

07.798.G Merry Christmas and Happy New Year

Other Products Used:
Twinkle Tones homemade watercolors
Versamark ink
Brutus Monroe Alabaster White embossing powder
PTI Dark Indigo cardstock
Curious Metallics Super Gold cardstock
Neenah Solar White 110# cardstock

Friday, November 5, 2021

Super Saturday at Magenta: Christmas Ornaments

I'm over at the Magenta blog today with this post, and you can see that here.

I love this new Christmas stamp from Magenta with the ornaments and my favorite Christmas flower, Poinsettia. I decided to try it on a darker background like I have been seeing on other blogs lately.


It was super hard to photograph this card and have all the colors true to life. The background cardstock is a dark navy blue. You can see the color better in the picture below.

I stamped it in white and colored it with Prismacolor pencils. I decided to emboss just the ornaments in gold and also stamped and embossed the sentiment - one of Sally Penley's beautiful calligraphy stamps - in gold also.


At the end I sprayed it with a sheer glitter spray. It's very sparkly in real life.

Magenta Products used:

Other Products used:
Prismacolor Pencils: PC923 Scarlet Lake,
PC998 Hot Pink, PC994 Process Red,
PC912 Apple Green, PC908 Dark Green,
PC938 White
White Gelly Roll 08
The Greetery Crimped Frame die
Ranger Gold Embossing powder
The Paper Cut Dark Blue cardstock
Curious Metallics Super Gold cardstock
Neenah Solar White 110# cardstock

Friday, October 8, 2021

Super Saturday at Magenta: Zig Watercolor Merry Christmas

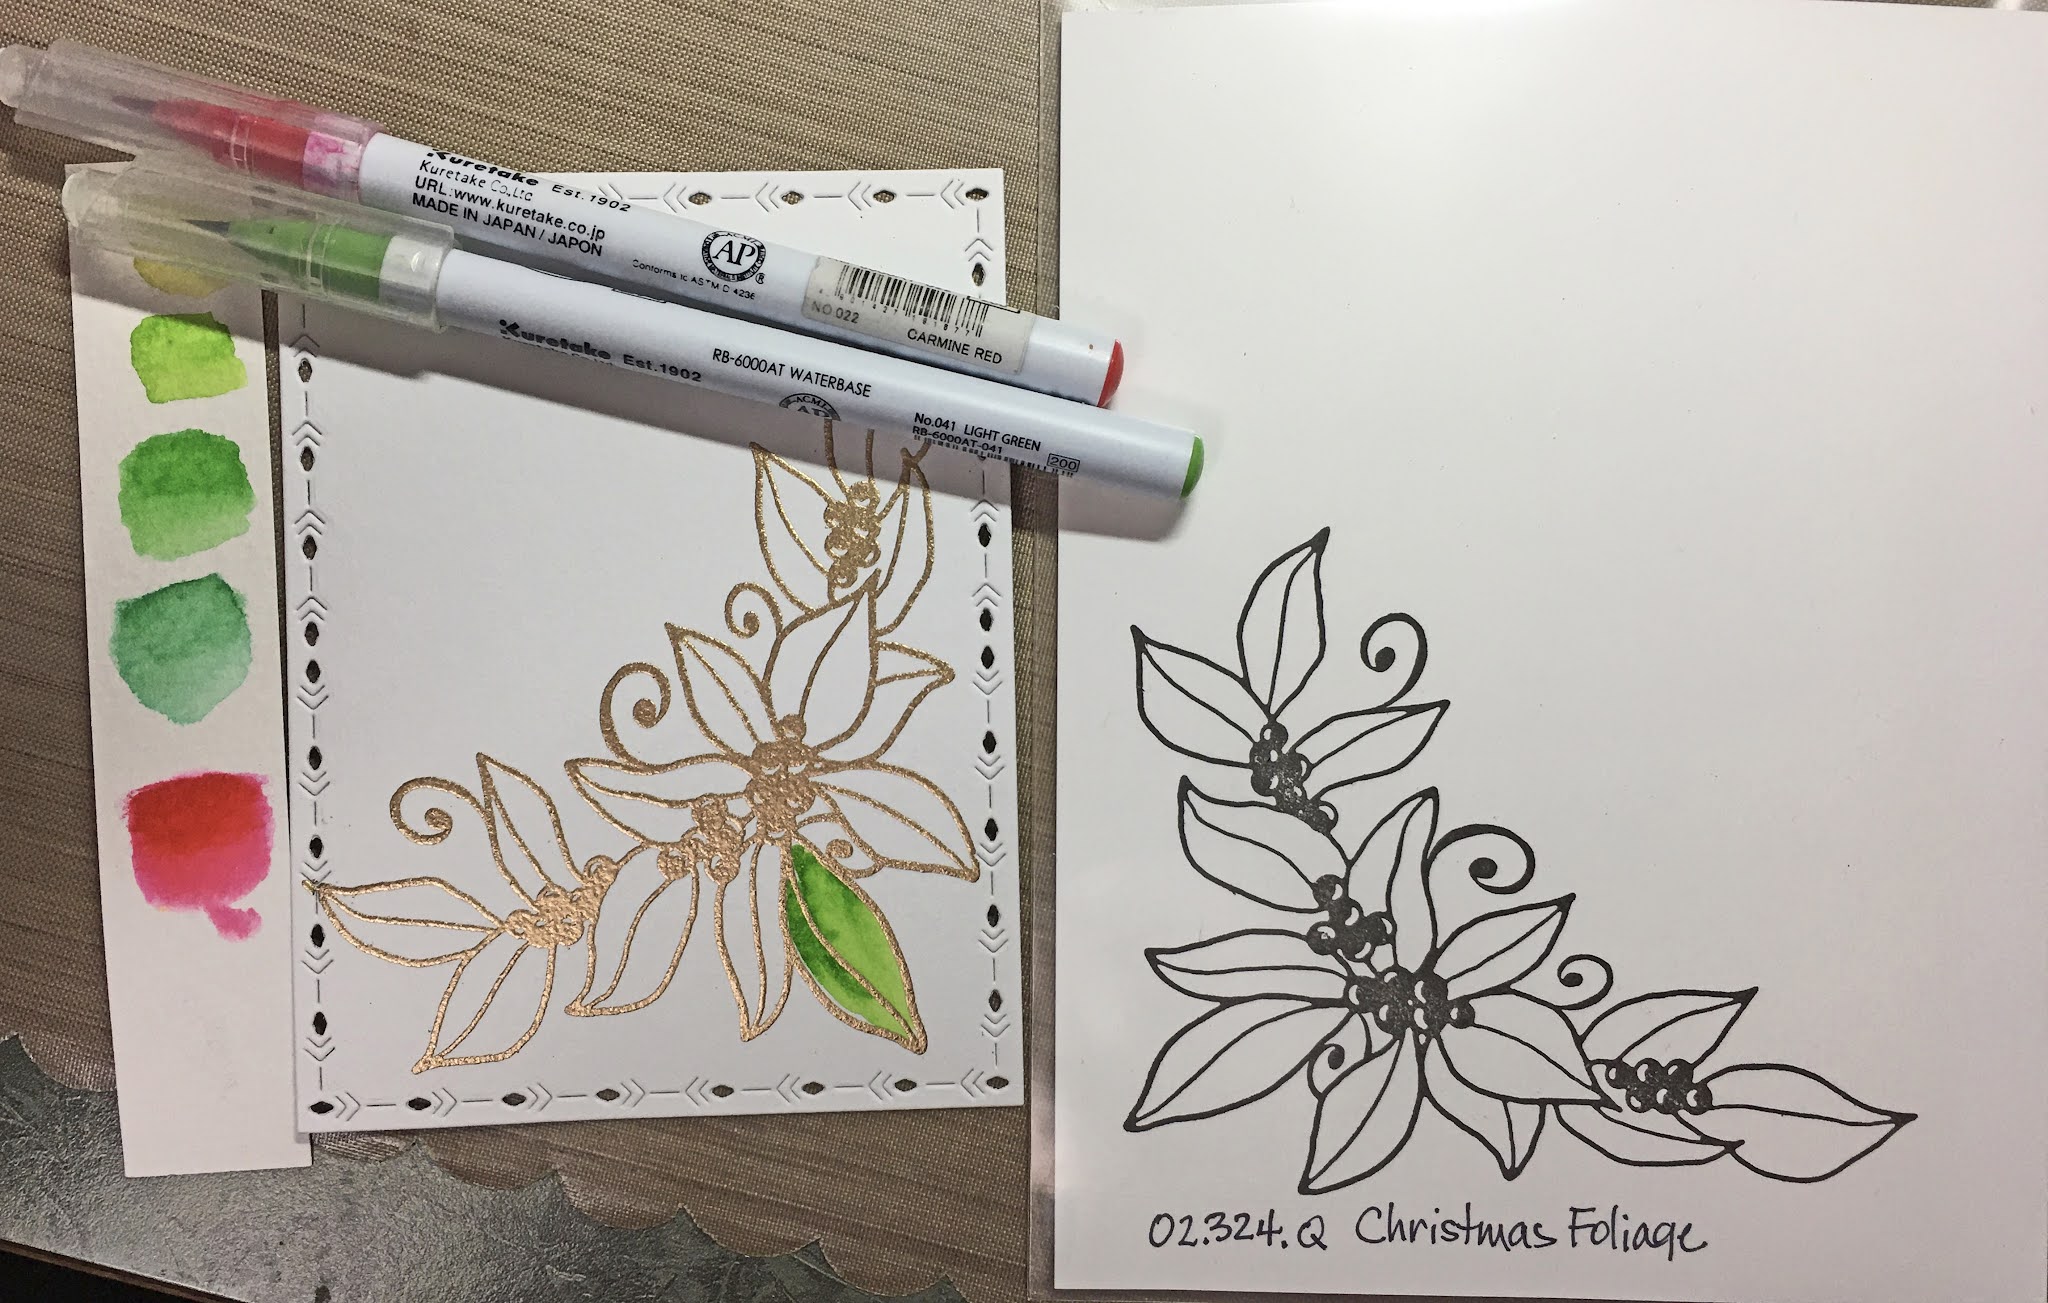
Hi everyone! Still making Christmas cards - they are one of my favorite kinds of cards to make. Today I'm using another new stamp from Magenta called Christmas Foliage, along with an old favorite sentiment. My card is also on the Magenta blog and you can see that post here.


 I stamped this beautiful image onto Tim Holtz watercolor cardstock that I had die cut to size with The Greetery Nordic Frames die. By the way, I love this die for Christmas cards, it just seems festive.

I used Versamark ink to stamp, and embossed the image with gold embossing powder. I chose two colors of Zig Clean Color markers. I dotted the red into the berries, and used a water brush to pull out the green.


This is how I choose the colors I want to use. I ended up using that middle green (041 Light Green), and the red is 022 Carmine Red.

At the end I stamped the Merry Christmas sentiment in Versafine Clair Glamorous and scattered a few Pinkfresh pearls.

This card was super simple and fast, and it would be easy to make multiples.

Magenta Products used:

Other Products used:

Zig Clean Color Markers: 041 Light Green,
022 Carmine Red
Versafine Clair Glamorous
Versamark ink
Ranger gold embossing powder
The Greetery Nordic Frames die
PTI Poppy Red cardstock
Tim Holtz Watercolor cardstock
Neenah Solar White 110# Cardstock
Pinkfresh Studio Gold Pearls