Pages

Friday, March 6, 2020

Super Saturday at Magenta: Watercoloring Embossed Leaves

Hi everyone! I'm on the Magenta blog today, and you can go to that post here.

One of my favorite collections from Magenta is the last Fall and Winter series. Many of the images in that collection can be used all year long. I chose the Leaf Branch Trio as a lovely image for a sympathy card. Sympathy cards are one of the hardest cards for me to make. I prefer to make some up in advance, and I like them to be simple and classic.


For this card I used Strathmore Tone Blue Mixed Media paper. This is a  nice heavy cardstock, and it comes in a variety of colors or tones. I stamped the leaf image in Versamark ink, and embossed it with JudiKins Silver Detail embossing powder.

To add some color, I used a Zig Clean Color Real Brush Marker in 038 Peacock Blue, and added color to the open areas of the leaves. I used a water brush to spread out the color in the leaves. The embossing resisted the color and added a nice contrast.

By the way, to find the right color, I swatched all of the darker blues that I had, and determined that the Peacock Blue would be the best color for my project. Here are the swatches, along with others that I have swatched in the past. The Peacock Blue surprised me, because I thought it would be more green, but holding it up to my paper, it was the clear winner. 030 Blue would have been the second choice. I'm really going to have to take the time to swatch all of these great markers at some point!


I cut the image out using Hero Arts Infinity Circle dies, and cut a piece of dark blue cardstock with the next larger size circle to mat it. I cut a rectangular piece of the Blue Tone paper using the Die-namics MFT-463 Blueprints 13 die set, and stamped and embossed the sentiment in the lower right corner. I mounted the panel it to a dark blue cardstock that was cut to 5.5" x 4.25". The entire panel was then mounted to a base card.

This was a very easy card to make, and could be accomplished with most any color of cardstock you may have, using this versatile stamp.

Magenta Products used:

0793.O Leaf Branch Trio

07.984.E With Sympathy

Other Products used:
Versafine ink
JudiKins Detail Silver embossing powder
Zig Clean Color Real Brush Marker:
038 Peacock Blue
Strathmore Toned Blue Mixed Media paper
PaperTrey Ink Dark Indigo cardstock
Die-namics MFT-463 Blueprints 13 die set
Hero Arts DI199 Infinity Circles die set


Wednesday, March 4, 2020

Quick Cards for a Good Cause: Thank You Cards

This is my second post regarding making cards for a charity sponsored by some of my friends' church. I am going to try to make 10 cards per month to donate to this cause. The cards for February are all pretty much the same except for colors.


As stated before, I am making only card tops, since they will be adhered to card bases with the charity information printed on them. My friend Deb Kuttel collaborated with me on these cards. She did the color blending on many of them, and I did most of the die cutting and putting together. I blended the one above, because this is one of my favorite color combinations (Distress inks: Twisted Citron, Peacock Feathers, and Wilted Violet).


Deb blended the one above, and I like it a lot. I believe the colors are Distress inks: Squeezed Lemonade, Shabby Shutters, and Ripe Persimmon. The background stamp is from Impression Obsession - Cover-a-Card CC303 Spring Garden. I stamped and embossed them using Versamark ink and JudiKins White Diamond embossing powder.


This one was made using the Impression Obsession background Cover-a-Card stamp, Floral Lines CC089 that we used a lot for the January cards. The colors in this one are Distress inks: Blueprint Sketch and Wilted Violet


The colors in this one are Distress inks Mustard Seed, Twisted Citron, and Mowed Lawn.
The "Thank You" sentiment used for these cards are from the Simon Says Stamp die "Thank You" czd74. It comes with a background and the outline sentiment. I cut the backgrounds out of silver glitter paper and colored them with very light Copic markers to coordinate with the colors in the cards. I don't think that coloring on the silver shows up super well in these pictures.


This is one I colored, and I used Distress inks: Spun Sugar, Picked Raspberry and Candied Apple. The detailed part of the sentiment is cut out of Black Ranger Alcohol Ink cardstock. This cardstock is a matte black that is so dark, and really looks good in real life. I got the tip to use this for sentiments from Jennifer McGuire.

All of the top panels on these cards were cut to size using the Lawn Fawn LF768 Stitched Rectangle Stackable die set. The largest die in this set cuts a panel to 3.75" x 5". This size allows a mat sized 4" x 5.25", and that is a good size to adhere to a base card.

Here are all of the card toppers we made for February. I hope you like them!


Monday, March 2, 2020

Quick Cards for a Good Cause

Hi everyone! I have been busy behind the scenes, catching up with life in general. We traveled to Iceland for Christmas, New Years and our grandson's first birthday, and since we got back, I just seem to be behind in everything. Early in February, I went to a gathering of women from my friend's church. The goal was to put together Valentines for the church to sell to buy blankets for accident victims and homeless people.

The woman who had organized the gathering said that she had wanted to also have some cards that were not Valentines, for people who don't give Valentines. I thought of how I am able to make a large volume of Christmas cards by starting early and making cards each month towards that goal. I decided to try to produce at least 10 cards per month for this cause, and that means that I should be able to contribute at least 120 cards by next February. Since I wanted the 10 per month to start in January, I was already behind.


I have not taken time to properly photograph the cards I'm making for the blog, but I will try to do that sometimes going forward. Here are a few rather poor quality photos, so you can see what we've been doing. My friend Deb Kuttel and I collaborated on all of these cards, and we will be joined by Pam and maybe others as soon as tax season is over.


Part of what makes these quick and easy is that we did not have to mount them on base cards. These are just card tops. The base cards are printed with the charity name, and will be done later.


For the designs of the January cards, we were all over the place. There are a few that we made just alike, but most of them are different. This took more time, and for February, the cards are pretty much the same except for color. The colors on all of these cards are Distress inks blended with brushes.


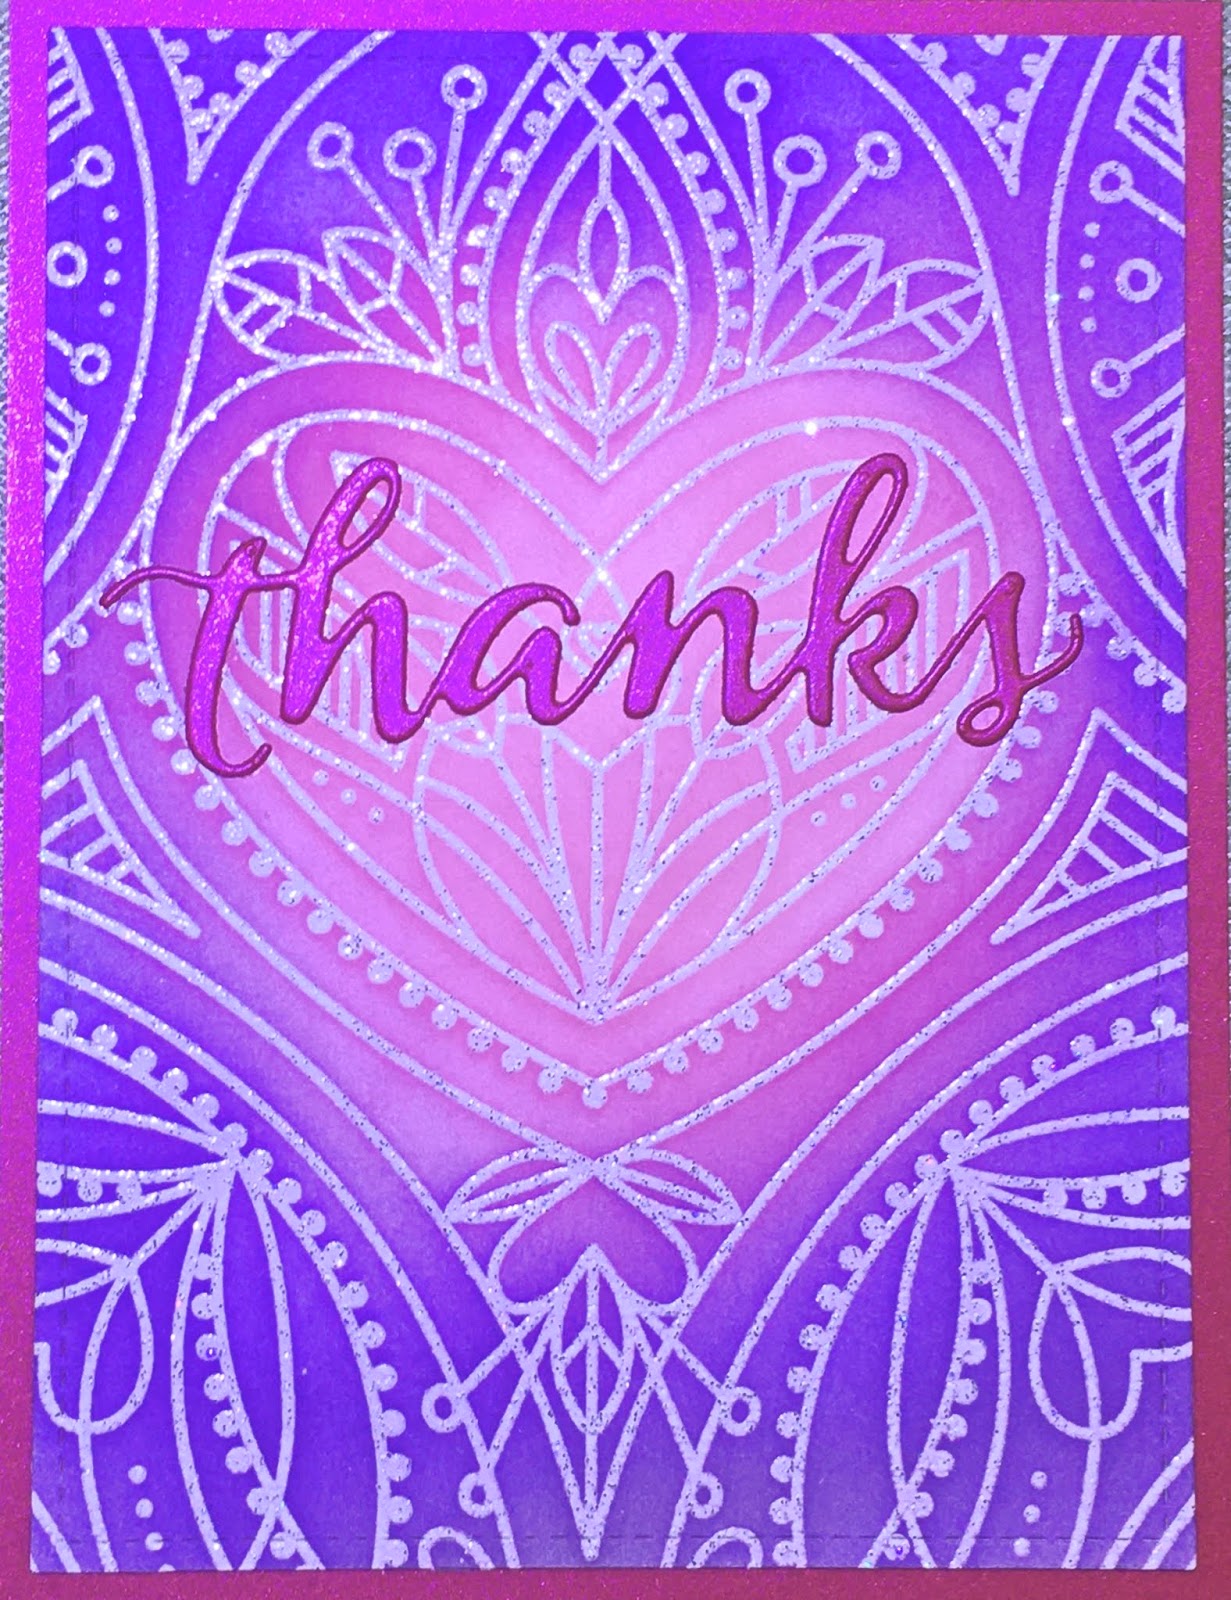
These first cards were done with a Simon Says Stamp center cut card (SSS101805 Center Cut Heart). This is a large background stamp, and there is also a die that coordinates with it 
(Deco Heart sssd11935). We used the Sugar Pea Designs SPD-00113 Thanks die on these as well.


We stamped and embossed all of the Center Cut Heart cards using Versamark ink and either JudiKins White Diamond embossing powder, or Ranger Gold embossing powder.


Sorry for the poor lighting on these. We made a couple of each one of these last 3. For the card above we used the fairly new Hero Arts Thinking of You Stamp & Cut set (DC273); the Simon Says Stamp Scollap Stitches die set (SSSD111612); and the Impression Obsession Cover a Card background stamp CC089 Floral Lines. We stamped and embossed the background using Versamark ink and JudiKins White Diamond embossing powder. We were able to make 2 cards with each stamped panel. I added a heart to the card above from my stash, saved from a previous project.


For the card above, we used the same exact dies and stamp as the one before, which shows how versatile they are. I love dies that I can use over and over and still get a different look.


For the card above we also used the Floral Lines Impression Obsession stamp and JudiKins White Diamond embossing powder. The die on this card is the Simon Says Stamp "Thanks Scallop Border" SSSD111508. I love this versatile die, and use it quite a bit. I added a little heart about the "Thanks" that I had in my stash from a previous project.

These are just some of the cards we made. We only spend a few hours working on these, and I think they will make a great first batch of cards for this very good cause. I did not take the time to write down all of the products we used, but have tried to list most of them under each card above.

I also had some leftover stamped and colored panels that I plan to make into cards just like these for my own stash of cards to use for various occasions.

I'll try to post the February cards in a few days. Thanks for stopping by!


Friday, February 7, 2020

Magenta Super Saturday: All About Love Watercolor Hearts

Hi everyone! I'm over at Magenta again today with a fast, easy and fun card of watercolor hearts using a stencil. You can go to my post on Magenta here.


I first die-cut a panel of Tim Holtz watercolor paper to 5.25" x 4", using the Die-Namics Blueprints 13 die, which leaves a nice stitched edge, which I like.


These are most of the things I used in this project, although I added more Nuance colors along the way.

I sprayed the back of the stencil with Pixie Spray, and stuck it down onto my paper. Taking a large flat brush, I brushed clean water into the first heart opening. I then tapped some Nuance powder into the opening. You really need very little powder. 


I used a small round brush to tap on the powder granules to be sure they all dissolved into the water. I also used this brush to be sure that the color flowed to the edges of the heart shape. It's also nice to leave some white space.


Here is my panel, with the stencil still adhered. I really like how it's turning out, but next time I may get more brave with my color combinations.


After taking off the stencil, I contemplated putting it back on and drawing around the hearts with a black pen; but in the end, I decided I liked it just as it is.

I added the sentiment with Versafine Onyx Black ink, and adhered it to a red card base. I hope you try this; I love this stencil, and it could be made simpler by using just one row of hearts.

This technique was inspired by Helene's post here. I just love how her project turned out. I decided to brush my water rather than spray to give me more control, but I think spraying may have added more water, which results in interesting and cool blend patterns

Magenta Products used:

TM210  15 Hearts

07.1039.D It's all about LOVE

Nuance
Nuance Colors used:
MNU001 Turquoise
MNU002 Bright Yellow
MNU004 Jade
MNU005 Hot Pink
MNU006 Orange
MNU007 Raspberry
MNU008 Golden Yellow
MNU010 Scarlet
MNU011 Cerulean Blue
MNU016 Red
MNU017 Rosebud
MNU019 Spring Green

Other Products used:
Tim Holtz Watercolor paper
Die-namics MFT-463 Blueprints 13 die set
Pixie Spray
Versafine Onyx Black ink
Ranger Artist brushes


Friday, January 17, 2020

Magenta Super Saturday: It's all About Love

Hi, I'm over at the Magenta blog today for Super Saturday!
I love this cute Cessna tow plane in the latest Magenta collection. There is also a stencil with 3 different banner shapes to tow behind the plane, and lots of banner sentiments. Just search for "banner" in the Magenta online store.


To make my card, I took a piece of white cardstock and taped the MC77 Mandala 2 Small stencil to it. I then blended Distress ink in Broken China and Tumbled Glass over the stencil. To add more interest, I used the TM328 Catch a Falling Star stencil and blended white pigment ink through the stars, and also flicked water onto the panel. 

I added a heavy application of Broken China Distress ink through one of the banners from the TM330 Banners - Set of 3 stencils. 

Once I was sure all of the panel was completely dry, I stamped with the banner sentiment "It's all about love" and the Cessna image using Versamark ink and embossed both images with white embossing powder. I colored the Cessna with a Kuretake Clean Color Real Brush pen in 024 Wine Red. I die cut the panel into a heart, using the Hero Arts Hearts Infinity die set.

I took a base card of Neenah Solar White 110# cardstock, and stamped it with the Clouds stamp using Distress ink in Tumbled Glass. I stamped it a couple of times to get a good image, and stamped it down the page, turning it upside down ad right side up alternately.

I popped the heart panel up onto the base card using a die cut heart shaped piece of black fun foam, and scattered some jewels across the whole card.

Magenta Products used:

0796.E Cessna Tow Plane

07.1046.D It's all about love

TM330 Banners - Set of 3

MC77 Mandala 2 Small

TM328 Catch a Falling Star

0703.Q Clouds

Other Products used:
Hero Arts Hearts Infinity die set
Distress ink: Broken China; Tumbled Glass
Hero Arts Unicorn White Pigment ink
Versamark ink
JudiKins Opaque White embossing powder
Kuretake Clean Color Real Brush Marker: 024 Wine Red
Black craft foam
Neenah Solar White 110# cardstock
various gems

Tuesday, December 31, 2019

Happy New Year!


A very Happy and Healthy New Year to you all! I have a card for you, but first I wanted to tell you why I feel that I have so much to be thankful for in the past year.

Our beautiful, healthy, sweet and happy grandson Asa was born, and will be a year old on the 5th of January. We  adore him so much, and he is a bright light in our lives. His parents are raising him in Iceland, and that is such a beautiful place to grow up.


I am also grateful that our son Austin is doing well. He was hit by a car, while riding his bicycle on the evening of last September 6th. I am grateful that he is alive and is healing so well. We have every expectation that he will get back to 100%. He is so strong, and he is working hard to be completely recovered. That story could have had such a different ending. Please everyone look out for the bicycle riders and drive very carefully around them.


Everyone else in the family is doing well also, and I'm grateful and happy about that. I hope you all had a wonderful year last year, and will have an even better one this year. Hold your loved ones close, kiss them, cherish them, and then let them go where they will. Their happiness will be your happiness too.

Here's my New Year's card, I hope you like it! I love these sweet Magenta birds with shoes, designed by Nathalie.
Happy New Year!


Check out this post at Magenta, where members of the Design Team wish you a Happy New Year.


Magenta Products used:

03.124.J Love Birds

07.1016.E Happy new Year!

MC84 Mandala 5 Small

Other Products used:
Broken China Distress ink
Prismacolor Pencils: PC905 Aquamarine,
PC924 Crimson Red, PC938 White
Versafine Onyx Black ink
So Silk Black Cardstock
Neenah Solar White Cardstock 80# & 110#
Lawn Fawn LF768 die
Imagine Crafts Sparkle Shimmer Spritz


Tuesday, December 24, 2019

Merry Christmas and Happy Holidays - Non-traditional colors this year!

Merry Christmas and Happy Holidays to you and yours!


Please check out this Christmas greeting from Magenta and the Design team to you!
All the best!
From Dianne Johnson

Magenta Products used:

02.321.P Noel Birds

Other Products used:
Picked Raspberry Distress ink
Prismacolor Pencils: PC930 Magenta;
PC909 Grass Green, PC949 Metallic Silver;
PC905 Aquamarine; PC938 White
Versamark ink
JudiKins White Detail embosing powder

Friday, December 20, 2019

Magenta Super Saturday: Berry Chickadee - Embossing and Prismacolor Coloring

Hi I'm over at the Magenta Blog today. I'm a huge fan of Nathalie's designs for Magenta, and I love all the bird stamps she has made for this latest collection. The Berry Chickadee is no exception, and it doesn't just have to be used for Christmas. Imagine the berries colored in blue.


I stamped the Berry Chickadee in green, and then colored the bird and the berries with Prismacolor pencils. I cut the image out with an oval die, and then inked the edges with Versafine ink. I dipped the inked oval into gold embossing powder, and embossed. The shine is subtle in the picture, but very pretty in real life. 

I stamped the sentiment with the same green ink (Distress Pine Needles), and then stamped the Bursts stamp twice, using Versamark ink and embossed in gold. I adhered the oval Berry Chickadee  panel to the larger white panel, and added some gold gems in the centers of the Bursts. To finish the card, I matted the panel with Red Palmero Pearl cardstock and mounted it to a base card.


I liked it so much that I thought I would make a simpler version as a tag. The entire tag is rimmed with gold embossing powder, and I chose a different sentiment and added a red ribbon.

I hoped you enjoyed! I have some more tag posts to come, stay tuned!

Magenta Products used:

02.123.K Berry Chickadee

0770.P Bursts

07.1018.H Let Your Heart be Light

07.1022.I Wishing you a Merry Christmas


Other Products used:

Prismacolor Pencils: PC901 Indigo Blue,
PC924 Crimson Red, PC905 Aquamarine,
PC938 White
Versamark ink
Distress ink: Pine Needles
Ranger Gold embossing powder
Hero Arts Infinity Nesting Ovals DI 337
Sizzix Super Scallop Tag die (discontinued)
Red Malmero Pearl Cardstock
Neenah Solar White Cardstock 80# & 110#


Friday, December 13, 2019

Mini Masterpiece Gnome Tags

I don't have a card for you today, but I have some adorable gnomes that I'm going to use as tags. These would also make great cards, and there are lots of samples online using them.

Simon Says Stamp Large Gnome die
sssd112037

I made them with this adorable new die that I got from Simon Says Stamp. It's the cutest gnome, and the set has 2 dies: an outline and a detailed die. This is what he looks like, and there is a little one too, for those of you who have to have both (which I did); and there is a stencil as well.


I went looking for patterned paper to cut out this cutie, and then I realized that I have patterned paper that I made myself. The Mini Masterpiece master sheets! For those of you who haven't seen my previous posts about Mini Masterpieces, which is a creative technique from Sally Penley, you can see my previous posts here, here , here, here and here and there are more posts using them. The possibilities are endless with this technique of creating a master sheet using acrylic paints and markers. To learn more about Sally, and possibly take her class on this technique, go here to her website. You can contact her via her email about available classes.


Here are some of the first ones I made, and I just love them! I could decorate them further, and put pearls or gems on them, but I just really like them just as they are.


This is the first batch. I cut the detailed die from both white and Mini Masterpiece cardstock, and also cut white outlines to assemble the detailed pieces onto. For most of the noses, I used a nose cut from white cardstock, and colored them with an E11 Copic, with a little touch of white gel pen at the top. The exception is the one in the middle at the bottom. He has a blue nose, and it came from the Mini Masterpiece detail cut. I couldn't resist.

The more I looked at them, the more I wanted to use the beards that came from the Mini Masterpiece cut too. You know how some guys with beards decorate them for the holidays? I thought these gnomes could do the same. But I wanted the hat and robe to have less color, so the beards would stand out a little.


Here are some of the gnomes with the wildly colored beards! I love these too!

I used hats and robes from the white cardstock cut of the detailed die, and I colored them with Distress ink and blending brushes. I chose Distress inks that would most closely match the acrylic colors on the Mini Masterpieces. In blending the colors, I made them darker at the edges away from their beards, and faded the blending to white. I also thought I might add more decoration to these gnomes, like stamping or gems on their hats, but I really just like them as they are.


I made a dozen of each: the fancy beards and the white beards, but I have sent some away already. These are also super cute using Christmas patterned paper, and/or velvet paper (Pam Nelson's idea).

I hope you enjoy these, they were so much fun to make!


Products used:

Simon Says Stamp Large Gnome die sssd112037
Mini Masterpiece sheets made using acrylic paints,
Sharpie markers, foil & Stickles
Copic marker E11
White gel pen
Distress inks: Mowed Lawn, Festive Berries,
Salty Ocean, Peacock Feathers
Neenah Solar White 80# cardstock
Connect glue