Pages

Friday, July 23, 2021

Magenta Super Saturday: Happy Birthday Pam!

 It just happened that a good friend of mine and fellow Magenta DT member, Pam Nelson's birthday is today. Happy Birthday Pam! This is my card for her and you can also see it on the Magenta blog here.


I stamped the Magenta Flower stamp on watercolor paper three times, and stamped the Fall Ash Leaves twice, using Versamark ink. All were embossed with gold embossing powder. I then used Distress re-inkers to watercolor the flowers and leaves.


I fussy cut everything out, which really didn't take that long, since the shapes are pretty simple. I arranged all of the pieces onto my panel, which I had die cut with the Greetery Crimped Frame die. Once I had the pieces arranged the way I wanted, I covered them with Press 'n Seal to hold them all together (Thanks to Jennifer McGuire for that tip).


I turned it all over and applied glue, and then stuck it down to my panel.

The sentiment was stamped at the top of the panel and embossed with gold embossing powder. The panel was then matted with gold cardstock and mounted onto a base card.

Magenta Products Used:

40.183.K Flower

0799.L Fall Ash Leaves

07.305.G Happy Birthday

Other Products Used:
Distress Re-inkers: Mustard Seed,
Mowed Lawn, Twisted Citron,
Spiced Marmalade, Picked Raspberry
Versamark Ink
Ranger Gold Embossing Powder
The Greetery Crimped Frame Die
Tim Holtz Watercolor cardstock
Curious Metallics Super Gold cardstock
Neenah Solar White 80# & 110# cardstock


Friday, July 2, 2021

Super Saturday at Magenta: Distress Oxide Gelli Plate Background With Prismacolors

 Hi! I'm over at the Magenta blog today and you can see that post here.

I really enjoy making Gelli plate backgrounds using Distress Oxide ink. I made this one using a brayer to apply Wilted Violet, Peacock Feathers, and Blueprint Sketch inks onto the Gelli plate. I picked up the colors with Neenah Solar White cardstock.


I also flicked some of the Oxide inks over the panel for additional texture.

I die cut the panel using The Greetery Crimped Frame die, and then stamped it with the beautiful Magenta Blossom Crescent stamp in Wilted Violet.


I pulled out some purple Prismacolor pencils (see below for which colors I used) and colored the flower petals. I used my favorite greens for the leaves and branches. I loved how the Prismacolors were not completely opaque, but let some of the spots on the background show through.


When I stamped the flower image, I used a stamp platform and left the stamp in. After coloring the image, I put the panel back in the platform and stamped again using Versamark ink. I embossed it with silver to bring out the detail in the flowers.

In the photograph at the top of the page, the embossing looks a bit white. The silver is hard to capture. Maybe it shows up here a bit better?


At the end, I stamped the sentiment with Versafine Clair Blue Belle ink., and matted the panel with PTI Enchanted Evening ink.

Magenta Products Used:
Other Products Used:
Prismacolor Pencils: PC1026 Greyed Lavender,
PC956 Lilac, PC1008 Parma Violet,
Scholar 331 Purple,
PC1004 Yellow Chartreuse, PC1005 Limepeel,
PC912 Apple Green, PC908 Dark Green
Distress Oxide: Wilted Violet,
Peacock Feathers, Blueprint Sketch
Gelli Plate
The Greetery Crimped Frame Die
Versafine Clair Blue Belle ink
Versamark ink
JudiKins Detail Silver embossing powder
PTI Enchanted Evening cardstock
Neenah Solar White 80# & 110# cardstock

Friday, June 11, 2021

Super Saturday at Magenta: Prismacolor Thinking of You

 Hi everyone! I'm over at the Magenta blog today and you can visit the Magenta blog here.

Sorry it's been so long. It seems like it's been so busy around here! We are doing Spring cleaning and painting the Back Porch, and all sorts of things like that, you know? It seems like after re-doing my craft room and work space, we all just got the fever to clean things out. It almost seems like we are emerging from our cocoons. We are so hoping that soon things will seem a lot more normal around here.


I have a dear friend who died last August, and his husband's first birthday since his death is coming up this month. I thought a nice Thinking of you card would be more appropriate than commanding him to have a Happy Birthday, so this is the result.


I stamped the Magenta Mallow Flowers stamp onto a panel of Strathmore Tone Blue cardstock in white pigment ink, and started coloring using my favorite colors of Prismacolor pencils. This takes some time to do, but I enjoy it and find it relaxing, which I can really use these days!


The cardstock looks kind of gray in this photo, but the Blue Tone cardstock is a very pretty blue.

After coloring, I smudged a bit of the blue around the flower for some texture. I stamped the lovely Sally Penley calligraphy stamp Thinking of you at the bottom using Versafine Clair Paradise ink, and added a few gems.

I tried out a Caran d'Ache blender pencil this time and I think I like it. I need to use it more to be sure.

I thought about my friend who died the whole time I was making this card and I poured some of my love and grief into it. I do hope his husband will like it.

Magenta Products used:

Other Products used:
Hero Arts Unicorn White ink
Caran d'Ache blender pencil
Prismacolor Pencils: PC938 White,
PC992 Light Aqua, PC905 Aquamarine,
PC105 Cobalt Turquoise, PC901 Indigo Blue,
PC1004 Yellow Chartreuse, PC1005 Limepeel,
PC912 Apple Green, PC911 Olive Green
Strathmore Toned Blue Mixed Media Cardstock
Versafine Clair Paradise ink
So Silk Glamour Green cardstock

Tuesday, May 18, 2021

Craft Room Makeover Part 2

 If you have been following my blog, you may have seen that I started a craft room makeover. I actually moved my work space into my office, and my craft room will now be used for storage. I'm also trying to do this on a budget. You can see part 1 of the makeover here. 

This has been a really long and difficult project, with a huge amount of hard work. Each part of the process seemed to generate more work as I would see more that had to be done. At first I was just going to change my office work space and make it into my craft work space, but that showed me that I absolutely had to clean out my craft room and convert it to easily accessible craft storage. It's just hard to imagine how much stuff I had accumulated. My only excuse is that I worked 7 years at a fine art rubber stamp store, and I also taught some classes.

Here is part of the South wall of my former craft room now


As a reminder, this was the same space before:


As another reminder from my other post, below is my newly created craft workspace that is in my shared office at the front of the house.


I like it all so much better now! The old large desk area was not optimal for storage, and so everything was just out in the open and besides being messy and disorganized, it did not inspire me to be creative. The difference is now I have storage for all of my tools and supplies, and I have gotten rid of things I don't need and won't use.


I had to clean everything off the desk, and also off of the shelf above the desk. The shelf was taken down and shortened by quite a lot.


Some of my household members helped by closely inspecting each step of the work. Above is Alaska, cat princess. After all of the desk pieces were removed, the wall was repaired and  two drawer sets that I had previously purchased were assembled and put into the corner. 

I did all of the sorting, difficult decisions, and moving craft supplies around; but my son and husband did all the hard physical labor,  taking the old desk out and assembling and setting up the new pieces. Thank goodness for their help. 


See the suitcase that says "Laugh Out Loud" sitting on the larger set of drawers? That contains all of my Hasty Lace stuff, and I'm never giving up any of it. I just have never had a good place to put this case until now. It fits perfectly right there. A piece of shelf will go over it.

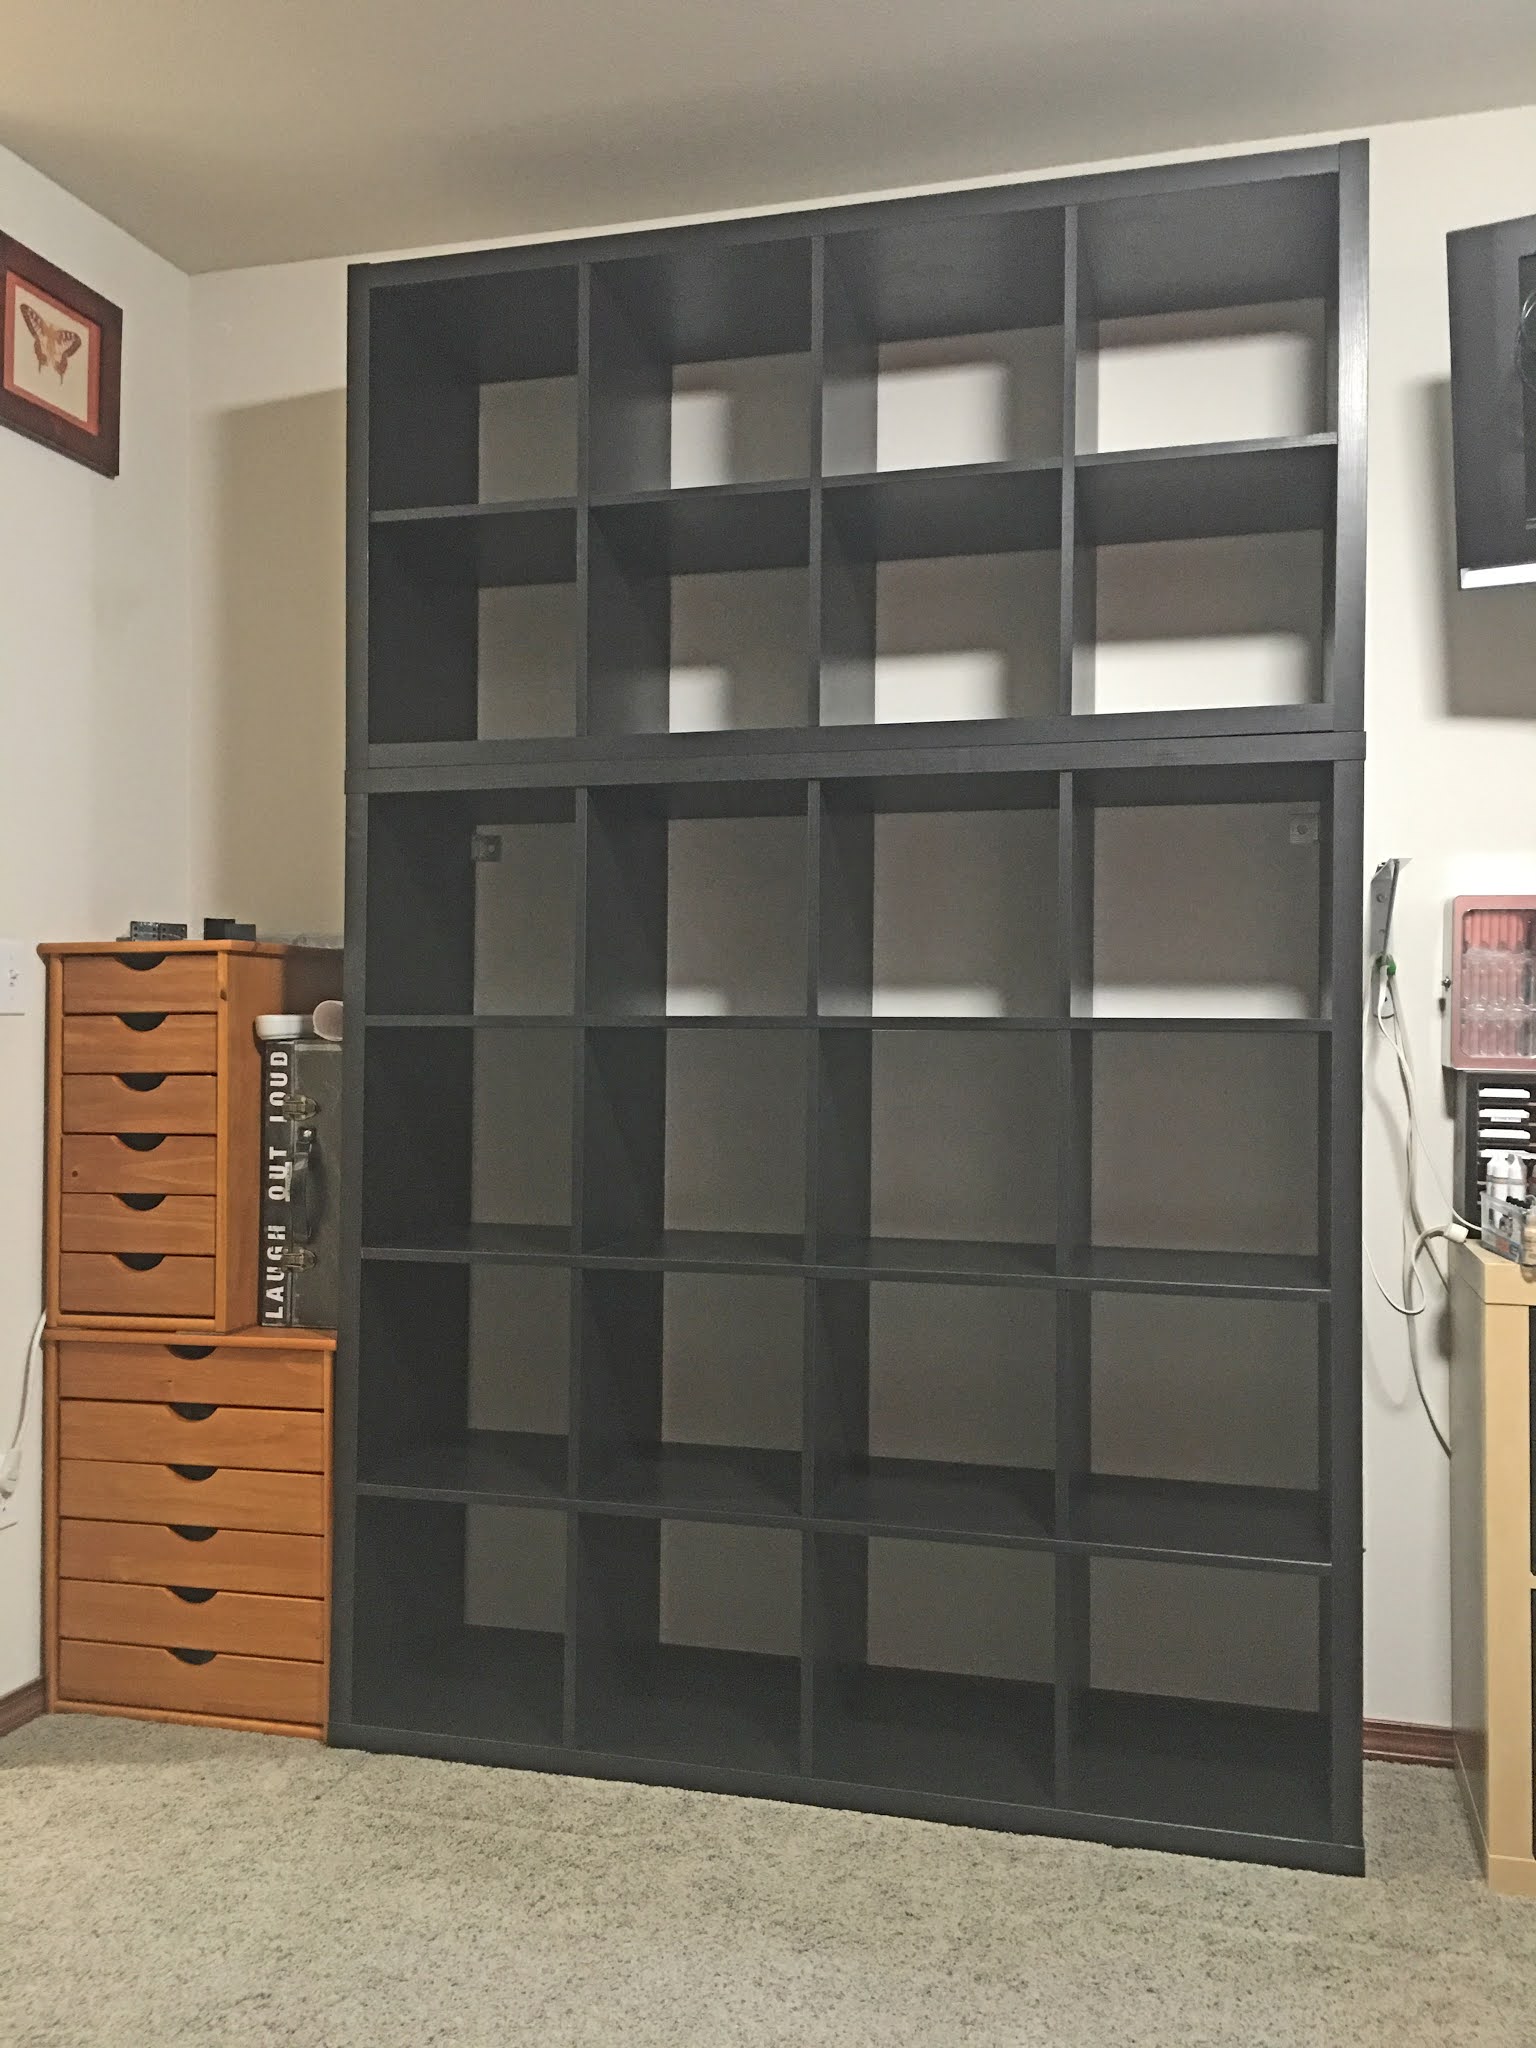
The Ikea Kallax pieces were finally in stock at Ikea, and they were brought in and assembled. 


The lower cubes seemed to meet with approval of the inspectors. I chose one Kallax section with 4 cubes x 4 cubes, and one with 2 cubes x 4 cubes. This created a wall of cubes that are 6 high by 4 wide. All of these pieces are well attached to the wall.


Do you see the space between the new Kallax units and an existing piece to the right? It's just over 5" wide.


I found this little rolly cart (on Amazon) that is 5.1" wide and it fits ALL of my sprays. I would probably not normally get a cart this tall and narrow because it's a bit tippy, but it fits right into that space and is perfect for holding the sprays. I only need to pull it out a little to reach sprays in the back.

The shelf that was once over the desk in the craft room was cut up and used in a couple of places


One piece still holds a small stereo and a DVD player for the TV


Some of the shelf pieces are being used to expand storage above the drawers

I was so happy to move all of my paper colors to once place where I could put them in rainbow order. One whole row of the Kallax is taken up with paper. I used to have it in a couple of places in the room. 


Before the Kallax pieces were available, I lined the cardstock up in my dining room, putting it in rainbow order with the neutrals at the end. Each type of cardstock is in job ticket holders, and organized in magazine files. I learned this storage method from Jennifer McGuire.  


I made less changes to the North wall of the room, but some of the things that were here went into the boxes in the Kallax, and I re-sorted some other things. Overall it looks much better, at least to me.

Most of my stamps are in the bins on the shelves shown above. I have unmounted almost all of them. I have them sorted by category. The ones I couldn't bear to unmount (especially my Fred Mullett stamps) are on the picture shelves above the couch.


All of the boxes in the Kallax unit are now labeled. I first put a piece of acetate on the cardboard boxes and then put the label onto the acetate. That's so if things change (which they always do), I can change the label for that box without damaging the box.

I chose black and white boxes because there were not any colored boxes that I liked at my Ikea. I didn't want to use all black or all white because it would look like a monolith. My plans are to make artworks for most of the boxes that will correspond to what is in the box, to break up the monotone look of the boxes. That will be done as future projects.

I was asked to say what things I got rid of during this process. I got rid of about half of the scissors that were in the box I showed you in the last post about this project. I also got rid of some stamps and dies; various tools, markers and inks. In some cases, this was due to duplicates, but also things I know I won't use again. Out is the large circular pencil holder that sat on my desk, as well as my kit I used to take to class. One heat gun is also out, as I have too many for just me.

A friend who has inspired me to clean things out has described the process as being like peeling the layers of an onion. This project was really just the first layer. One of the things that helps is to get all "like" things in the same place. 


Doing this made me realize things like that I have 6 powder tools (the tool that you use when you are going to heat emboss and you want to prevent getting embossing powder where you don't want it). I also have 4 of the old fashioned type of stamp alignment tool. (I don't need these as much now that I use the MISTI tool, but I will probably keep one of these for aligning wood stamps and other techniques). I know I have these extras because I once taught classes, but since I don't plan to teach in the future, it's time to get rid of some of my duplicates. I'm not even sure why I have so many stylus tools and brayers. I haven't gotten rid of all of these things yet, but that's definitely going to be part of the second layer of cleaning out.

I did a lot of cleaning out in the closet of the craft room. I'm not showing it now, but I was happy that I cleaned everything off the floor of the closet, and I can get to pretty much everything in there. There are still 3 shelves that I need to clean out, but that will be for layer 2. I will collect some pictures and maybe do one more post to show you if you like.

I'm super happy with how things have turned out for this project so far. I love my workspace now. It's easy to work there and easy to put things away afterward, so it actually stays pretty clean. Here's a final picture that I think is funny.


This is a rack that my husband once made for me to hold washi tape. I outgrew it some time ago and I only had unloved, rather ugly washi tape on it (those also went out) and it just sat on my former desk, unused. It now has a new life in the kitchen as a drying rack for washed zip lock bags. Perfect right?


Friday, May 14, 2021

Magenta Super Saturday: Happy Birthday with Shimmer Watercolor

 Time to make a guy birthday card and I decided to use my shimmer watercolors from Iuile at Etsy. I am posting this on Magenta today, and you can see that post here.


I wish that I could photograph this properly to show how gorgeous the glittery shine is with these watercolors.


I first stamped the Magenta Floral Snowflake image in gold Delicata ink. Because there is some texture on this dark blue cardstock, it didn't stamp completely solid, so I put some of the gold ink onto a block and with a wet brush I spread the ink out to cover the image better.

I then painted in parts of the image using the Christmas Set of Iuile watercolors. Since these watercolors have so much mica in them, they are opaque


I added some dots of gold Sakura Poster Color paint using a stylus

I stamped the Magenta Sally Penley calligraphy Happy Birthday and embossed it with gold embossing powder. I was afraid that if I stamped it with the Delicata on the textured paper it wouldn't show up well enough. I matted the panel with So Silk Fair Blue cardstock and mounted it onto a base card.

Magenta Products used:

Other Products used:
The Greetery Crimped Frame die
Delicata Gold ink from Tsukineko
Iuile Christmas Set watercolor
Versamark ink
Ranger Gold embossing powder
Papercut Deep Blue cardstock
So Silk Fair Blue cardstock
Neenah Solar White 110# cardstock


Tuesday, May 11, 2021

Celebrating Heart Happy Birthday

 I had a birthday card to make and decided to use the Magenta Celebrating Heart stencil to start with.


I die cut my panel to size using the Greetery Crimped Frame die. I then blended Festive Berries Distress ink through the stencil. I applied some small amounts of water with a brush onto the heart to add texture. I have used this stencil before for a card and you can see that post here.

I used the die cut sentiment Happy Birthday Poe Script by Poppy Stamps. I tried using different red cardstock and nothing matched properly. I used black and found it too stark. To get the proper color of cardstock for the sentiment, I decided to ink up a panel with the Festive Berries ink.


I used a brush to blend the ink, and it was just a matter of getting it to the right shade.


I added some water spots and also sprayed it with Sheer Shimmer Spritz from Tsukineko for a little extra shine and sparkle.

When I mounted the sentiment works, I backed the red with the black I had already die cut for a little bit of a shadow.

Magenta Products used:

TM138 Celebrate Hearts Medium

Other Products used:
Festive Berries Distress ink
Poppy Stamps 2437 Happy Birthday Poe Script
The Greetery Crimped Frame die
Tsukineko Sheer Shimmer Spritz
Neenah Solar White 80# & 110# cardstock
Ranger Black Alcohol Ink cardstock


Sunday, May 2, 2021

Leaf Burst Birthday

 I recently needed to make a guy birthday card, and was looking through my stencils to make a background. I pulled out the Altenew Leaf Burst stencil to make this simple but pretty card.


On a white panel I blended Distress inks through the stencil. This color palette is one of my favorite blends.


While I had the inks out, I made 3 of these panels for future cards, and die cut them using the Greetery Crimped Frame die.

Last, I die cut the Simon Says Stamp Happy Birthday Brush Script out of silver holographic cardstock, also from Simon. I affixed the sentiment to the center of the card. It's really bright and pretty in real life.

I matted the panel with So Silk Glamour Green cardstock and mounted it to a white base card.

Products Used:
Altenew Leaf Burst Stencil ALT2192
Simon Says Stamp Happy Birthday Brush Script die sssd112116
The Greetery Crimped Frame die
Distress inks: Twisted Citron, 
Peacock Feathers, Wilted Violet
So Silk Glamour Green cardstock
Neenah Solar White 80# & 110# cardstock


Wednesday, April 28, 2021

Spring Blooms Corner for Multiple Cards

I needed to make a sympathy card recently and I pulled out the Simon Says Stamp Spring Blooms Corner that I had not yet used. I really like these silhouette type of dies, and I'm planning to use it for more cards in the future.


I first cut a panel of 80# white Nina cardstock with The Greetery Crimped Frame die to get the size just right. I then cut the panel with the Spring Blooms Corner. I placed the cut panel over a background that I had previously made using alcohol inks and glossy white cardstock. I had not found anything to use the panel with until this card. It had just the right tones to create a colorful floral mix.

These are some of the things I used. The background showing below was one of the shaving cream backgrounds I made awhile back (you can see a post where I show how to make shaving cream backgrounds here).


I stamped the white panel with a Magenta Sympathy stamp, and mounted both pieces onto a white base card. I made two more, since Sympathy is the hardest kind of card for me to make.


I also had a birthday card to make, and this die can easily make a card for almost any occasion. The card this time is for a friend for whom I always make a black and white card. I actually think it looks classy in black and white.


At the end I added a few black acrylic dots from my stash.

Magenta Products Used:

07.928.I With Sympathy

Other Products Used:
Simon Says Stamp sssd112325 Spring Blooms Corner
Poppy Stamps 2437 Happy Birthday Poe Script
The Greetery Crimped Frame die
Various backgrounds from my stash
Neenah Solar White 80# & 110# cardstock
PTI True Black Cardstock
Versafine Onyx Black ink

Friday, April 23, 2021

Super Saturday at Magenta: Christmas Card with Pan Pastels

Hi all, I'm over at the Magenta Blog today, and you can see that post here.

This is my Christmas Card for April. Yeah, I didn't make any in March, and I'm letting that go. I will still have plenty of cards by the end of summer, which is my goal. Honestly my craft space(s) renovation has been taking up a lot of my time and energy. You can see my Part 1 post here.


 I decided to pull out my Pan Pastels for this card. I have some metallics that I haven't used a whole lot.


This background stamp is new to me, and I can't believe I never saw it when it first came out. It's really a beautiful design by former Magenta designer Valerie. First I die cut a piece of red cardstock, using the Greetery Nordic Frames die. I think this die is great for a Christmas card.

I stamped the Wishing You Peace Love Joy sentiment toward the bottom third of the panel in Versamark ink and embossed it using gold embossing powder. I then masked off the sentiment area with 1" wide Post It tape. 


I stamped the background image on the panel using Versamark Ink and then removed the tape. Using a sponge applicator, I applied gold Pan Pastel over the entire cardstock. Excess pastel was removed with a Swiffer cloth.


This shot shows how shiny the metallic Pan Pastels are. I was contemplating using strips of the gold cardstock above and below the sentiment, but in the end decided not to.

I matted the panel with gold cardstock and then mounted it to a base card.

I love how this card turned out, but there is one issue that I wasn't super happy with. It's usually a good idea to seal pastel to your cardstock because it can rub off. I don't think it rubs off as much if you are using Versamark ink to hold it there, but it can happen, and I don't want that to be an issue since I'm mailing these cards away. I sprayed my panel with a fixative spray, and I think it dulled the gold shine of the pastel a bit. In any case, I didn't think it was quite as amazingly shiny and bright after spraying. I'm planning to get a different brand of fixative (Spectrafix) that is recommended for pastels and try it out. I will let you know how I like it.

If you have been reading my blog you know that I have been working on renovating my craft space(s). My work space has been incorporated with my office (see Part 1 link at the beginning of this post). My former craft room will be used for storage. I haven't been able to obtain a Kallax unit from Ikea yet, but my craft supplies will be stored in containers that will go into Kallax shelving eventually. I have obtained some of those containers to get started.


This is one of the boxes I will use, and there will be black and white ones of these. My plan is to make a panel for the front of each that will reflect what is inside. Since I have my Pan Pastels out, I am going to make a panel for the front of this one. Stay tuned for a future post about it.

Magenta Products Used:

Other Products Used:
The Greetery Nordic Frames die
Versamark ink
Gold Pan Pastel
Ranger Gold Embossing powder
PTI Pure Poppy cardstock
Curious Metallics Super Gold cardstock
Neenah Solar White 110# cardstock