Pages

Thursday, April 30, 2020

Throwback Thursday: Make Your Own Pearly Sprays With Distress Inkers

Some years ago, I did a post about making your own pearly sprays with Distress Inkers, water, and Perfect Pearls powder. This is still a great technique and you can see the post here. I pulled out my sprays recently to make a birthday card for a friend, and it was so fun that I plan to make lots more of this same kind of background.


For this card, I used a stencil from Magenta that came from a set called Zen Trio. 3 great stencils inspired by some Zentangle patterns that I drew up as examples. This one is my favorite.

I sprayed the back with Krylon repositionable adhesive, and stuck it down to a piece of Tim Holtz watercolor cardstock. I masked off the top and bottom and just sprayed lightly with 3 colors of the spray. In real life these colors are shimmery and very pretty. 


For the sentiment, I stamped the Happy Birthday on a piece of black cardstock with Versamark ink and embossed with white embossing powder. I attached it to the card, and added a few gems. I matted my panel and attached it to a base card.

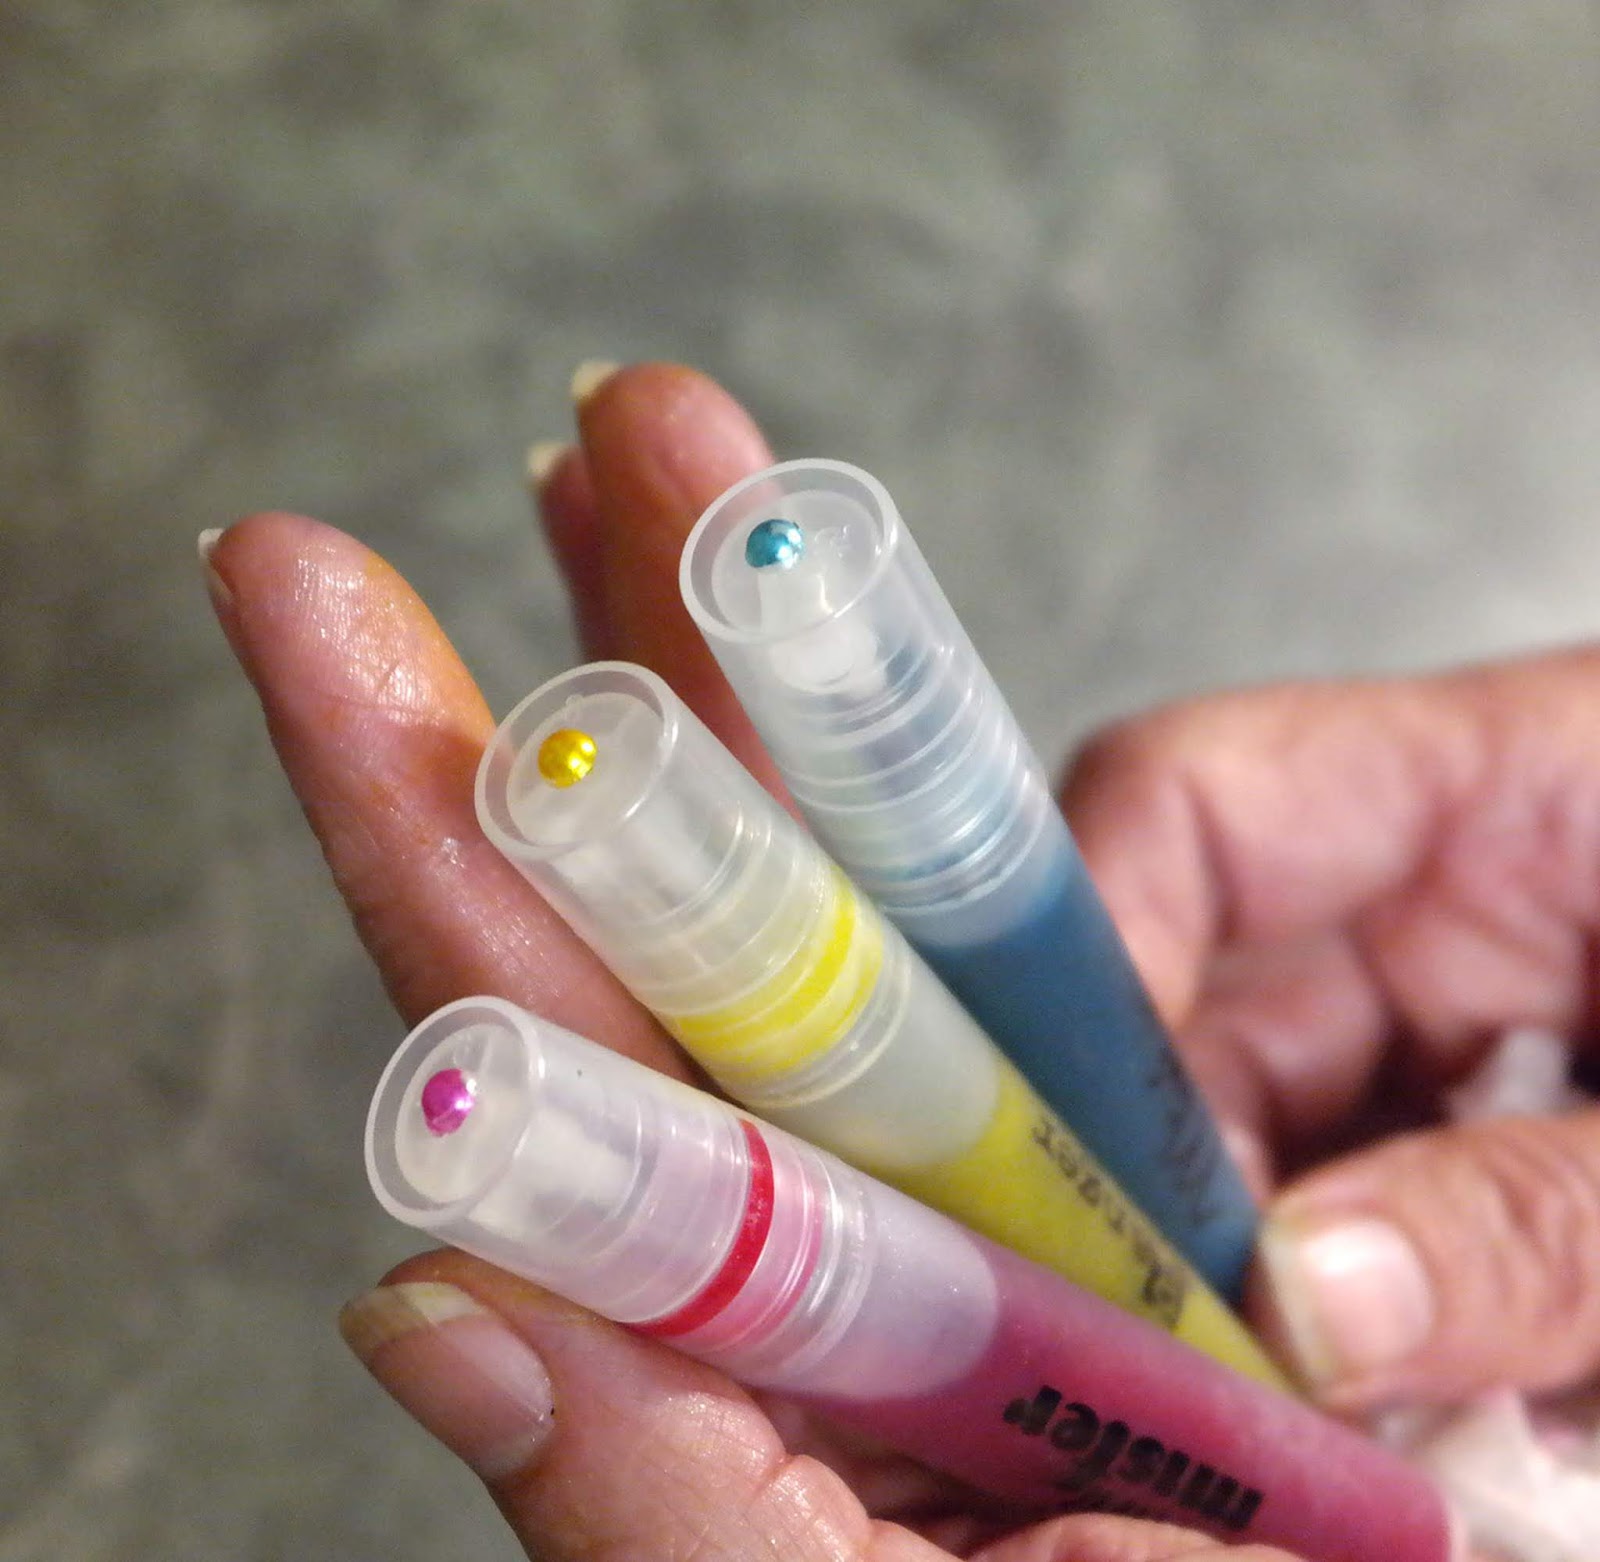
Here, from my old post, are the 3 colors I used to spray with - my 3 favorite Distress colors: Picked Raspberry, Mustard Seed, and Peacock Feathers. Use my link above to pull up my previous blog post and see how I made them.


Also, about the sentiment. This is a favorite of mine. It comes from a Magenta stamp that has Happy Birthday written out in 7 languages, and this stamp was made at my request some time ago (yes Iceland is one of the languages). I still love this stamp and use it often. I purchased an extra one and cut it apart so that I can stamp the sentiments separately, in whichever language I want. Of course, it looks good all together too, but I've shown you lots of those (here's one)


Magenta Products used:

TM54 Zen Trio

07.907.L Multilingual Happy Birthday

Other Products used:
Distress re-inkers: Picked Raspberry;
Mustard Seed; Peacock Feathers
Ranger mini misters
Perfect Pearls powder
Tim Holtz watercolor cardstock
Krylon repositionable spray adhesive
masking tape
Black cardstock
Versamark ink
JudiKins opaque white embossing powder
Lucy's Little Things Rainbow Jewels
So Silk Beauty Pink cardstock

Friday, April 24, 2020

Super Saturday at Magenta: Distress Inks and Prismacolor Pencils

Hi everyone, I'm over at the Magenta Blog today, and you can see that post here.


I love the newApple Blossom Mask that Magenta made, inspired by one of my favorite stamps, Apple Blossom Bouquet.  This template comes in two pieces and can be used as a stencil or a mask. In this case, I taped it together and used it as a stencil.


There are a lot of cool techniques that you can do with stenciling, including using paste, but this time I just blended Distress ink through the stencil. It's the easiest and fastest thing you can do, and it looks amazing.


I kind of think that you could just leave it the way it is, add a sentiment and it's a card. But I decided to deepen the colors using Prismacolor pencils.


Since I already had lots of great color laid down with the Distress inks, it was pretty easy to blend in the colored pencils, and I always enjoy coloring.

I added the sentiment at the end in Versafine Onyx Black ink and matted my panel in So Silk Black Style cardstock.

Hope everyone is staying healthy and safe! I keep seeing an advertisement from a Mexican restaurant in Spanaway Washington. The ad has a photo of 24 mini (street) tacos, salsa and rice and beans that they are offering for take-out (no sit-down restaurants open at this time). It makes me want to go to Spanaway, and I don't even know where that is. So we are going to try and make our own street tacos soon. All the best to you all!

Magenta Products used:
MC102 Apple Blossom Mask

07.305.G Happy Birthday

Other Products used:
Distress ink: Shabby Shutters; Abandoned Coral
Blending brushes
Prismacolor Pencils: PC1036 Orange Neon;
 PC1014 Deco Pink; PC929 Pink; 
PC994 Process Red; PC912 Apple Green;
PC1005 Limepeel; PC1004 Yellow Chartreuse
Versafine Onyx Black Ink
So Silk Black Style cardstock
Neenah Solar White 80# & 110# cardstock


Monday, April 13, 2020

April Cards for Charity: Hello From the Inside

Ha! A little quarantine humor. But seriously, I am finding that I have more time these days to catch up on projects. I seem to work in little spurts of dedication, interspersed with long periods of sleeping and reading escape fiction. How about you? My friend Pam is enjoying doing her Spring gardening in her beautiful yard. As for me, I did go out once today, to the front yard. It was bright, and I came back in. I'm not going to judge myself too harshly right now. I think we need to be good to ourselves.


I am making 10 cards each month to donate to my friends' church. They have a sale every February and sell cards to buy blankets for the homeless and for accident victims. 

My April cards for this charity came together very quickly. the front panels of most of these were something I got from a packet that was bequeathed to me by my dear friend Marj. She had these in her stash and left them to me. I'm sorry I don't know where they came from, it was an open packet of 11 pieces. I thought this was the perfect way to use them. They are embossed and have a circle cut-out and some flower cut-outs. I cut them down a little and went to find some already made backgrounds to adhere them to.


These are mostly glossy cardstock with different mediums added. Most of then have Nuance (powdered color from Magenta) with Perfect Pearls Powder added; some have alcohol inks, and some of them are not glossy, but watercolor cardstock. They are just pieces that I was playing with putting some color down in the past, and I grabbed them out of my stash.


I would say that I was not super happy with some of these backgrounds at the time I made them; but this project is perfect for that, since the background only partially shows through the circle cut-out, the flower cut-outs and around the edges of the card. This is a good reason to save everything, even if you don't love it at first.


I pulled out a background for each panel, and cut out a "hello" from coordinating cardstock. I got this super cute "hello" die free from Poppy Stamps during one of their promotions. It's 1690 Scribble Hello, and is the perfect size for inside the circles.

When I was searching for backgrounds, I pulled out 2 too many, and rather than put them back, I thought I would try to make up 2 additional and similar front panels. I don't have an emboss and cut die that would do this all in one step (do they still make those?), but I got out an embossing folder, a circle die and a little leaf punch.


What do you think? This is one of the cards I made the front panel for. I'm pretty happy with it. Did you notice that the close up above is this same card and a little different than the others?

At the end, I added different sizes of silver/gold glitter dots from Elizabeth Craft. These are nice and flat, so they won't make the card overly bulky, but they still add something.

Okay, here they all are, and I think they will be great "generic" cards for the church to sell. Can you spot the two that I made the front panels for?


The front panels are unknown provenance, but you can
make some yourself with white cardstock (textured or not);
 a 2" circle die; an embossing folder with some blank space
in the design; and a small die or punch to allow more of the
background to show through. The front panels are cut to 3 3/4" x 5".
The background panels are cut to 4" x 5.25" using the Lawn Fawn LF768 die.
The cute hello die from Poppy Stamps is only 1.5" long and less than 1" tall


I hope you enjoyed this project. Take care of yourselves, be kind to yourselves, and please stay healthy everyone!

Magenta Products used:

Other Products used:
 Poppy Stamps die 1690 Scribble Hello
Lawn Fawn LF768 die Small Stitched Rectangle Stackables
Perfect Pearls powder
Glossy cardstock
Tim Holtz watercolor cardstock
Various colored cardstock for die cut sentiment



Friday, April 10, 2020

Two Cards: One Die and Distress Oxides

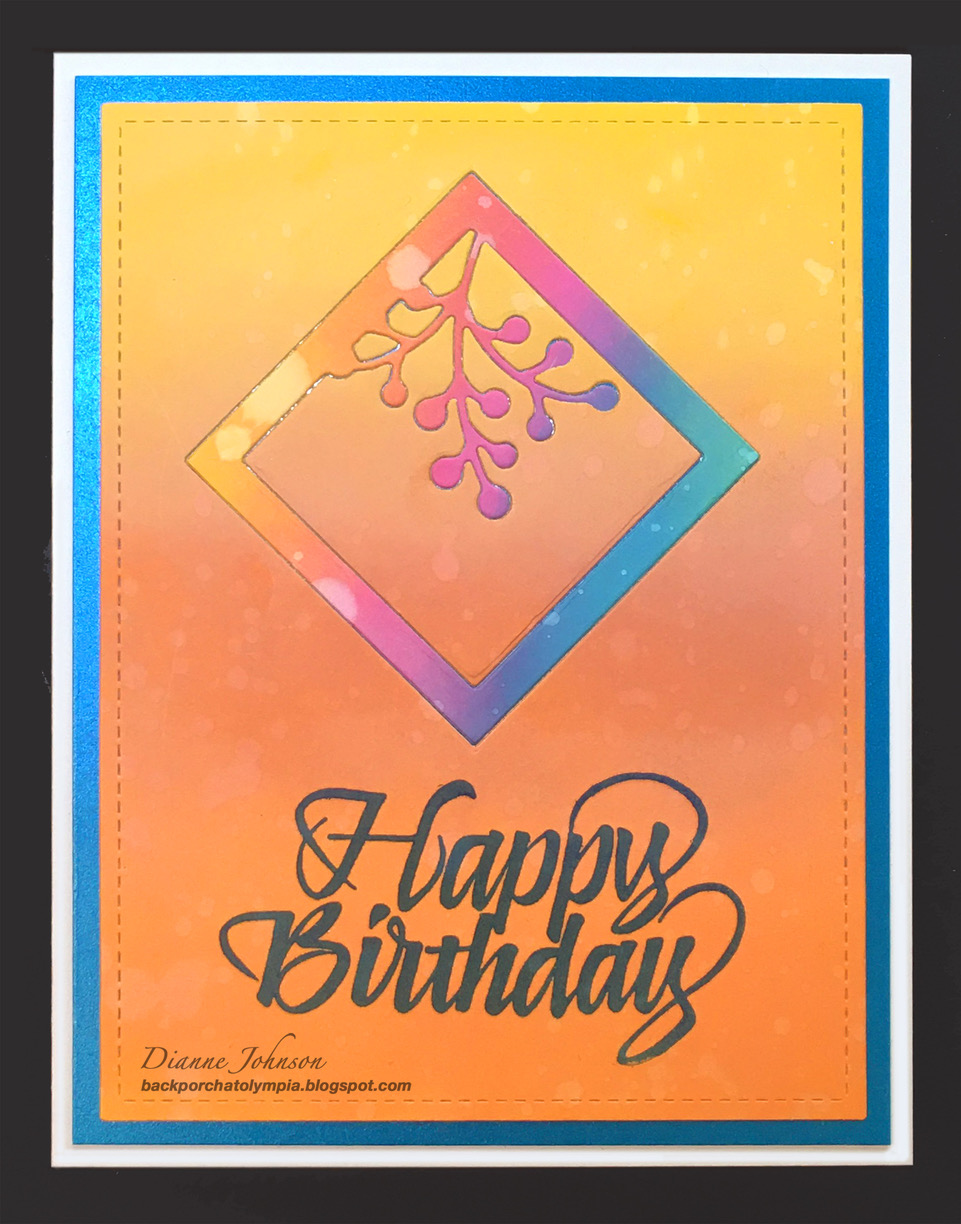
I recently got a great die from Poppy Stamps called Berry Square Frame (2234). I got a couple of other square frames too, that I will use in future cards. I needed some birthday cards, so I got out the Oxide backgrounds out that I recently made.


This background is part of a panel that I made and used in this post that I did for Magenta. It turned out to be the perfect size for this card.

I cut the Berry Square Frame from white cardstock, and also cut it out of the Oxide background panel. I fit the white cut-out into this panel, piecing the Oxide colored pieces back in.

I stamped the Happy Birthday sentiment with a great Magenta stamp designed by Sally Penley as part of her calligraphy series. I love this stamp and use it as much as I can. The ink I used is Versafine Clair Paradise.

I lined both sides of the panel with strips of So Silk Glamor Green cardstock and mounted the entire panel on a 110# white base card.


For the second card, I chose an Oxide background from yellows and oranges. I wanted something more homogenous with a smooth blend so that I could use the frame piece from the previous card. I cut the die out of the background in a diamond shape this time, and I fit the die cut from the first card into the space, piecing the orange blend background in around it.  I also stamped this one with the same Magenta sentiment, and the same ink. It looks so different on this color Oxide background.

I still have the piece I cut out of this panel to use in another card


Here's the pile of oxide backgrounds I chose these from


I made these backgrounds just using a blending tool with Oxide inks, and I splattered them with water when they were dry.


Above are the colors for the first card


And these are the colors for the second card

I hope you liked these, and I hope you will consider buying dies from Poppy Stamps. They are a local Washington company, and have long been a favorite. You can buy from them directly on their site. Their parent company, Memory Box, is also a favorite of mine. You can get Memory Box dies and stamps from Impress Cards and Crafts, also a local Washington company. Impress also has online sales of lots of fabulous things for cardmaking, so please support them.

Don't forget Magenta as well. You can get Sally Penley's entire line of Calligraphy stamps at Magenta here scroll through to see them all.

Stay well, everyone!

Magenta Products used:

07.975.I Happy Birthday

Other Products used:
Poppy Stamps Berry Square Frame 2324
Distress Oxide inks: Mustard Seed,
Peacock Feathers, Twisted Citron, 
Picked Raspberry, Rusty Hinge,
Carved Pumpkin
Versafine Clair ink: Paradise
Neenah Solar White 80# & 110#
So Silk Glamor Green cardstock
Lawn Fawn die LF768 
Small Stitched Rectangle Stackables


Tuesday, April 7, 2020

March Cards for Charity: Distress Oxide Backgrounds

I have finished the 10 cards for March for the charity at my friend's church. They have a sale every February, and sell cards to buy blankets for the homeless and for accident victims. It's my goal to make 10 cards per month for a year to donate to this cause. You can see my other posts like this here and here.

For March I decided to make lots of Distress Oxide blended backgrounds. I started blending with just blending tools and ink pads (those will be in another post). It was taking me a long time to make each, so I decided to switch it up and use Distress Oxide sprays.


I absolutely love this die from Impression Obsession (Die365-W Good Wishes Word Block). It was always good, but it fits in so well with what's going on in the world today. I decided to just cut it out of white cardstock.

So about the Oxide sprays. There are some pros and cons to them, and this is just my opinion and my experience. The pros: They are FAST to use. They create a background very quickly. They are FUN to use also. It's really hard to stop. Just spray another color! Occasionally I would stop and sop up extra color onto another piece of cardstock and then spray some more. I also like the blends I get with these, in that they are all jumbled up. I like some of the splotchiness I got.


I had to spray these in a box, but that's not so bad. The main thing I didn't like is that I didn't think the colors were as bright as I wanted. Maybe I need more experience with them, but I did spend some time making these. Also, I sprinkled drops of water on them and the water splotches didn't show up as much as they do with the ink pad ink.


I did end up adding color from the Oxide ink pads using blending tools and brushes, just to brighten them up. The sprays were still a huge time saver though. I don't think I had to touch them up all that much.


Once I added ink pad ink, the splotches of water showed up nicely.


I cut everything out that I needed and stacked them up so that I could just sit at my desk and listen to podcasts while I put them together. One of the ones I'm listening to right now is The Daily from the New York Times.

Here are the finished pieces (photographed in sunlight)


We are staying home and only getting groceries about once every 2 weeks. So far we are doing fine and just trying to keep busy at home. I hope you all are also doing well! 

I was just thinking what if someone links back to this post from somewhere a few years in the future and wonders what I'm talking about. Future people, this is the middle (?) of the Covid-19 Pandemic, and I'm so glad you made it through ok. Treasure your freedom to travel around, future people! Oh how I do hope we will get back to that! Stay well everyone!


Products Used:
Distress Oxide Sprays and Oxide pads - various colors
(experiment with what you have)
Impression Obsession Die365-W Good Wishes Word Block
Various colored cardstock for mats
Elizabeth Craft glitter dots silver/gold


Friday, April 3, 2020

Magenta Super Saturday: New Designs for Spring

I hope that everyone who can is staying home and that you are safe and healthy. My heart goes out to everyone who is suffering. Other than a few trips to the grocery store, I have been staying home for some time, and I feel fortunate to be able to do so. I have been cooking and reading a lot. My mojo has been a bit low, but getting some new stamps and stencils in the Magenta Spring collection has helped tremendously. I am at the Magenta blog today, and you can see that post here. You can also look at the new catalog by clicking on the image on the main blog, or you can click here to look at them in the online store. Click on "Rubberstamps" or "Templates and Masks" to see everything.


I'm really fascinated by this new stamp called Mandala Dreams, and I'm looking forward to seeing what the rest of the Design Team will do with it. This beautiful stamp was designed by my friend and super talented designer Miranda Degenaars. She is also a member of the Magenta Design Team, and you can check out her blog here.

I made this card by first blending some Distress Oxide colors onto a piece of 80# Neenah Solar White cardstock.


I flicked water drops onto the blended colors at the end for a little texture. I made a whole pile of these for future projects.


I cut a 1.25" strip from my panel to use for this card. I then put the stamp into my MISTI stamping tool and aligned the colored strip to about where I would want it on my finished card. It was stamped with Versafine Onyx Black ink.

I cut another piece of 80# Neenah Solar White cardstock, using the stitched rectangle die from the MFT463 Die-Namics Blueprints 13 die set, which cuts a rectangle to 5.25" x 4". With my stamp still in the MISTI, I stamped the white panel with Versamark ink and embossed it with Ranger gold embossing powder. I stamped the sentiment with Versafine Onyx Black ink.

I aligned the colored strip with the gold embossing and adhered it to the panel. I matted it with gold cardstock and mounted to a base card. A few gold and silver glitter dots from Elizabeth Craft were added at the end. I want to mail this card overseas and didn't want any gems poking through the envelope.

Magenta Products Used:

14.679.Q Mandala Dreams

07.1028.D Happy Birthday

Other Products Used:
Distress Oxide ink: 
Mustard Seed; Twisted Citron; 
Peacock Feathers; Picked Raspberry
Versafine Onyx Black Ink
Versamark ink
Ranger gold embossing powder
Neenah Solar White 80# & 110# cardstock
Papercut Gold Glossy cardstock
Elizabeth Craft gold/silver glitter dots
MFT463 Die-Namics Blueprints 13 die set

Friday, March 6, 2020

Super Saturday at Magenta: Watercoloring Embossed Leaves

Hi everyone! I'm on the Magenta blog today, and you can go to that post here.

One of my favorite collections from Magenta is the last Fall and Winter series. Many of the images in that collection can be used all year long. I chose the Leaf Branch Trio as a lovely image for a sympathy card. Sympathy cards are one of the hardest cards for me to make. I prefer to make some up in advance, and I like them to be simple and classic.


For this card I used Strathmore Tone Blue Mixed Media paper. This is a  nice heavy cardstock, and it comes in a variety of colors or tones. I stamped the leaf image in Versamark ink, and embossed it with JudiKins Silver Detail embossing powder.

To add some color, I used a Zig Clean Color Real Brush Marker in 038 Peacock Blue, and added color to the open areas of the leaves. I used a water brush to spread out the color in the leaves. The embossing resisted the color and added a nice contrast.

By the way, to find the right color, I swatched all of the darker blues that I had, and determined that the Peacock Blue would be the best color for my project. Here are the swatches, along with others that I have swatched in the past. The Peacock Blue surprised me, because I thought it would be more green, but holding it up to my paper, it was the clear winner. 030 Blue would have been the second choice. I'm really going to have to take the time to swatch all of these great markers at some point!


I cut the image out using Hero Arts Infinity Circle dies, and cut a piece of dark blue cardstock with the next larger size circle to mat it. I cut a rectangular piece of the Blue Tone paper using the Die-namics MFT-463 Blueprints 13 die set, and stamped and embossed the sentiment in the lower right corner. I mounted the panel it to a dark blue cardstock that was cut to 5.5" x 4.25". The entire panel was then mounted to a base card.

This was a very easy card to make, and could be accomplished with most any color of cardstock you may have, using this versatile stamp.

Magenta Products used:

0793.O Leaf Branch Trio

07.984.E With Sympathy

Other Products used:
Versafine ink
JudiKins Detail Silver embossing powder
Zig Clean Color Real Brush Marker:
038 Peacock Blue
Strathmore Toned Blue Mixed Media paper
PaperTrey Ink Dark Indigo cardstock
Die-namics MFT-463 Blueprints 13 die set
Hero Arts DI199 Infinity Circles die set


Wednesday, March 4, 2020

Quick Cards for a Good Cause: Thank You Cards

This is my second post regarding making cards for a charity sponsored by some of my friends' church. I am going to try to make 10 cards per month to donate to this cause. The cards for February are all pretty much the same except for colors.


As stated before, I am making only card tops, since they will be adhered to card bases with the charity information printed on them. My friend Deb Kuttel collaborated with me on these cards. She did the color blending on many of them, and I did most of the die cutting and putting together. I blended the one above, because this is one of my favorite color combinations (Distress inks: Twisted Citron, Peacock Feathers, and Wilted Violet).


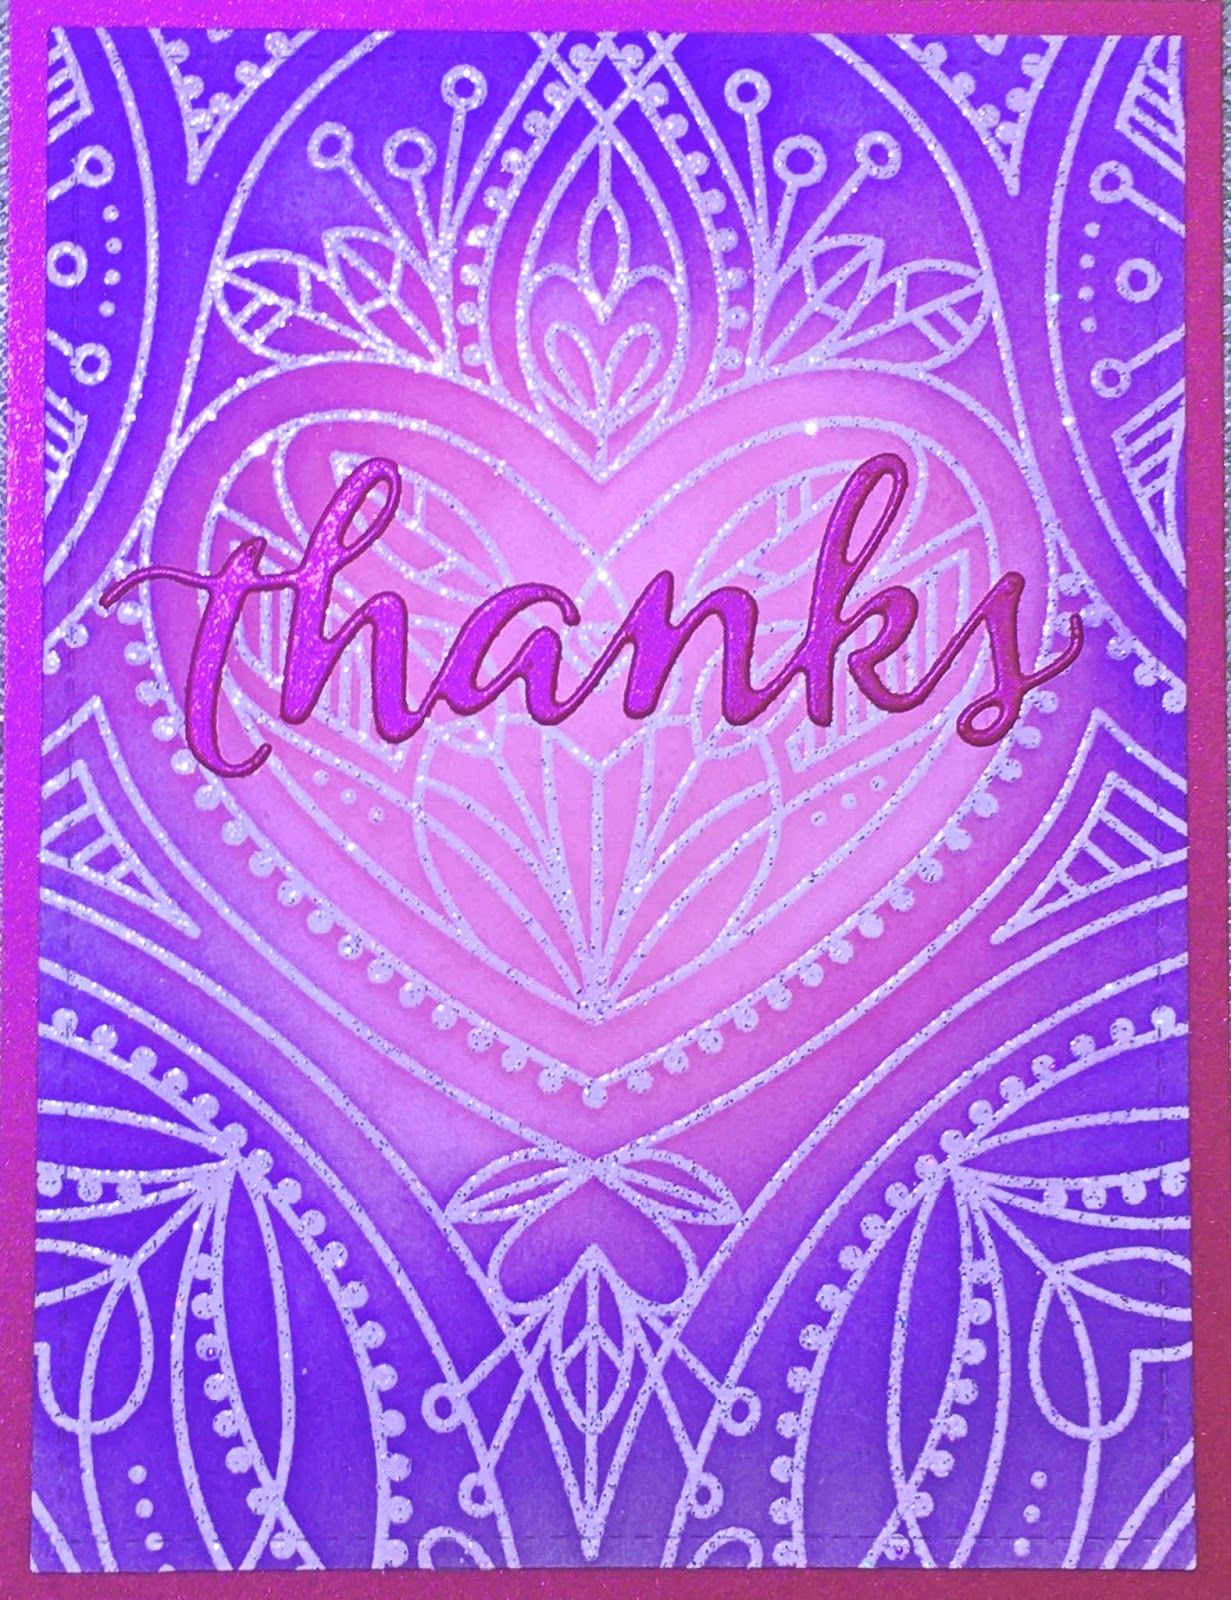
Deb blended the one above, and I like it a lot. I believe the colors are Distress inks: Squeezed Lemonade, Shabby Shutters, and Ripe Persimmon. The background stamp is from Impression Obsession - Cover-a-Card CC303 Spring Garden. I stamped and embossed them using Versamark ink and JudiKins White Diamond embossing powder.


This one was made using the Impression Obsession background Cover-a-Card stamp, Floral Lines CC089 that we used a lot for the January cards. The colors in this one are Distress inks: Blueprint Sketch and Wilted Violet


The colors in this one are Distress inks Mustard Seed, Twisted Citron, and Mowed Lawn.
The "Thank You" sentiment used for these cards are from the Simon Says Stamp die "Thank You" czd74. It comes with a background and the outline sentiment. I cut the backgrounds out of silver glitter paper and colored them with very light Copic markers to coordinate with the colors in the cards. I don't think that coloring on the silver shows up super well in these pictures.


This is one I colored, and I used Distress inks: Spun Sugar, Picked Raspberry and Candied Apple. The detailed part of the sentiment is cut out of Black Ranger Alcohol Ink cardstock. This cardstock is a matte black that is so dark, and really looks good in real life. I got the tip to use this for sentiments from Jennifer McGuire.

All of the top panels on these cards were cut to size using the Lawn Fawn LF768 Stitched Rectangle Stackable die set. The largest die in this set cuts a panel to 3.75" x 5". This size allows a mat sized 4" x 5.25", and that is a good size to adhere to a base card.

Here are all of the card toppers we made for February. I hope you like them!


Monday, March 2, 2020

Quick Cards for a Good Cause

Hi everyone! I have been busy behind the scenes, catching up with life in general. We traveled to Iceland for Christmas, New Years and our grandson's first birthday, and since we got back, I just seem to be behind in everything. Early in February, I went to a gathering of women from my friend's church. The goal was to put together Valentines for the church to sell to buy blankets for accident victims and homeless people.

The woman who had organized the gathering said that she had wanted to also have some cards that were not Valentines, for people who don't give Valentines. I thought of how I am able to make a large volume of Christmas cards by starting early and making cards each month towards that goal. I decided to try to produce at least 10 cards per month for this cause, and that means that I should be able to contribute at least 120 cards by next February. Since I wanted the 10 per month to start in January, I was already behind.


I have not taken time to properly photograph the cards I'm making for the blog, but I will try to do that sometimes going forward. Here are a few rather poor quality photos, so you can see what we've been doing. My friend Deb Kuttel and I collaborated on all of these cards, and we will be joined by Pam and maybe others as soon as tax season is over.


Part of what makes these quick and easy is that we did not have to mount them on base cards. These are just card tops. The base cards are printed with the charity name, and will be done later.


For the designs of the January cards, we were all over the place. There are a few that we made just alike, but most of them are different. This took more time, and for February, the cards are pretty much the same except for color. The colors on all of these cards are Distress inks blended with brushes.


These first cards were done with a Simon Says Stamp center cut card (SSS101805 Center Cut Heart). This is a large background stamp, and there is also a die that coordinates with it 
(Deco Heart sssd11935). We used the Sugar Pea Designs SPD-00113 Thanks die on these as well.


We stamped and embossed all of the Center Cut Heart cards using Versamark ink and either JudiKins White Diamond embossing powder, or Ranger Gold embossing powder.


Sorry for the poor lighting on these. We made a couple of each one of these last 3. For the card above we used the fairly new Hero Arts Thinking of You Stamp & Cut set (DC273); the Simon Says Stamp Scollap Stitches die set (SSSD111612); and the Impression Obsession Cover a Card background stamp CC089 Floral Lines. We stamped and embossed the background using Versamark ink and JudiKins White Diamond embossing powder. We were able to make 2 cards with each stamped panel. I added a heart to the card above from my stash, saved from a previous project.


For the card above, we used the same exact dies and stamp as the one before, which shows how versatile they are. I love dies that I can use over and over and still get a different look.


For the card above we also used the Floral Lines Impression Obsession stamp and JudiKins White Diamond embossing powder. The die on this card is the Simon Says Stamp "Thanks Scallop Border" SSSD111508. I love this versatile die, and use it quite a bit. I added a little heart about the "Thanks" that I had in my stash from a previous project.

These are just some of the cards we made. We only spend a few hours working on these, and I think they will make a great first batch of cards for this very good cause. I did not take the time to write down all of the products we used, but have tried to list most of them under each card above.

I also had some leftover stamped and colored panels that I plan to make into cards just like these for my own stash of cards to use for various occasions.

I'll try to post the February cards in a few days. Thanks for stopping by!